Pre-requisites
This article assumes that you have a valid gateway certificate, root certificate and also a working RADIUS server. Windows NPS will be used.
Note: This article was created based on older versions of cOS Core and iOS. It may or may not be applicable for newer versions. Some of the cryptographic algorithms used are also no longer recommended for use (such as SHA1).
The preparation for the IKEv2 Tunnels
The four things we need to before we start setting up the tunnel is to prepare the cOS Core Address book, Config Mode Pool, the algorithms and the RADIUS Server.
First, we create the object that we will use:

Second, we prepare the Config Mode Pool:
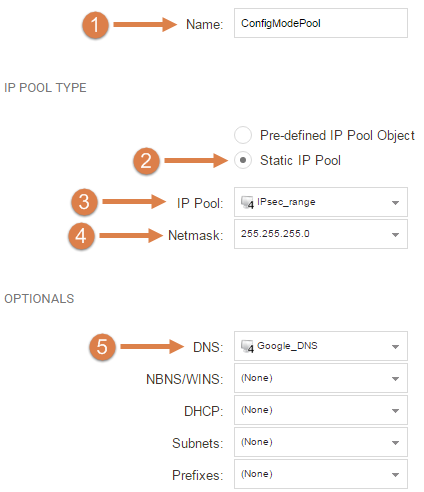
- Select a fitting name for the Pool, we named it ConfigModePool.
- Select "Static IP Pool".
- Choose the IPsec_range object that we created previously.
- As our IP Pool is almost covering an entire /24 net, we go with 255.255.255.0 as our netmask.
- Here we select Google's DNS (8.8.8.8).
Third, we create the Algorithms for the IPsec Tunnel:
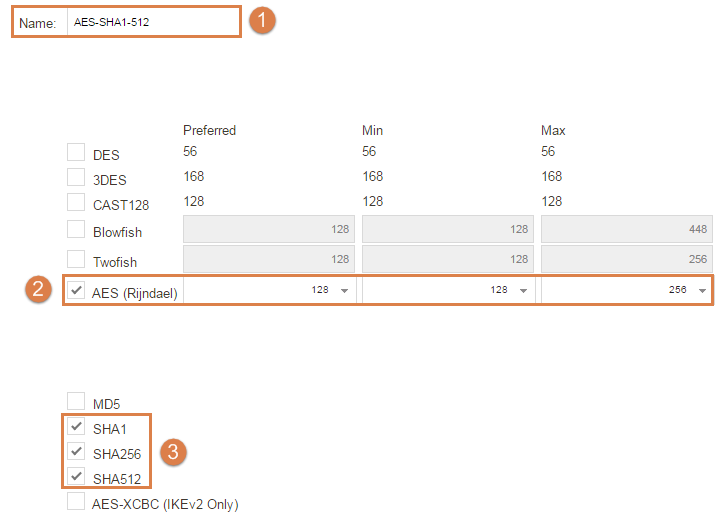
- First set a name, we are setting AES-SHA1-512 to represent the algorithms that we are using.
- Select AES as encryption algorithms.
- As Integrity algorithms we select SHA1 to 512.
NOTE-1: We are using the same algorithms for both the IKE and IPsec Phase.
NOTE-2: It’s possible to use only SHA256 and higher for the IKE phase, but for the IPsec phase you will need SHA1 as this and MD5 are the only proposals sent by the iOS at the time of writing.
NOTE-3: If you’re using Local User Database the next steps can be skipped.
Fourth, we create the RADIUS Server object:
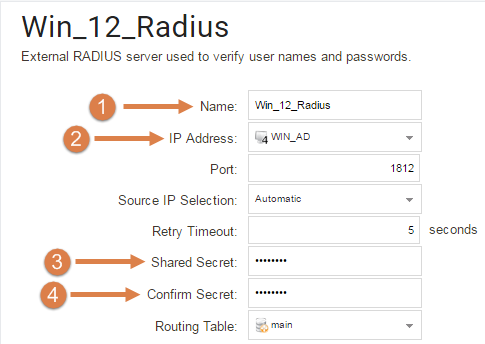
(We are using a Windows 2012 R2 server as our RADIUS)
- Name the Radius Server. Here, we name it Win_12_Radius.
- Select the IP of the Windows Server/RADIUS server.
- Enter the shared secret.
- Confirm the shared secret.
NOTE-1: The other settings are default settings.
NOTE-2: If you’re using Local User Database the next steps can be skipped.
The configuration of the NPS/Windows RADIUS Server to accept the iOS request
There is two things that needs to be done on the NPS in order for this to work.

1. On the Connection Request Policy, under Settings -> Authentication Methods:
You will need to activate the “Override network policy authentication setting” and add “Microsoft: Secure Password (EAP-MSCHAP v2)” as EAP Types.
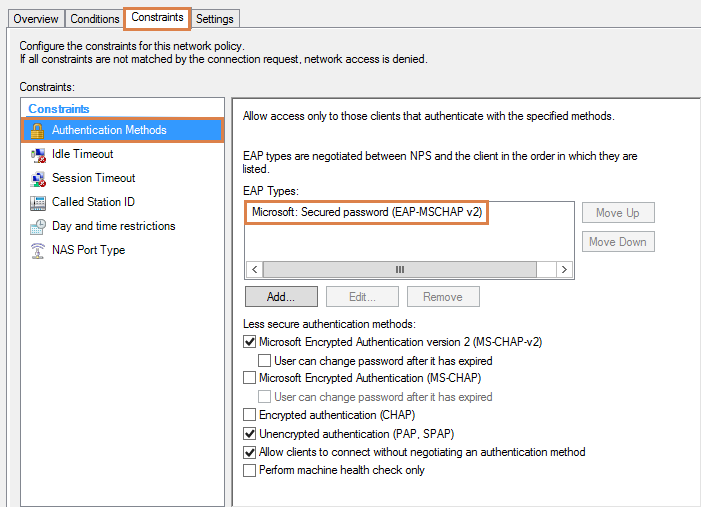
2. On the Network Policy, under Constrains -> Authentication Methods:
Here you add the “Microsoft: Secure Password (EAP-MSCHAP v2)” as EAP Types.
The configuration used in cOS Core
We will setup both a simplified IPsec Roaming tunnel as well as a regular made IKEv2 IPsec Roaming tunnel.
Let’s start with the Simplified IPsec Roaming Tunnel:
A simplified tunnel is a tunnel that require minimum configuration in order to work, it also hides more advanced settings and it’s pre-configured with settings to successfully connect with iOS, macOS and Windows clients using IKEv2 and EAP-MSCHAPv2.
There is seven things to configure in order to get the Simplified tunnel working.
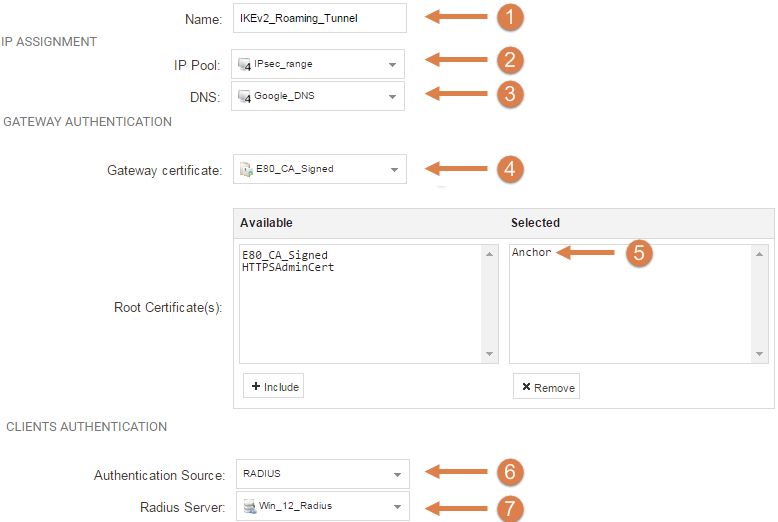
- We specify a name for the tunnel. We are calling it IKEv2_Roaming_Tunnel
- We specify the IP Pool that we created earlier.
- The DNS that the clients will use. Here, we specify Googles DNS(8.8.8.8).
- The Gateway certificate.
- The Root certificate.
- Here we select the authentication source, in this how-to we are using RADIUS, although a Local User database is also fine.
- Lastly specify the RADIUS server that we created earlier, or Local User Database if you're using that.
Continuing with the “Regular” configured IKEv2 Roaming Tunnel:
The Regular configured IKEv2 Roaming tunnel require more configuration and you also see all the advanced options.
General settings:
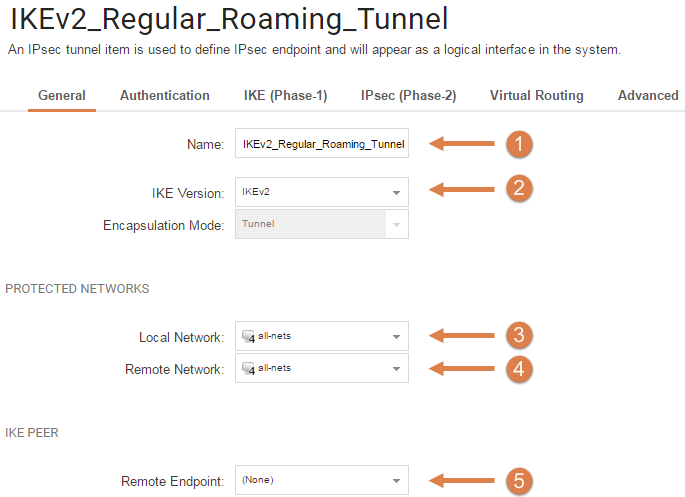
- Choose a name for this IKEv2 Tunnel, we are using "IKEv2_Regular_Roaming_Tunnel".
- Select IKEv2 as IKE version.
- Select all-nets as it's a roaming tunnel.
- Select all-nets as it's a roaming tunnel.
- As this is a roaming tunnel we select (none) as remote gateway.
Authentication
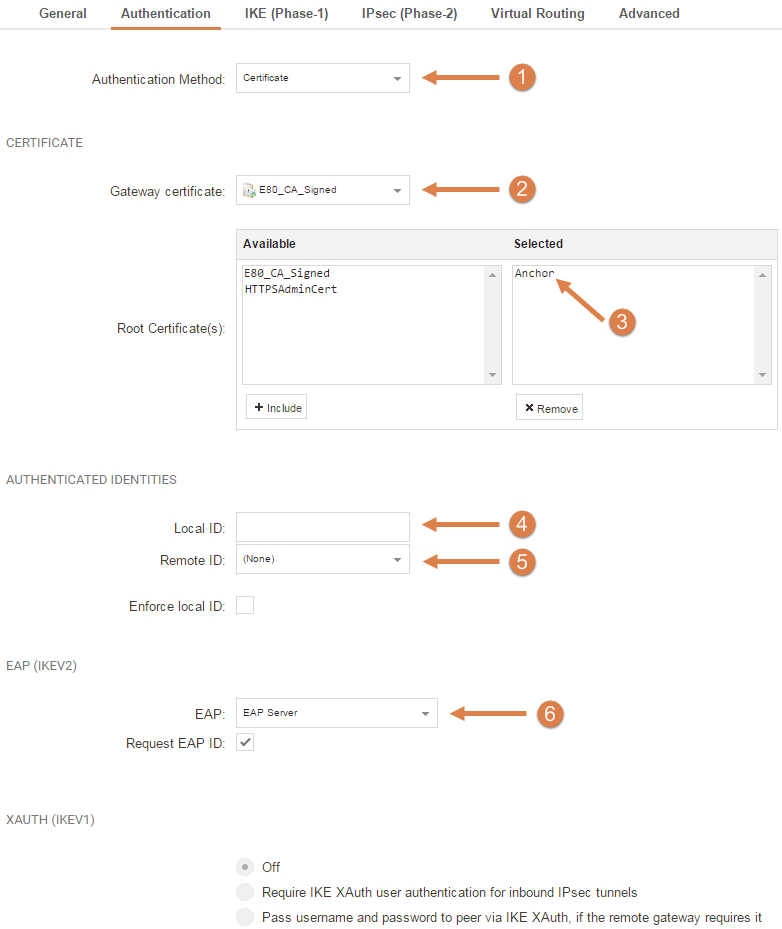
- Choose Certificate.
- Select the correct Gateway Certificate.
- Select the correct Root Certificate.
- Neither Local ID nor Remote ID is required.
- Neither Remote ID nor Local ID is required.
- On EAP select first EAP Server and activate the Request EAP ID.
IKE (Phase1)
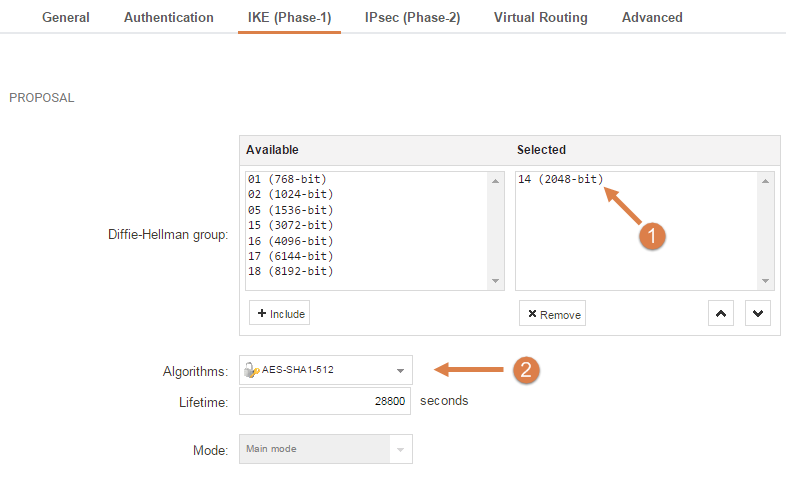
- Select the Diffie-Hellman Group. We are using group 14 as this is the highest group that iOS sends at the time of writing.
- We select the Algorithms that we made before (AES-SHA1-512).
IPsec (Phase 2)
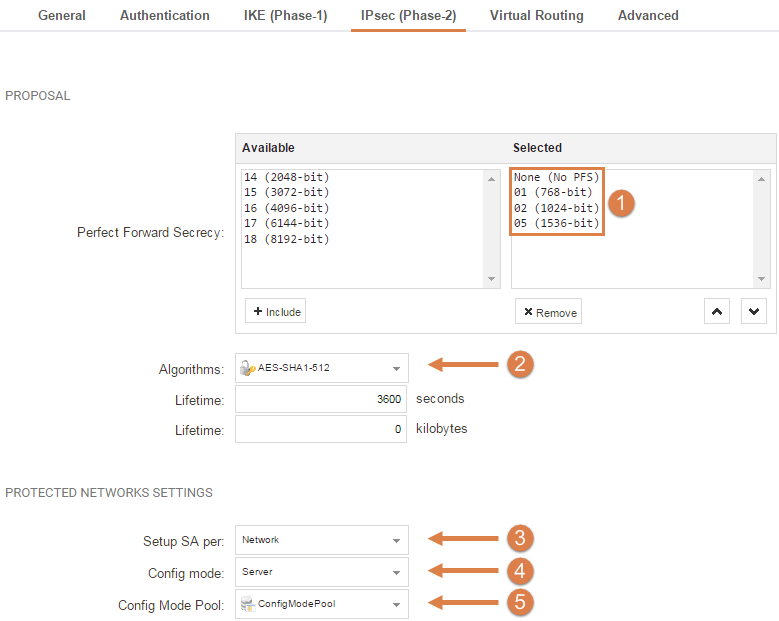
- Leave Perfect Forward Secrecy(PFS) at its default settings.
- For Algorithms, select the earlier created AES-SHA1-512.
- Leave the Setup SA per Network setting.
- For Config mode, select Server.
- For the Config Mode Pool, select the ConfigModePool that we created earlier.
Virtual Routing
Leave these settings at their defaults.
Advanced
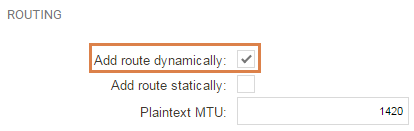
Disable the default “Add Route Statically” and enable “Add Route Dynamically”.
General UserAuth
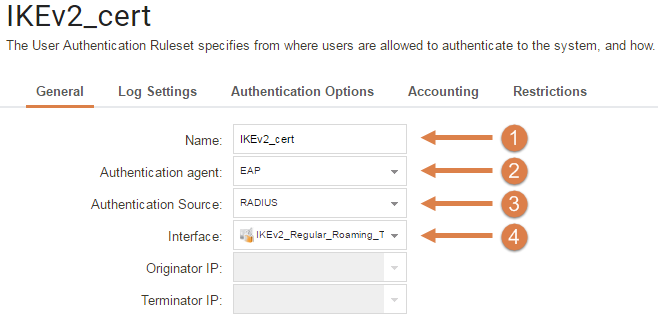
- For simplicity, name the Userauth Rule something that can be easily distinguished from other Userauth Rules.
- Select EAP.
- As our authentication will be handled by a RADIUS server, we select RADIUS as our Authentication Source.
- Select the IKEv2_Regular_Roaming_Tunnel.
Authentication Options
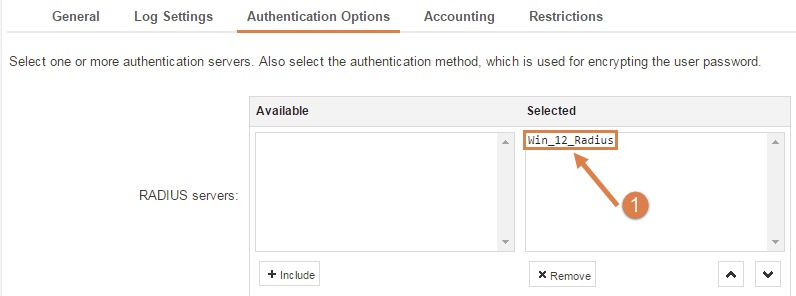
- Select the RADIUS server object that we created earlier.
NOTE: All other settings are left at their defaults.
IP Policies for both the Simplified and the Regular IKEv2_Roaming Tunnel.

We are using the Regular IKEv2_Roaming tunnel as an example, if you create the Simplified simply change the Source interface of the Policies.
NOTE: The certificate needs to be pre-installed on the iOS client!
Configuring iOS.
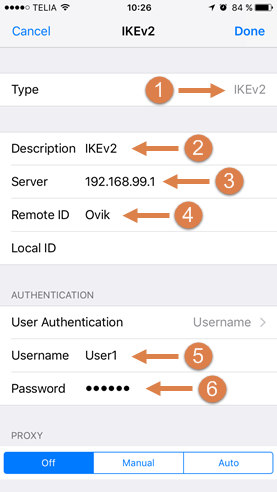
Now, the final settings that needs to be configured.
- Start by selecting IKEv2 as Type of tunnel.
- We name it IKEv2.
- Specify one of the interface IPs of the firewall. For example, the Lan or Wan IP. In this guide we are using our Lan IP as server.
- This setting is important: we need to specify the Common Name (CN) of the certificate as Remote ID, in our case this is 'Ovik'.
- Select a User with the right privileges and is added in the RADIUS Server.
- Enter the password for that user
Related articles
13 Jun, 2022 oneconnect macos ios windows android
28 Apr, 2023 openconnect oneconnect macos ios iphone