Problem description
In some situations it can get complex when using self-signed certificates, for example when using them for VPN connections like IPSEC IKEv2 or SSLVPN via OneConnect.
The reason is that you need to deploy your whole certificate chain on all devices you wish to connect from. Otherwise you will get security warnings and/or connection warnings.
Solution
Buying a certificate from a Trusted Root Certification Authority can simplify your life a lot, as most modern clients (like Windows, Linux, Mac) and browsers trust them already. As a result VPN deployments are much simpler.
Please be aware that you need a DNS name pointing to your NetWall’s public IP address. In case you only have a dynamic IP you can use a DynDNS provider of your choice to make this solution work.
XCA for certificate management
For comfortable management per GUI we will use XCA in this HowTo. XCA is a free certificate and key management software made by Christian Hohnstädt ( christian@hohnstaedt.de ) and can be found on the following webpage:
http://xca.sourceforge.net or https://www.hohnstaedt.de/xca/
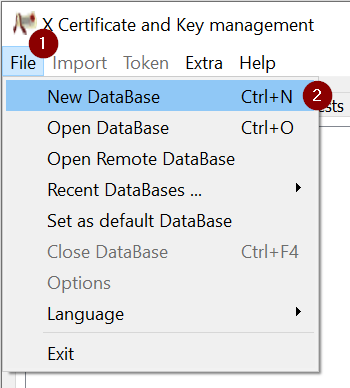
When XCA is installed, start the program and create a new Database. In this database you can manage all your certificates. Please make sure you use a strong password and keep a backup in a safe place to avoid data loss!
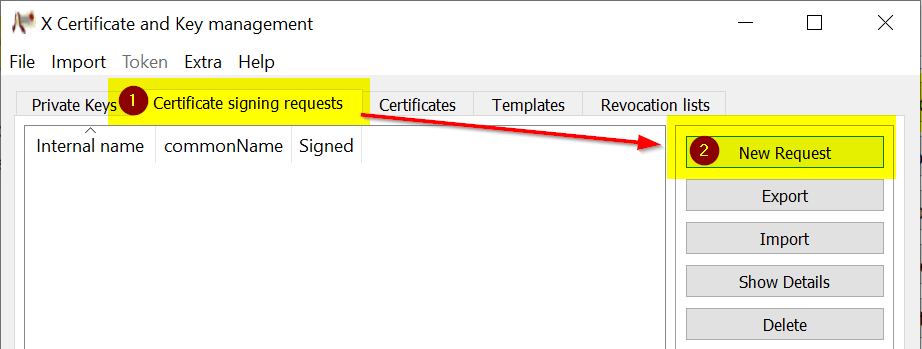
Generating the certificate signing request (CSR)
Create a certificate signing request for your NetWall system.
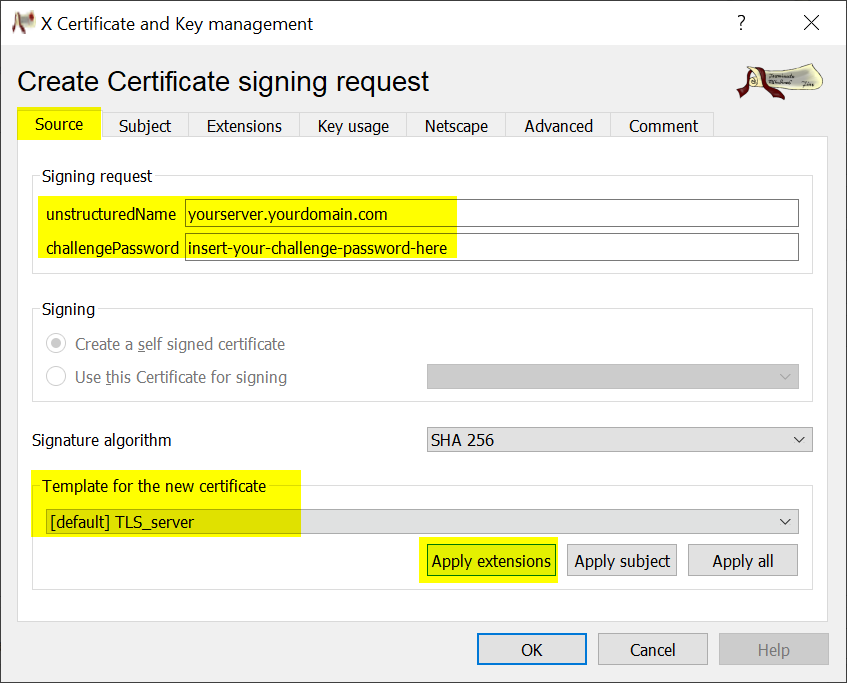
On the source tab enter name and challenge password for the CSR. Select ‘TLS_server’ as template and press Apply extensions.
(Note: The challenge password was typically used for identification purpose in case you need to revoke your certificate. Depending on your provider it could be obsolete. Only use alphanumeric characters here.)
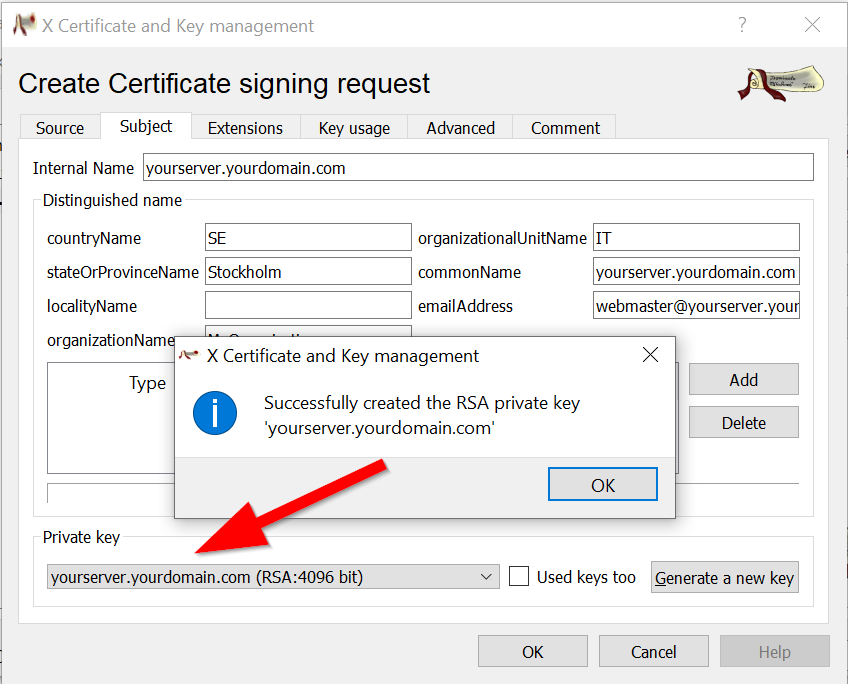
On the subject tab fill in the necessary fields. The commonName is the DNS name. Using a valid emailAddress is recommended as resellers commonly use this for validation.
When finished click on Generate a new key. This will generate the private key for your certificate.
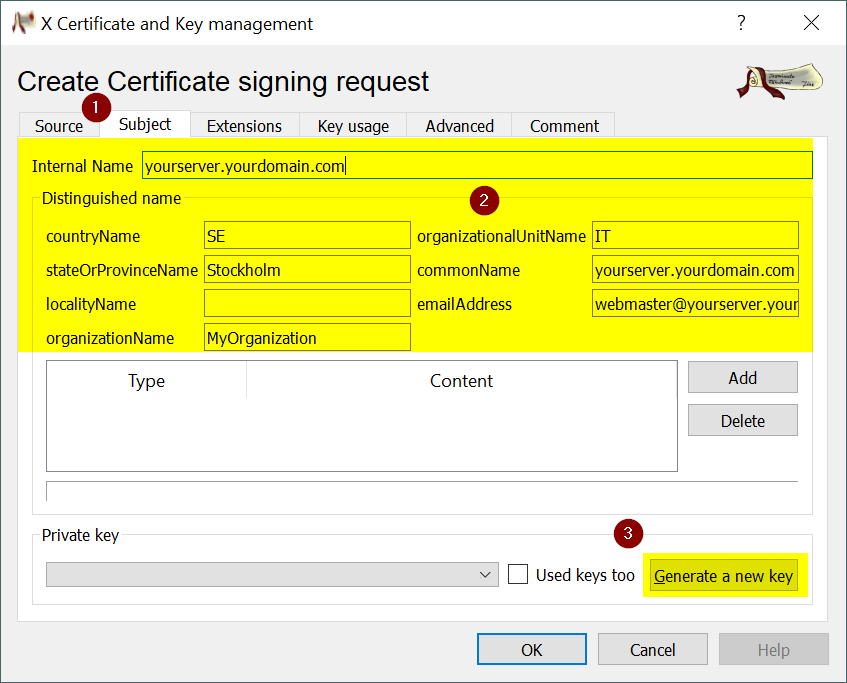
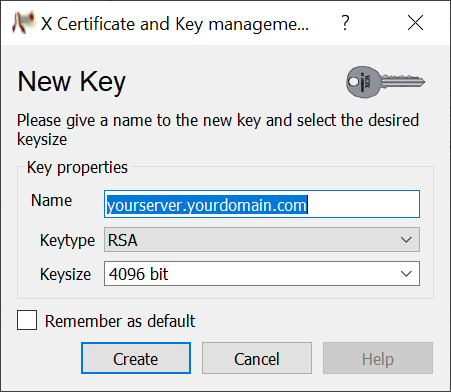
You should get a confirmation that the key was successfully generated.
NOTE: The key file with your private key is NOT part of the CSR. The private key stays on your computer! You will need it later when importing the certificate in the firewall.
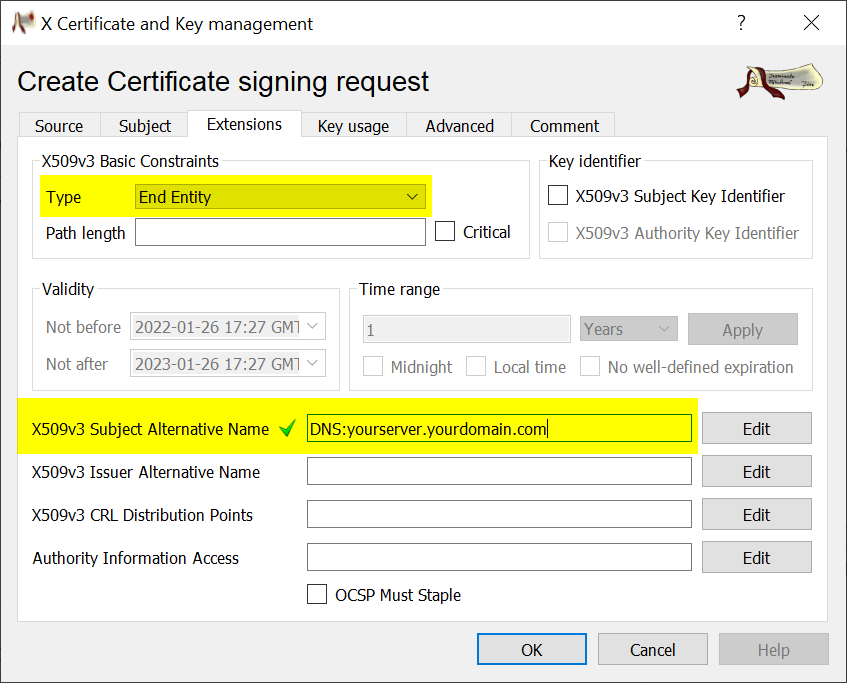
On the extensions tab it is necessary that you select End Entity as type. It’s also mandatory that the field X509v3 Subject Alternative Name contains the DNS name of your domain as shown.
(Note: If the field is pre-set with ‘DNS:copycn’, this function will fill in the commonName you did set in the subject tab)
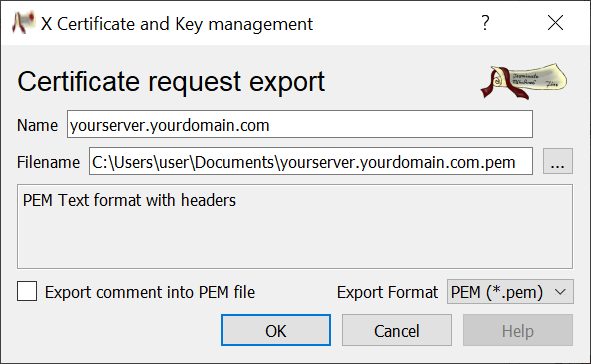
Export the CSR in .PEM format.
Request your certificate (CER)
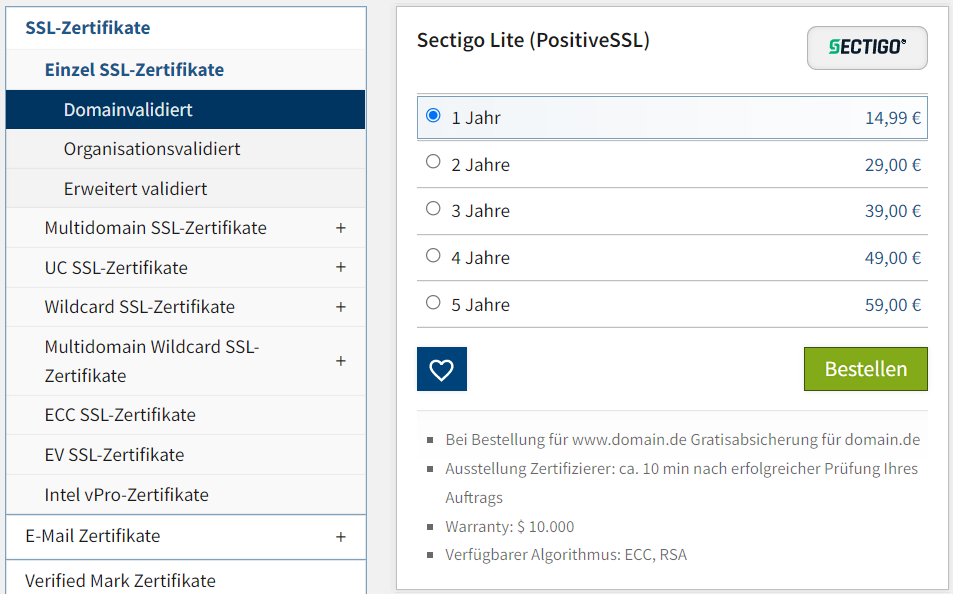
You will find plenty of resellers for certificates. Some thoughts which might help you: There are some ‘well-known’ names on the market which offer certificates for an afforable price (less then 20,- EUR/year). Please make sure that your selections Certificate Authority (CA) is listed in the trusted certificate stores of your client operating systems and/or apps. (note: Firefox for example uses it’s own internal certificate storage).
In this HowTo we use a ‘Domain Validation SSL certificate’ from Sectigo, as it’s cheap and we do not need (the more expensive) Organization or Extended Validation certificates. Note: Clavister has NO relationship with Sectigo or gets any compensation from them.
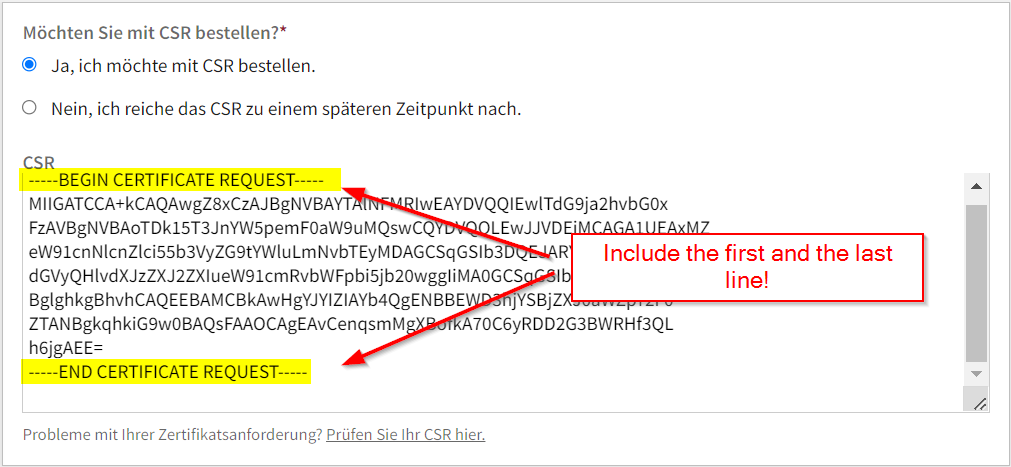
Open the .PEM file with a text editor and copy the complete string in the CSR field in your resellers web page. Don’t forget to include the first and the last line with ‘BEGIN’ and ‘END’!
NOTE (again, as it is so important): The key file with your private key is NOT part of the CSR. The private key stays on your computer! You will need it later when importing the certificate in the firewall.
You should be asked how you want to confirm that you are a valid owner of the domain. Here are some examples of popular methods:
E-mail: Sending a confirmation email to domain-related addresses.
HTTP hash: checking a text file in the root directory of the domain via HTTP
HTTPS hash: check of a text file in the root directory of the domain via HTTPS
CNAME: Check via a CNAME record, which is created in the DNS.
Order your certificate. After validation you should get the option to download the certificate in various formats. You also have to download the providers certificate (key chain) where your certificate belongs to.
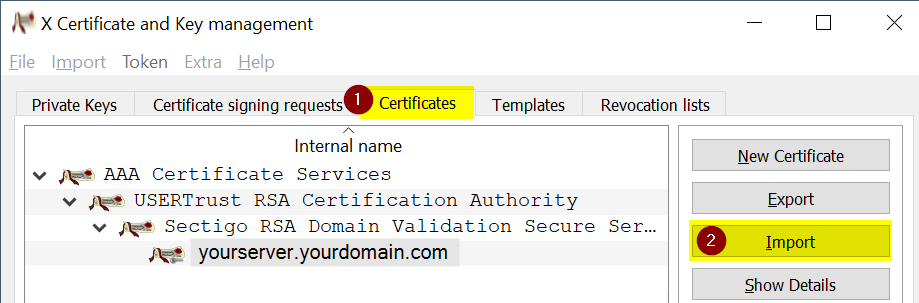
The end entity certificate is issued by ‘Sectigo RSA Domain Validation Secure Server CA’. So from your point of view this is the CA you need to import later.
Download the certificate + intermediate certificate + RootCA from the certificate provider.
Import them in XCA - this allows you to store them secure and export them in any variant you could need in the future.
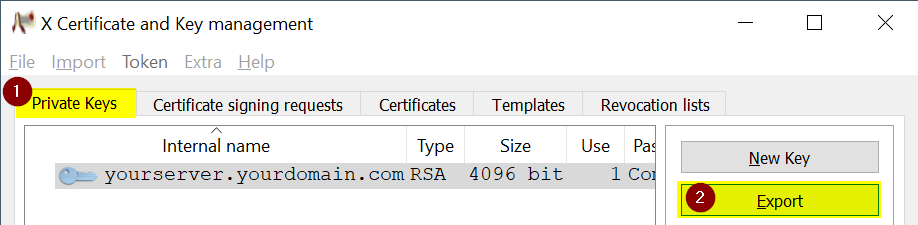
Export the private key you created earlier in PEM format.
Import the certificate in NetWall
Click ‘Add Certificate’ under /Objects /General /Key Ring.
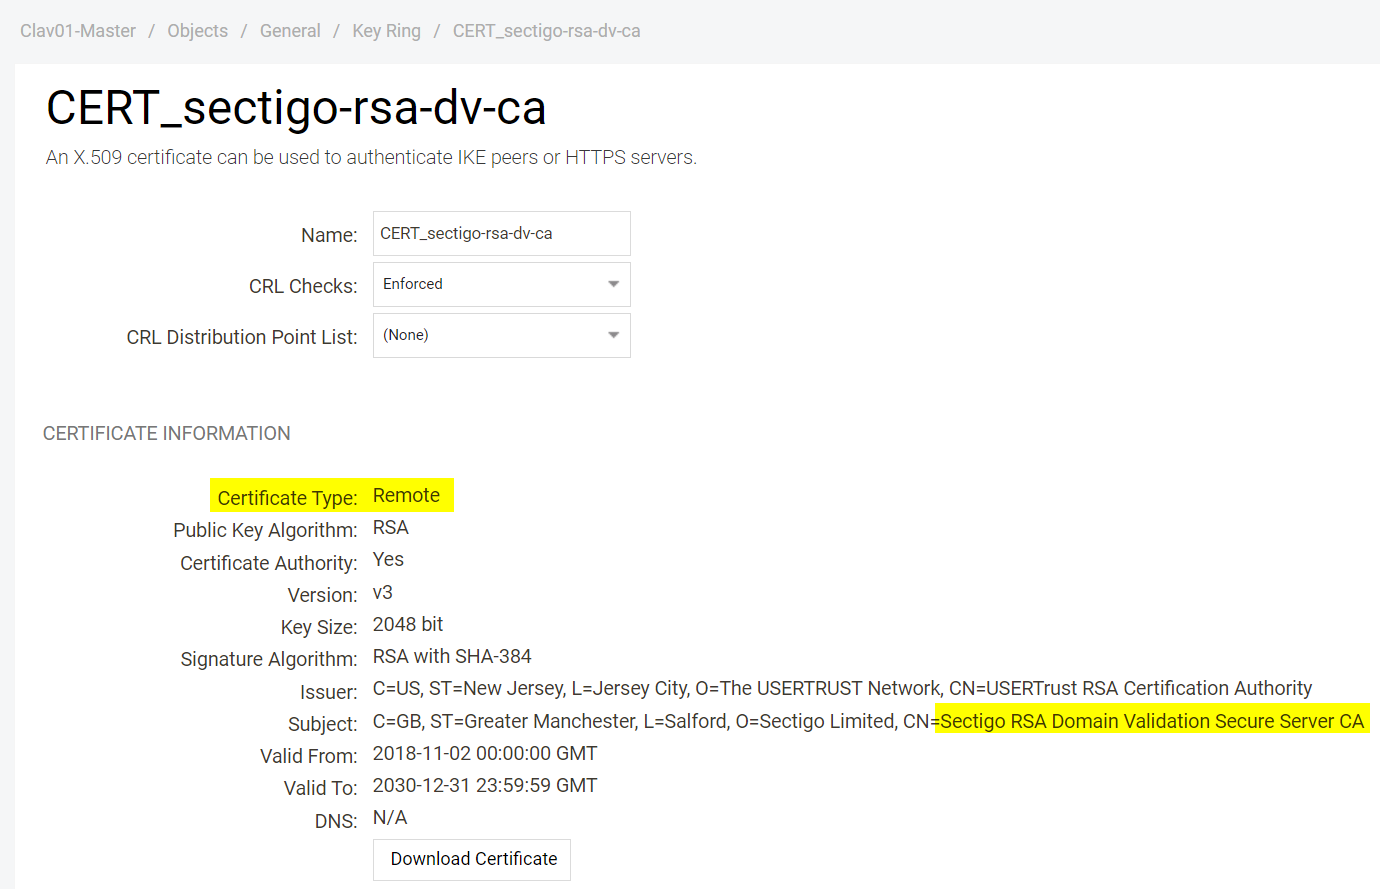
Import the ‘Sectigo RSA Domain Validation Secure Server CA’ in CRT or CER format. As we do not import a private key the key will show with certificate type ‘Remote’.
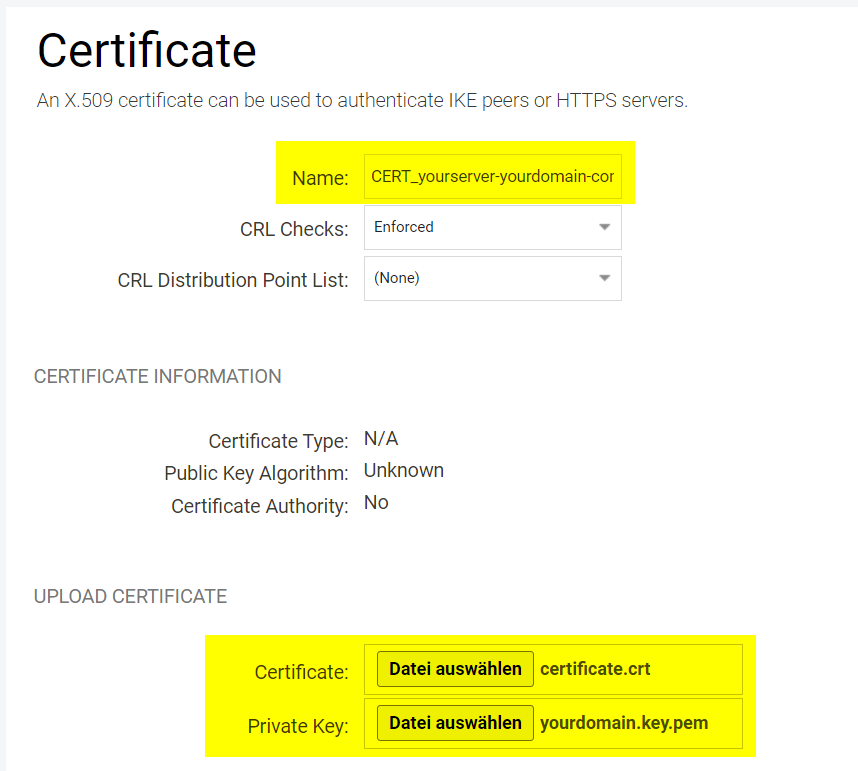
Import the certificate ‘yourserver.yourdomain.com’ in CRT or CER format. Also make sure to import the private key of your certificate you exported in a previous step. The certificate type will now show as ‘Local’
Activate the certificate
Go to /System /Device /Device Settings /Remote Management. Click on Advanced Settings.
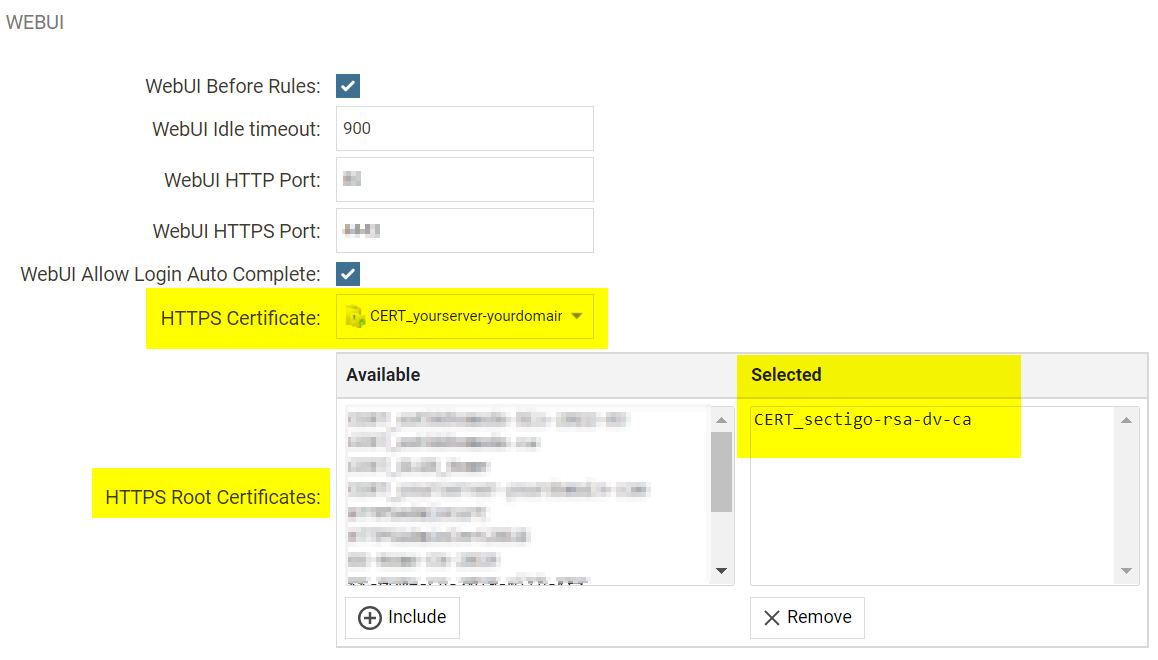
In the section ‘WebUI’ select your certificate as HTTPS Certificate. Add the RootCA ‘CERT_sectigo-rsa-dv-ca’ under HTTPS Root Certificates.
Save & Activate the configuration.
Check the certificate you see in the browser when accessing the WebUI admin interface. Now you are using the new public certificate.
Related articles
11 Jan, 2023 ipsec core vpn
10 Mar, 2023 core vpn ikev2 windows radius certificate
24 Mar, 2023 core ipsec ippool dhcp
12 Apr, 2023 core proxyarp arp ipsec routing
2 Jul, 2026 vpn core ipsec alg highavailability trafficshaping
2 Feb, 2021 core sslvpn macos certificate
23 Nov, 2022 core ipsec
21 Feb, 2023 ipsec certificate windows ca core
22 Mar, 2021 core ipsec routing
18 Mar, 2024 core incontrol certificate oneconnect ipsec vpn
11 Dec, 2025 core routing ospf ipsec
17 Jun, 2021 core ipsec routing
8 Mar, 2023 core l2tp ipsec
18 Mar, 2024 onetouch sslvpn oneconnect troubleshoot certificate
20 Feb, 2023 core vpn ipsec
4 Aug, 2023 core ipsec troubleshoot ike
14 Apr, 2021 core license ipsec
8 Sep, 2020 core ipsec rules access
23 Jan, 2024 core howto certificate management letsencrypt
29 Mar, 2023 ipsec core windows vpn l2tp
5 Apr, 2023 ipsec core
16 Sep, 2020 vpn ipsec ikev2 windows howto dh
7 Dec, 2022 ipsec ike troubleshoot core
14 Dec, 2022 core ipsec
5 Apr, 2023 core nps ipsec radius legacy
14 Mar, 2023 core ipsec vpn ikev2 certificate
23 Aug, 2022 core ipsec license memory
11 May, 2023 oneconnect certificate howto
15 Mar, 2023 core ipsec ipv6
22 May, 2024 netwall ikev2 windows certificate vpn core
23 Aug, 2022 core connections ipsec memory
13 Feb, 2023 ipsec core routing failover
28 Mar, 2023 dhcp ipsec core