This guide explains how to add, delete and manage users to the Clavister Cloud Service.
The guide uses our example company ShieldIT as <tenant_name> through the different steps.
The guide assumes you are already enrolled as an administrator in the service.
Accessing Clavister Cloud Service
Access Clavister Clavister Cloud Service, example using ShieldIT below:
https://shieldit.sase.eu/
As an Admin you will now enter the Clavister Cloud Service and see any relevant features enabled for your tenant, select Users in the menu to see all users in the services.
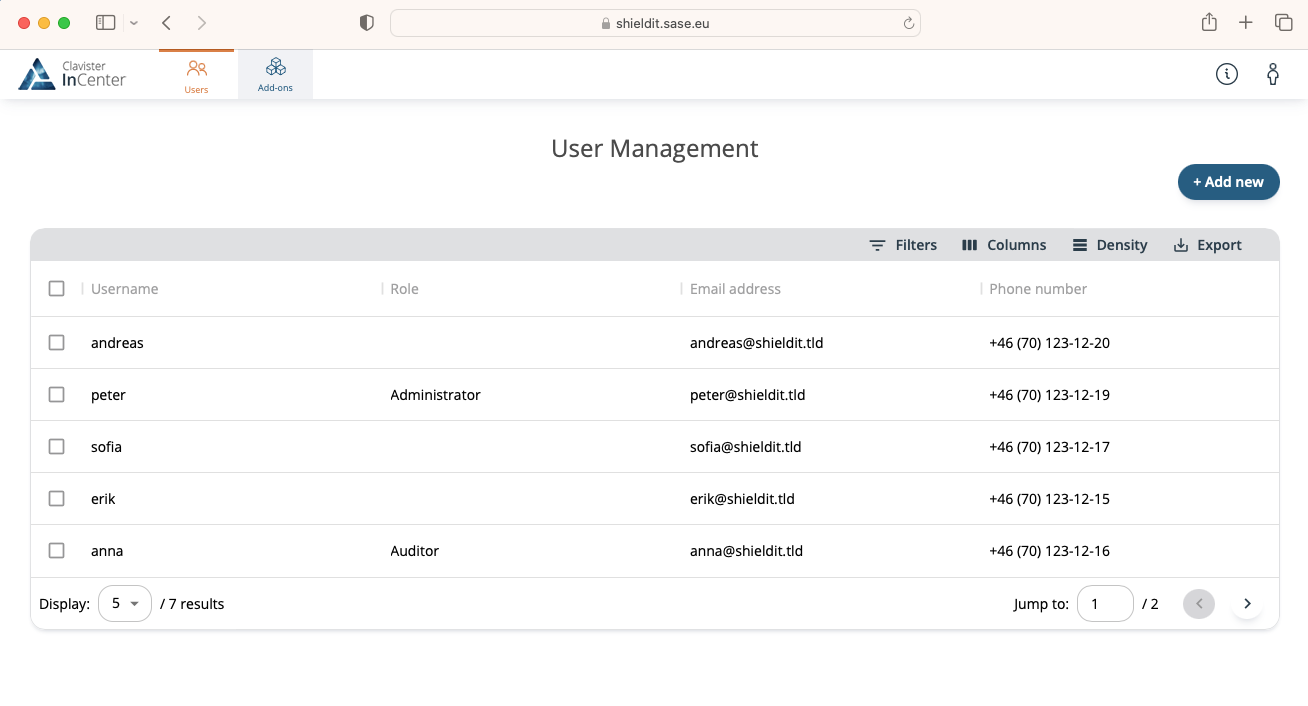
Managing Users
Adding Users
Under Users, you will see all users, to add a new cloud user manually click + Add new.
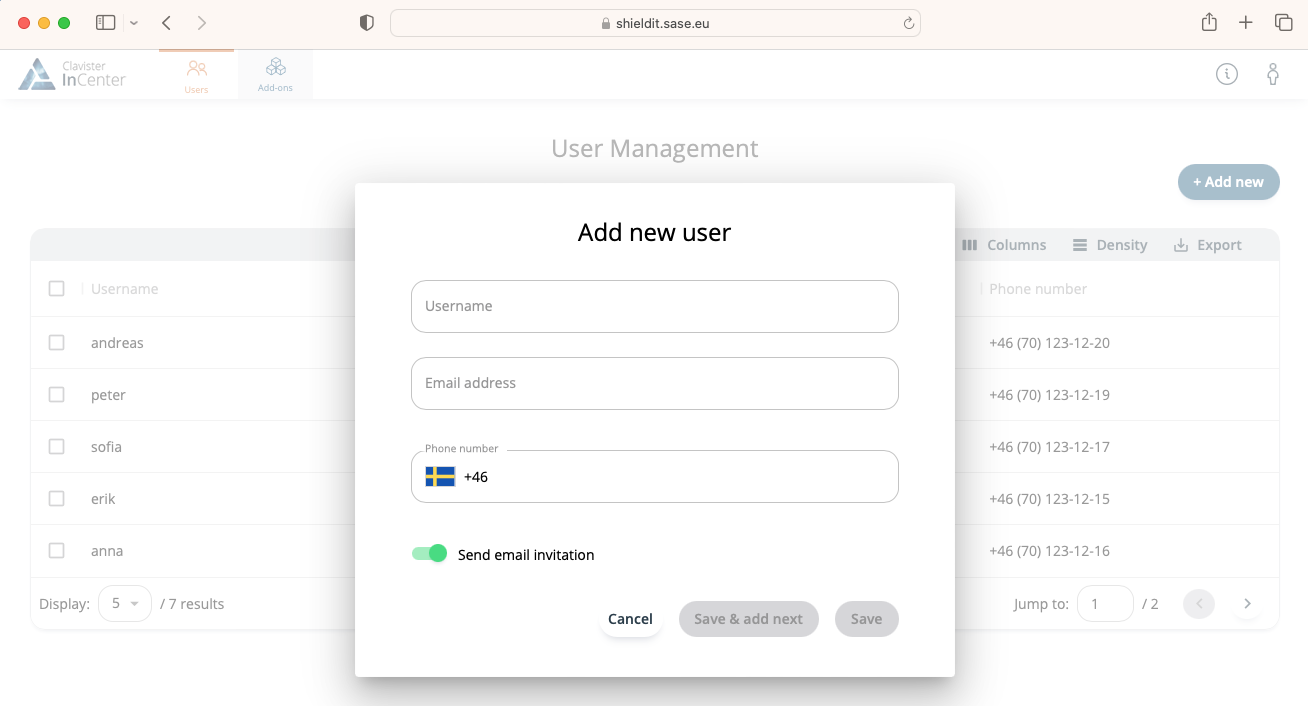
It is essential for a user to have a valid email address and phone number in order to be able to enroll in the system. Once a user is added, they are ready to enroll by being provided with the following link.
https://iam.<tenant_name>.sase.eu/enroll/
Example:
https://iam.shieldit.sase.eu/enroll/
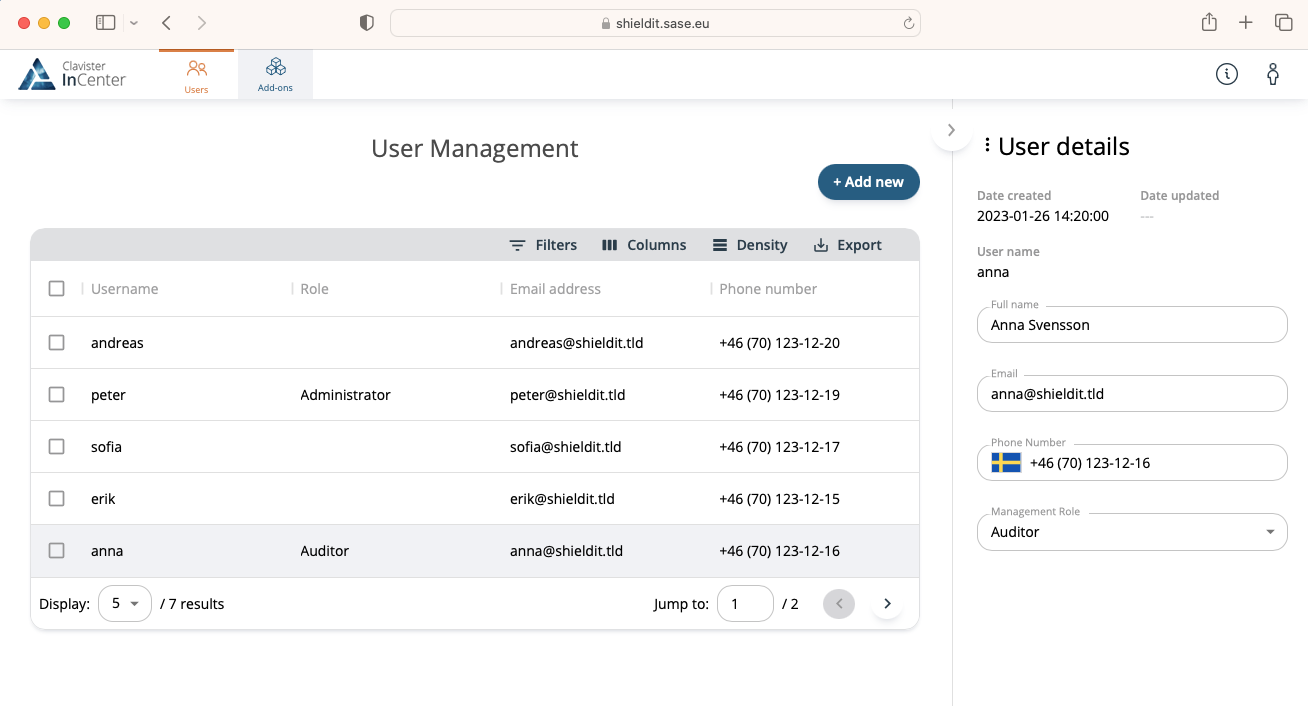
Editing Users
Under Users, select the user you would like to edit and you will can update the user details, when done, click save.
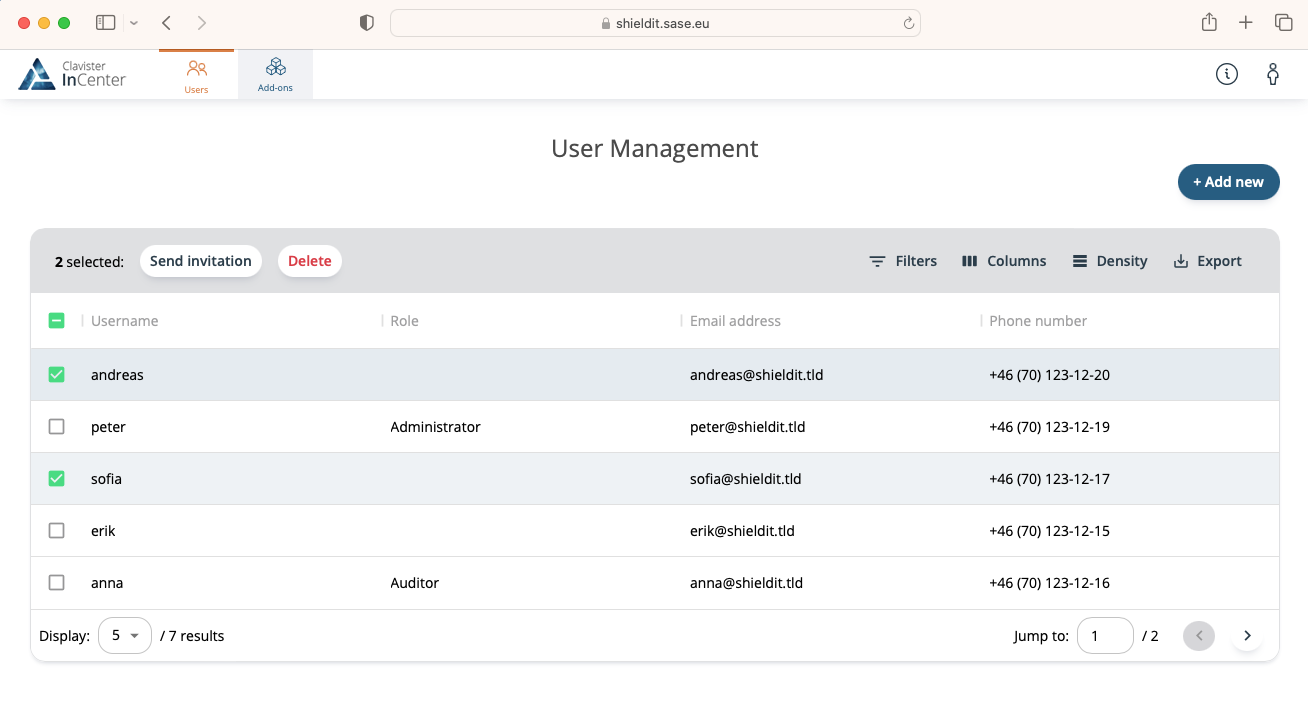
Deleting Users
Under Users, you will see all users added to the system, select the the users to delete, this will allow you to delete these users.
Dashboards
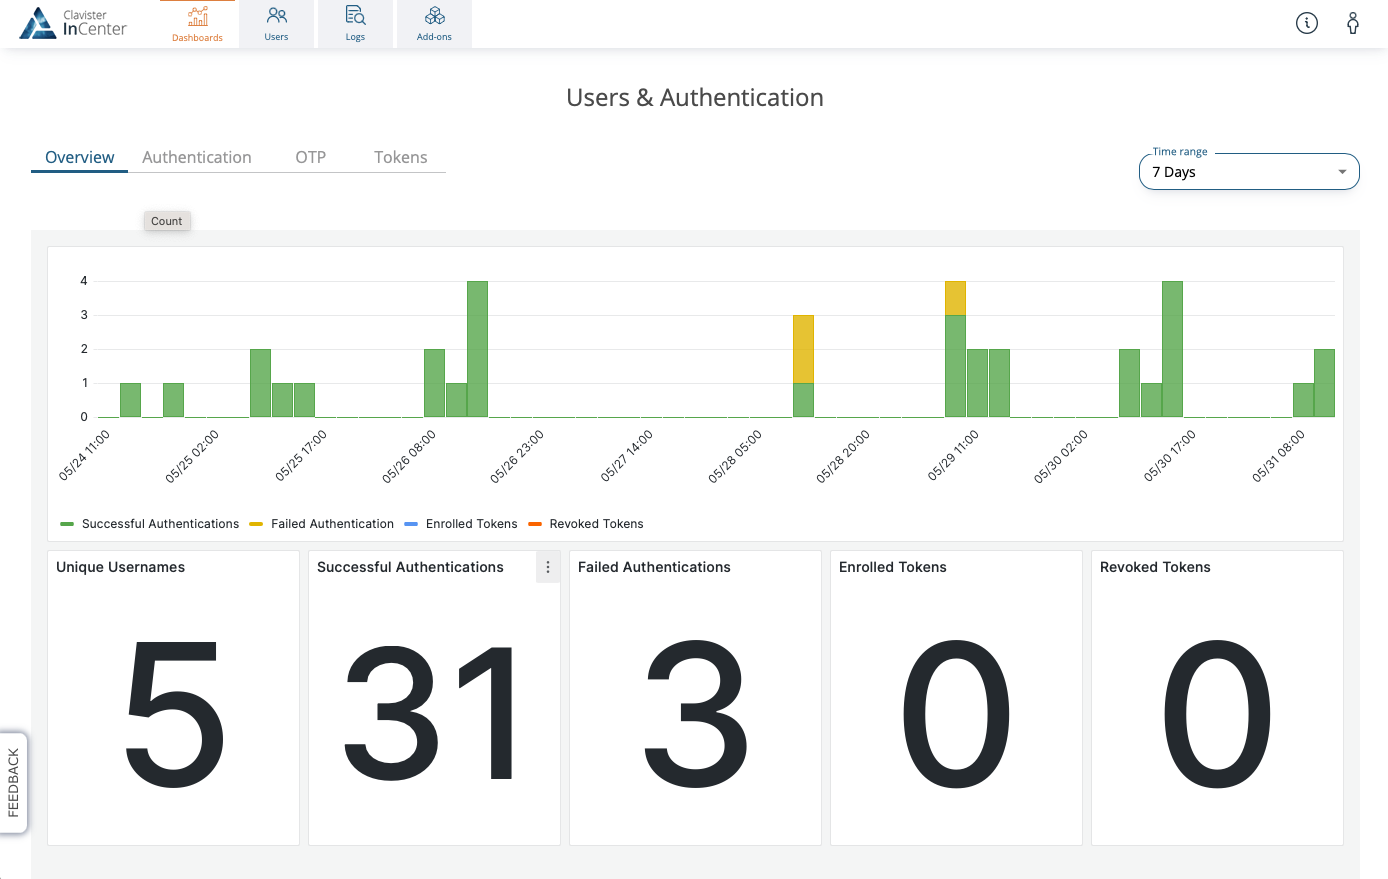
Users & Authentication
Information about who are using the service can be seen by using the Users and Authentication dashboard, this can also be used to see if any user have problems on-boarding into the service.
Related articles
26 Jan, 2026 sase cloud oidc
8 Feb, 2026 oneconnect sase cloud
8 Feb, 2026 oneconnect sase
17 Sep, 2025 sase
6 Dec, 2025 sase cloud oidc oneconnect core
8 Feb, 2026 sase
6 Dec, 2025 sase cloud oidc
21 Nov, 2025 sase cloud ad
21 Nov, 2025 sase azure cloud
8 Feb, 2026 sase oneconnect core userauth oidc
21 Nov, 2025 oneconnect sase cloud radius
7 Feb, 2024 sase
8 Feb, 2026 sase
13 Feb, 2026 cloud sase
21 Nov, 2025 sase cloud ad