Prerequisite
HTTP Port 80 is required for Simplified challenge – it cannot be used in remote management or authentication rules.
The domain’s DNS must resolve to an IP of the WAN interface or core routed and proxy ARP’ed on the WAN interface
https://kb.clavister.com/324735780/assigning-additional-ips-to-cos-core-ethernet-interfaces
Step 1: Create ACME Account
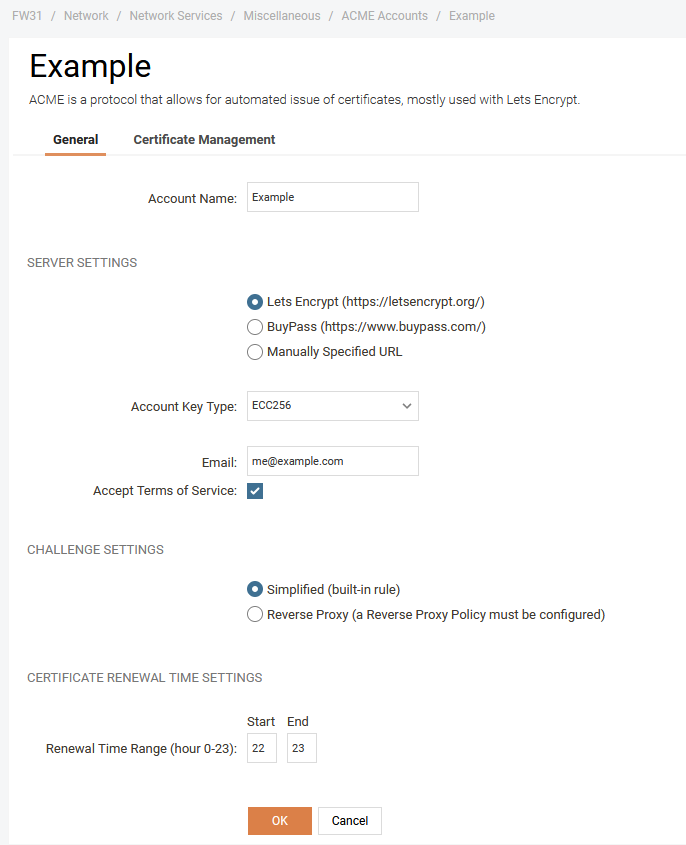
Network → Network Services → Miscellaneous → ACME Accounts → Add → ACME - Account
General Tab
Account Name: Name it (e.g., LetsEncrypt)
Select Provider:
✅ Lets Encrypt
Manually Specified URL
Key Type: ECC256
Email: Enter your contact email
✅ Accept Terms of Service
Challenge + Renewal
Challenge: Simplified
Renewal Time: Choose when auto-renewals are allowed (e.g., 22 to 23)
Click OK
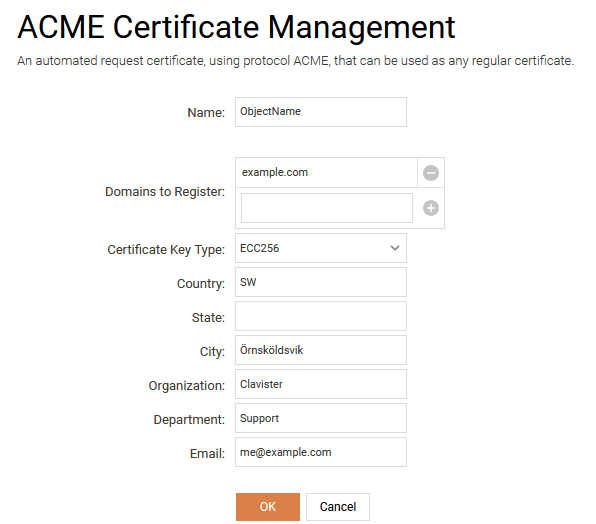
Step 2: Request a Certificate
Go to “Certificate Management” tab and press “Add”
Name: Name the certificate object
Domains to Register: Add domain(s), like example.yourdns.com then click ➕
Certificate Key Type: ECC256
Fill Optional Info (only if needed)
Country
State
City
Organization
Department
Step 3: Save and Activate
The firewall will start domain validation and certificate issuance.
Once issued, it can be applied to services (e.g., OneConnect, IPsec.).
🔑 Certificate Placement:
After issuance, the certificate and its components will be found under:
Objects → General → Key Ring
certificate_object (contains the whole certificate chain)
Related articles
23 Jan, 2024 core howto certificate management letsencrypt