Scenario
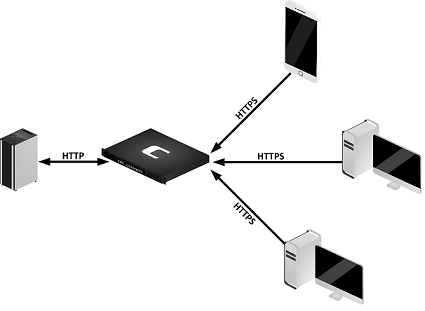
Internal and external clients need to reach a web site hosted on the DMZ network behind a NetWall firewall. The web server itself is using the HTTP protocol so transferring user data between the client and the server is considered insecure since the communication between the server and the client is in plain text. In order to protect the user information, the data needs to be encrypted and the HTTPS protocol allows us to do this . This article will describe how to secure the web server using the TLS ALG. The diagram below illustrates the network topology.
Assumptions
It is assumed the following is ready:
- A web server
- Valid SSL certificates.
The firewall configuration
1. The clients will connect to the web server using port 443 and since the firewall will handle these requests the remote management port for HTTPS needs to be changed. In this example, the port for remote management will be changed from port 443 to 8443. To do this in the WebUI, go to System - Remote Management -> Advanced settings and under “WebUI HTTPS port” change the port to 8443. Note that after the port change has been deployed, the new port number should be used for connection.
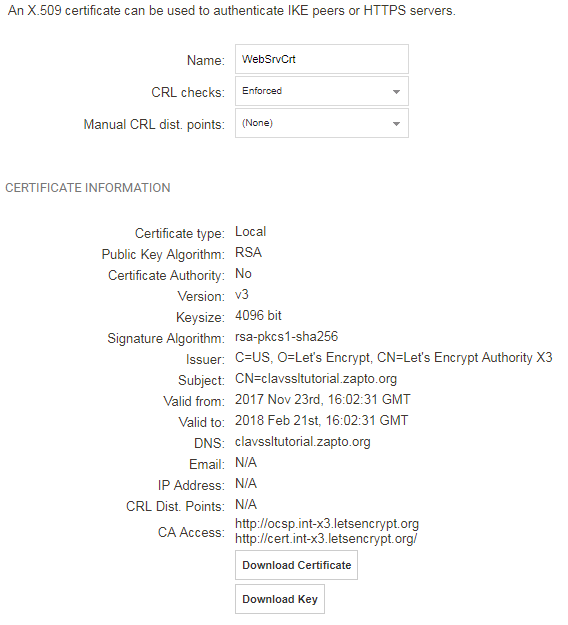
2. Next, the certificate and the private key needs to be uploaded to the firewall. Do this by going to Objects -> Key Ring -> Add -> Certificates. Name the new certificate. In this example it will be called “WebSrvCrt”. Both the key and certificate files must be uploaded. When complete, press OK. The newly created key ring object should now look something similar to the screenshot example below.
3. Next, create a new service object under Objects -> Services using the parameters below and leave the rest of the values at their default.
Name: HTTPS_Webserver
Type: TCP
Destination: 443
Protocol: TLS
4. For the internal and external network to be able to reach the web server using HTTPS, two new IP Policy entries needs to be created in the IP rule set. The policy called “Websrv_LAN” needs to be above the second policy.
The first policy says that the devices connected to the LAN should hide the source IP and translate the destination towards the web server. The second policy says that everything arriving on WAN should be SATed to the web server. Note that the Source Address Translation property in the second IP policy is set to the value None.
IP Policy 1:
Name: Websrv_LAN
Source interface: LAN
Source network: LAN_net
Destination interface: Core
Destination Network: WAN_IP
Services: HTTPS_Webserver
Source Translation
Address Translation: NAT
Address action: Outgoing Interface IP
Destination Translation
Address Translation: SAT
Address Action: Single IP
New IP address: Internal_webserver_IP
Port Action: Single port
New Port: 80
TLS TAB
Under ‘Host certificates’ add the ‘WebSrvCrt’ and leave ‘Root certificates’ empty.
IP Policy 2:
Name: Websrv_WAN
Source interface: WAN
Source Network: all-nets
Destination interface: Core
Destination Network: WAN_IP
Service: HTTPS_Webserver
Source Translation
Address Translation: None
Destination Translation
Address Translation: SAT
Address Action: Single IP
New IP address: Internal_webserver_IP
Port Action: Single port
New Port: 80
TLS TAB
Under “Host certificates” add “WebSrvCrt” and leave “Root certificates” empty.
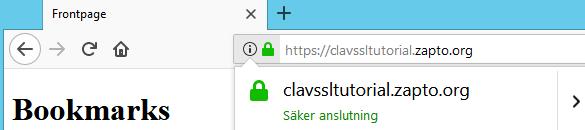
5. Activate and commit the cOS Core configuration changes. Verify that the clients can reach the server using HTTPS by opening a web browser session. When connected, the browser should indicate that the connection is secure. For example, in the browser screenshot below, the green padlock icon indicates this.
Related articles
No related articles found.