Introduction
Note: This article is based on older cOS Core versions and Microsoft Server 2008 but the principles will be the same in newer versions of both cOS Core and Windows Server. However some screenshots and references will not be up to date and minor variations will exist.
In this article, we will set up an environment that will grant access to external users that belong to the AD Windows Group Remote_Access, which is defined and populated in an Active Directory server.
We will allow user authentication via HTTPS in cOS Core. After successful authentication, the user is allowed to open an RDP connection to our internal network.
The authentication against the Active Directory can be done using either RADIUS or LDAP in the cOS Core configuration. Instead of HTTPS, the authentication method can be L2TP or PPTP but we will not cover that further in this article.
In this article we allow external connections after authentication, but for example in a School environment you can use this mechanism to allow internal clients to access internet after successful authentication.
Network Policy Server (NPS)
Starting from Windows Server 2008 the RADIUS implementation in Windows Server is called Network Policy Server (NPS) instead of Internet Authentication Service (IAS). You enable NPS by adding the Role: Network Policy and Access Services.
Prepare Active Directory when using CHAP
Since we are using PAP in this setup we don’t need to enable Reversible Encryption for domain passwords in our Active Directory:
Note: This policy should never be enabled unless application requirements outweigh the need to protect password information. (More information about Reversible Encryption: http://technet.microsoft.com/en-us/libr … 10%29.aspx)
Globally:
- Admin Tools - Group Policy Management
- Choose your forest, domain and then right click your Default Domain Policy and choose Edit.
- Computer Configuration -> Policies -> Windows Settings -> Security Settings -> Account Policies -> Password Policy -> Store passwords using reversible encryption = Enabled.
Per User:
Open the domain user’s properties and checking Store password using reversible encryption on the Account tab.
Note: Passwords must changed/reset for reversible encryption to apply
Configure Network Policy Server (NPS) on the server:
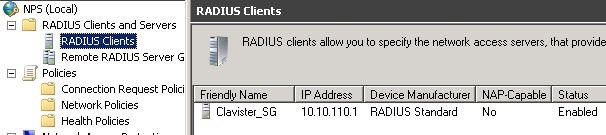
In order for cOS Core to be allowed to communicate with NPS you must add it to known clients:
- Start NPS and choose: RADIUS Clients and Servers -> RADIUS Clients (right-click) -> New
- Enter a friendly name, IP address of cOS Core and a shared secret.
- In tab Advanced make sure RADIUS Standard is used.
Configure a Network Policy:
- Policies - > Network Policies (right-click) -> New - > Enter a friendly name and select Unspecified as Type of network access server
- Add a condition and select Windows Groups -> Add -> Add Groups -> enter an AD group that the remote users belong to (in our example Remote_Access)-> Next
- Select the type of authentication methods you will be using, CHAP or PAP, and Next. Enter custom restrictions if needed and Next.
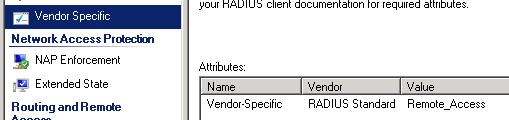
- Select Vendor Specific -> Add -> Select Vendor-Specific at the bottom of the list -> Add -> Add
- Pick Enter Vendor Code and type 5089. Select Yes. It conforms and Configure Attribute
- Enter 1 as attribute number and String as format. Type the name of the AD group (in our example Remote_Access) as Attribute Value and Next and Finish
Note: It is also possible to specify more than one group. Just separate each group with a comma, for example “TrustedUsers, Employees, Personal”. This would tell cOS Core that a user that matches this policy belongs to three groups, “TrustedUsers”, “Employees”, and “Personal”. cOS Core have no group amount limit, but the group name cannot exceed 128 characters.
If you want to control the access permission only through AD group member ship and not with the Dial-in properties:
- Right-click on the policy and select Properties. In Tab Overview select Ignore user account dial-in properties
- On each user properties in the Dial-In tab, make sure that Control access through NPS Network Policy is selected
Configure RADIUS in cOS Core
1 In the WebUI, go to: User Authentication -> External User Databases
2 Select Add -> RADIUS Server.
- Name: Enter a name for the server, for example: Radius_srv.
- IP Address: Enter the IP address of the server, or enter the symbolic name if the server has been defined in the Address Book.
- Port: 1812 (RADIUS service uses UDP port 1812 by default).
- Retry Timeout: 2 (The SG will resend the authentication request to the sever if there is no response after the timeout, for example every 2 seconds. This will be retried a maximum of 3 times).
- Shared Secret: For basic encryption of the RADIUS messages enter the shared secret which was used on the NPS server in section 2.2 (Note that this is case-sensitive!).
Confirm Secret: Retype the string to confirm the one typed above. - Routing Table: The SG´s routing table where route lookup will be done to resolve the server's IP address into a route.
3 Click OK.

Configuring LDAP in cOS Core
1 Enter the User Authentication -> External User Databases section
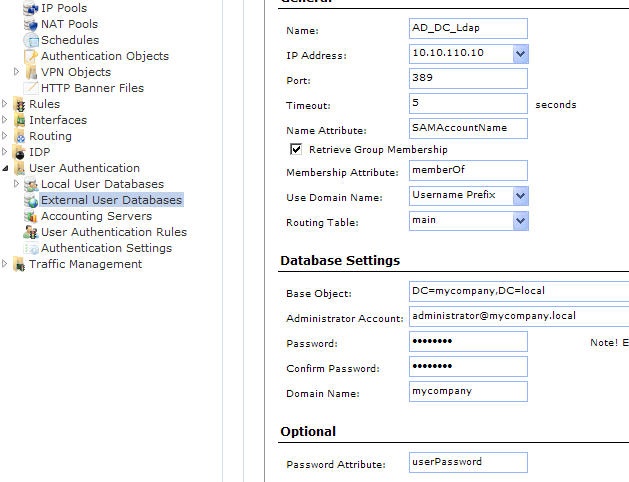
2 Select Add -> LDAP Server.
- Name: The name given to the server object for reference purposes in the SG.
- IP Address: The IP address of the LDAP server.
- Port: The port number on the LDAP server which will receive the SG request. This port is by default 389.
- Timeout: This is the timeout length for LDAP server user authentication attempts in seconds. If no response to a request is received from the server after this time then the server will be considered to be unreachable. The default timeout setting is 5 seconds.
- Name Attribute: The Name Attribute is the ID of the data field on the LDAP server that contains the username. When using Microsoft Active Directory this should be set to SAMAccountName.
- Retrieve Group Membership: This option specifies if the groups that a user belongs to should be retrieved from the LDAP server. The group name is often used when granting user access to a service after a successful logon.
- Membership Attribute: The Membership Attribute defines which groups a user is a member of. When using Microsoft Active Directory this should be set to MemberOf.
- Use Domain Name: Some servers require the domain name in combination with a username for performing successful authentication. For Microsoft Active Directory Username Postfix will add @<domain name> after the user name when authenticating.
- Routing Table: The SG´s routing table where route lookup will be done to resolve the server's IP address into a route.
- Base Object: Defines where in the LDAP server tree search for user accounts shall begin. If the Active Directory domain for example is mycompany.local the root Base Object is DC=mycompany,DC=local. The username search will now begin at the root of the mycompany tree.
- Administrator Account: The LDAP server will require that the user establishing a connection to do a search has administrator privileges. The Administration Account specifies the administrator username.
- Password/Confirm Password: The password for the administrator account which was specified above.
- Domain Name: The Domain Name is used when formatting usernames. This is the first part of the full domain name. In our examples above, the Domain Name is mycompany.
- Password Attribute: The password attribute specifies the ID of the tuple on the LDAP server that contains the user's password. The default ID is userPassword. This option should be left empty unless the LDAP server is being used to authenticate users connecting via PPP with CHAP, MS-CHAPv1 or MS-CHAPv2.
3 Click OK
Configure HTTP/HTTPS User Authentication Rules in cOS Core
Now, we must create a User Authentication Rule that specifies which users will be allowed to authenticate, and how this will be processed. In our case, we want to let users belonging to AD group “Remote_Access” to authenticate.
1 In the WebUI, go to: User Authentication -> User Authentication Rules section
2 Select: Add -> User Authentication Rule
- Name: The name given to the server object for reference purposes in the firewall.
- Authentication Agent: The type of traffic being authenticated. In our setup we use HTTPS but you can also use HTTP, PPP or Xauth.
- Authentication Source: This specifies that authentication is to be performed using one of the following:
- LDAP - Users are looked up in an external LDAP server database.
- RADIUS - An external RADIUS server is used for lookup.
- Disallow - This option explicitly disallows all connections that trigger this rule. Such connections will never be authenticated. Any Disallow rules are best located at the end of the authentication rule set.
- Local - The local database defined within cOS Core is used for user lookup.
- Allow - This option allows all connections that trigger this rule. With this option, all connections that trigger this rule will be authenticated. No authentication database lookup occurs.
We use RADIUS or LDAP in this guide
- Interface: The source interface on which the connections to be authenticated will arrive. This must be specified.
- Originator IP The source IP or network from which new connections will arrive. For XAuth and PPP, this is the tunnel originator IP. To allow roaming clients All-Nets is often used. For outbound connections the Internal network object is often used.
- Terminator IP: The terminating IP with which new connections arrive. This is only specified where the Authentication Agent is PPP.
- Log Settings: Enable and select severity if you want it enabled.
- Authentication Options: Select the RADIUS server or the LDAP server created previously depending on your authentication source. If RADIUS is selected pick the same authentication method used in previous section. cOS Core supports the authentication methods PAP (Password Authentication Protocol) and CHAP (Challenge Handshake Authentication Protocol). If you choose CHAP, you will have to store the user password in Active Directory using reversibly encryption. Please refer to NPS help chapter “Authentication Methods” for further explanations about the difference between PAP and CHAP. In this example we will use PAP.
- Authentication Servers - Select the NPS Server, which was previously defined.
- Accounting: We leave that out in this guide.
- Agent Options: We use the built-in web page for login and if HTTPS is the authentication agent we pick the Certificates to be used.
- Restrictions: If you need to apply any idle or session timeout enter the value in seconds. Select your preferred policy for multiple Username Login.
3 Click OK

Now we have successfully created a User Authentication Rule. However, this rule only specifies who and how. In order to test this set-up, we also need to specify a rule, which will only trigger if a user from the “Remote_Access” AD group is logged in.
Enabling User Authentication in a network object
In order to create user authentication specific rules, user authentication information is entered in the network objects:
- Go to: Objects -> Address Book section
- Select Add -> IP4 Group
- Enter a friendly name and select the network members of the object. This is the source IP or Network from where the authentication is performed. In this example, all-nets.
- In the User Authentication tab type in the name of the AD group the user must belong to. In this example, "Remote_Access".

Enabling User Authentication in a rule
Now it is possible to use the previously created user authentication enabled network object in the rule section.

- The first two rules will only trigger (allow RDP to an internal server) if a user, which is a member of the AD group "Remote_Access" , is currently logged in and authenticated against Active Directory.
- The third rule specifies that we allow access to port 443, TCP, to cOS Core. This is necessary in order to allow HTTPS authentication.
Testing the set-up
To successfully test the set-up, the AD group Remote_Access must be populated with at least one user. We assume that this is the case, and that josm is a member of the Remote_Access group. If you are using CHAP as encryption method, remember to check the box that says “store password using reversibly encryption” in Active Directory.
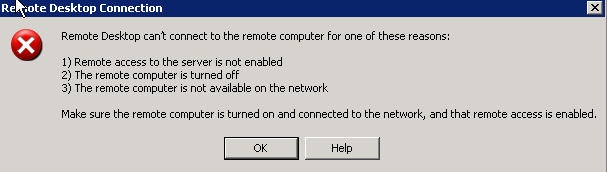
First of all, make sure that the set-up is correct by trying to open a RDP session to the WAN IP of cOS Core. You should receive a connection error message (as you are not authenticated yet).
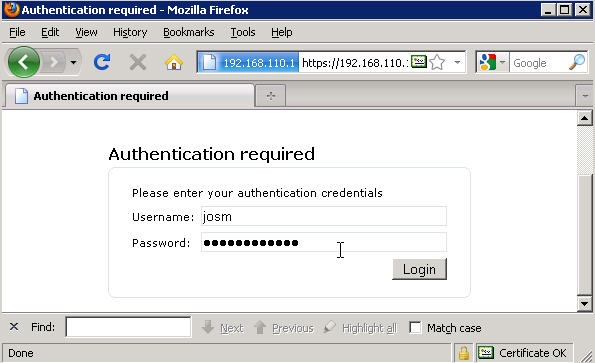
Now, start a browser and enter the URL or WAN IP to cOS Core. You should be presented with an authentication screen asking for a username and password. Enter the username (josm) and the password and press “Login”.
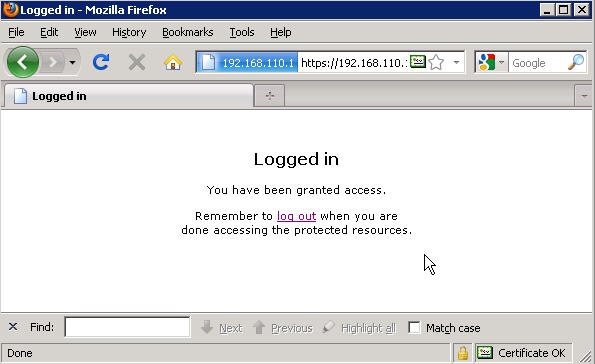
If the password and the link between cOS Core and NPS or LDAP server (and thus Active Directory) are correct, you should be greeted with a “Logged in” page.
To verify that your user is logged in and has received privileges for the Remote_Access group, open up a SSH connection to cOS Core and type userauth -l, as shown below:

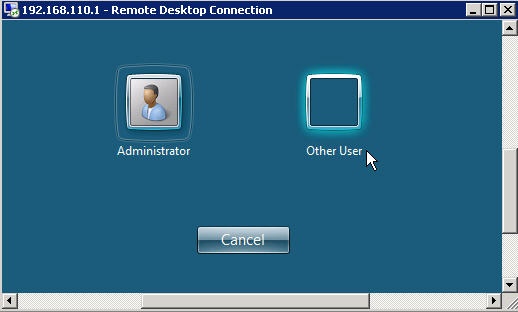
We should now be able to successfully connect with RDP to our internal server:
Troubleshooting
In case the test was not successful, ensure that:
• You allow access to port 443 on the firewall. (remember that the default HTTPS management port is also 443. You need to change that port to follow this guide).
• That cOS Core is able to communicate with the NPS server (UDP, and in our case port 1812).
• The shared secret is typed exactly the same in both cOS Core and on the NPS server.
• If you have not enabled the setting Ignore user account dial-in properties make sure the user in Active Directory is allowed to Dial-in.
• If you are using CHAP, the password of the user must be stored “using reversibly encryption” in Active Directory.
• The correct privilege information (“Remote_Access”) is defined in both the NPS server and in the source network object used in the “RDP_Inbound_Authed” rule.
• It may be necessary to change “Use Domain Name” from “Username Prefix” to “Username Postfix” depending on your Core version and/or Active Directory version.
Related articles
8 Feb, 2026 sase oneconnect core userauth oidc