This guide is on how to configure your On-Prem NetWall firewall to work with the Cloud Services Log Ingestion add-on.
The guide uses our example company ShieldIT as <company_name> through the different steps
Setup your NetWall firewall
The NetWall firewall configurations provided within the following instructions enables your firewall to forward log traffic generated by corresponding NetWall firewall towards the Cloud Services via an IPsec tunnel. The IPsec tunnel and all it’s related routing configurations utilizes the Virtual routing capabilities in NetWall to isolate routing configurations from current Firewall setup to avoid any potential routing conflicts.
Modifying the template script
Edit above downloaded script file with your favorite text editor

Change following values to the values provided to you by Clavister - values that require change are put as <change me> :
- IP4Address sase_logging_ip Address=<change me>
- PSKHex=<change me>
Example:
- IP4Address sase_logging_ip Address=10.223.11.12
- PSKHex=3ccb660224092b7042ebc49bb4d3a91480e9f950a05420bf154f1b124345f0044739a9d018f93234f7e1b527a556347deb64ae6f1f2470a9cdab15c84577044a
Importing and applying the script
Navigate to Status → Maintenance → Import Script
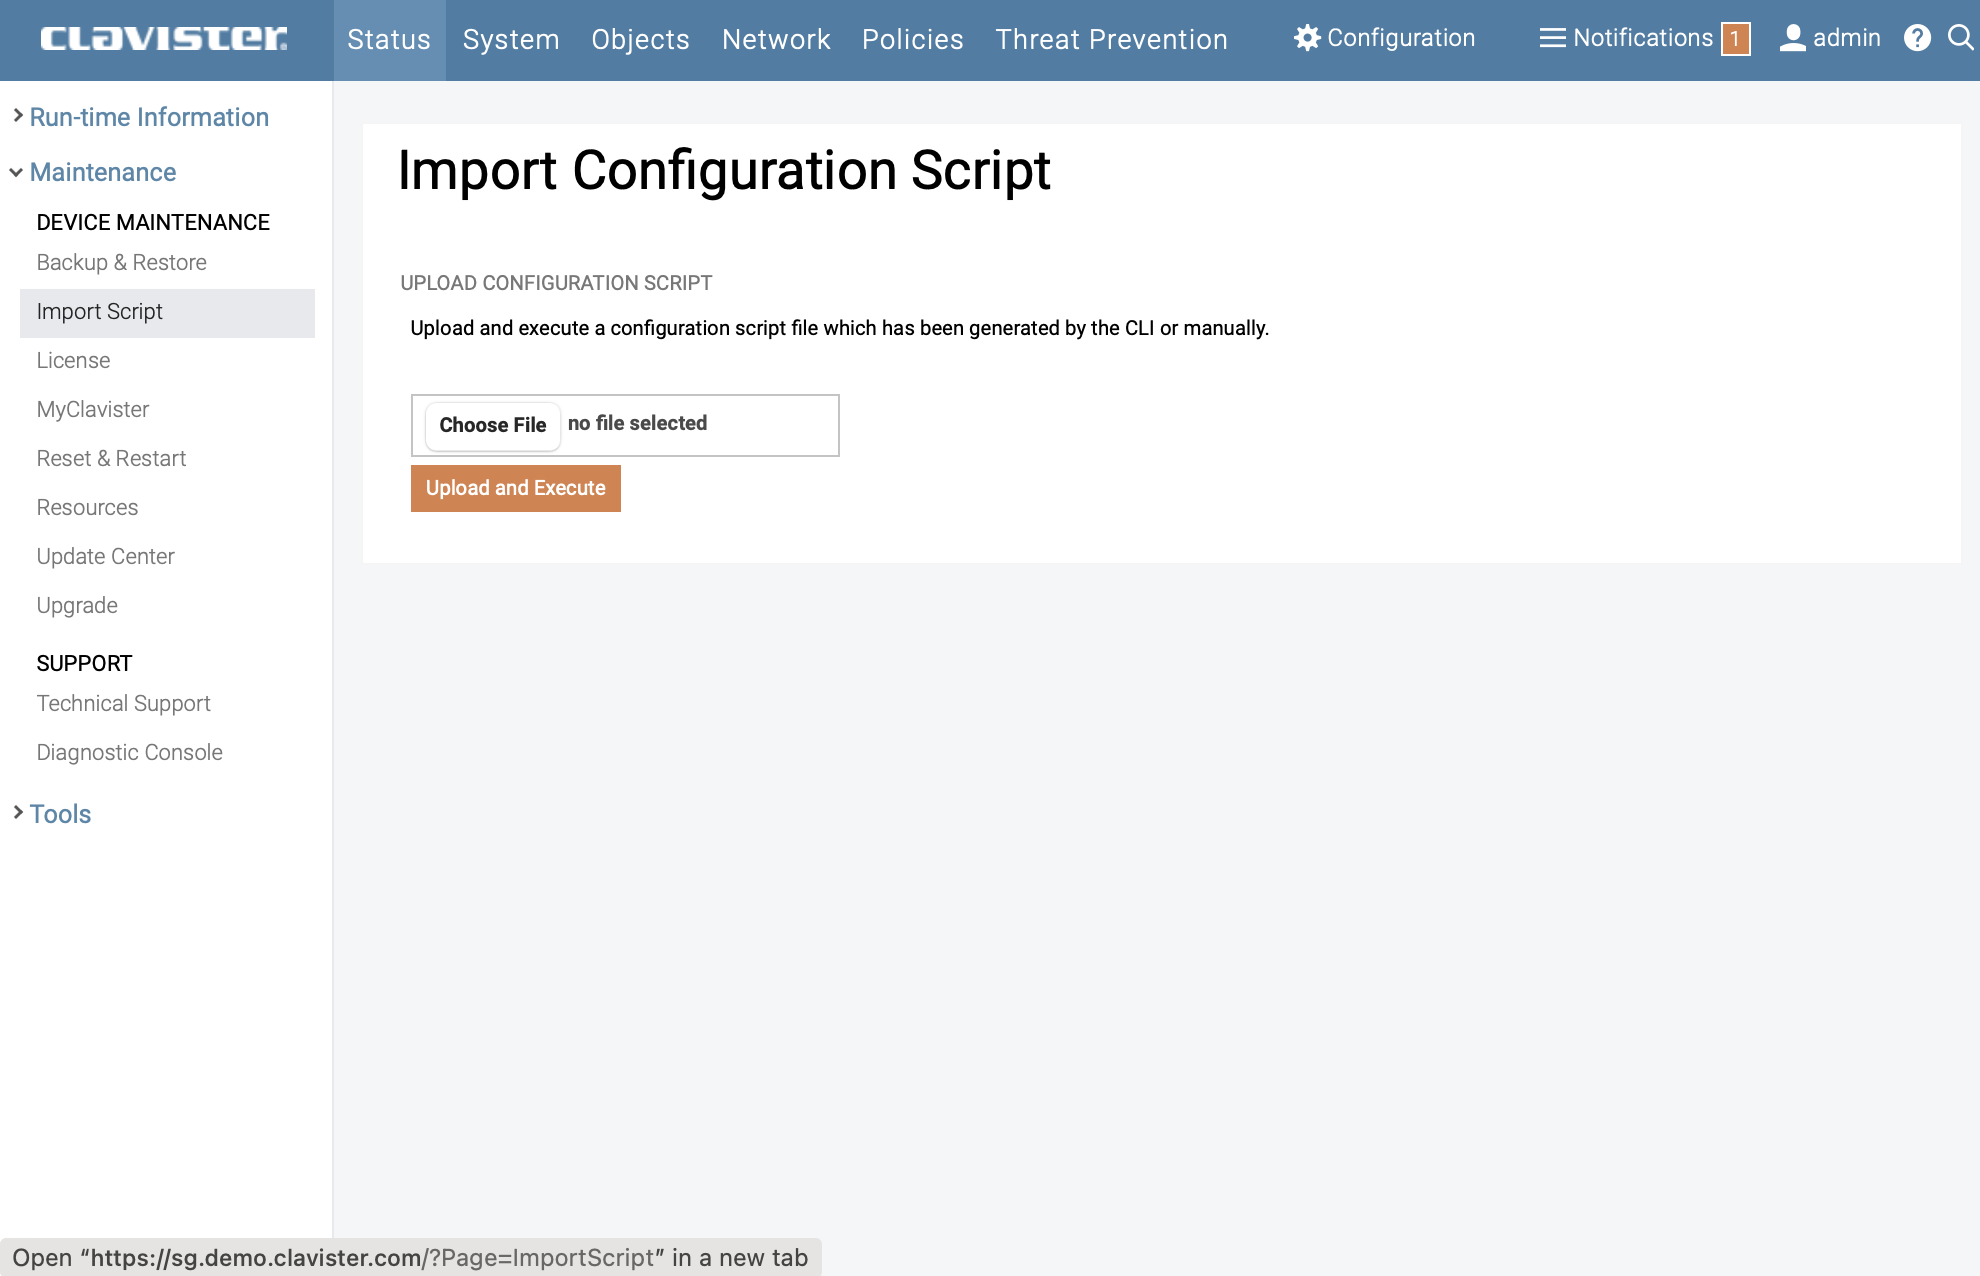
Click on Browse… then select and upload the Script file edited and saved in previous step.
You should get following message:
Success! Execution completed successfully. You can now review and activate your new configuration.
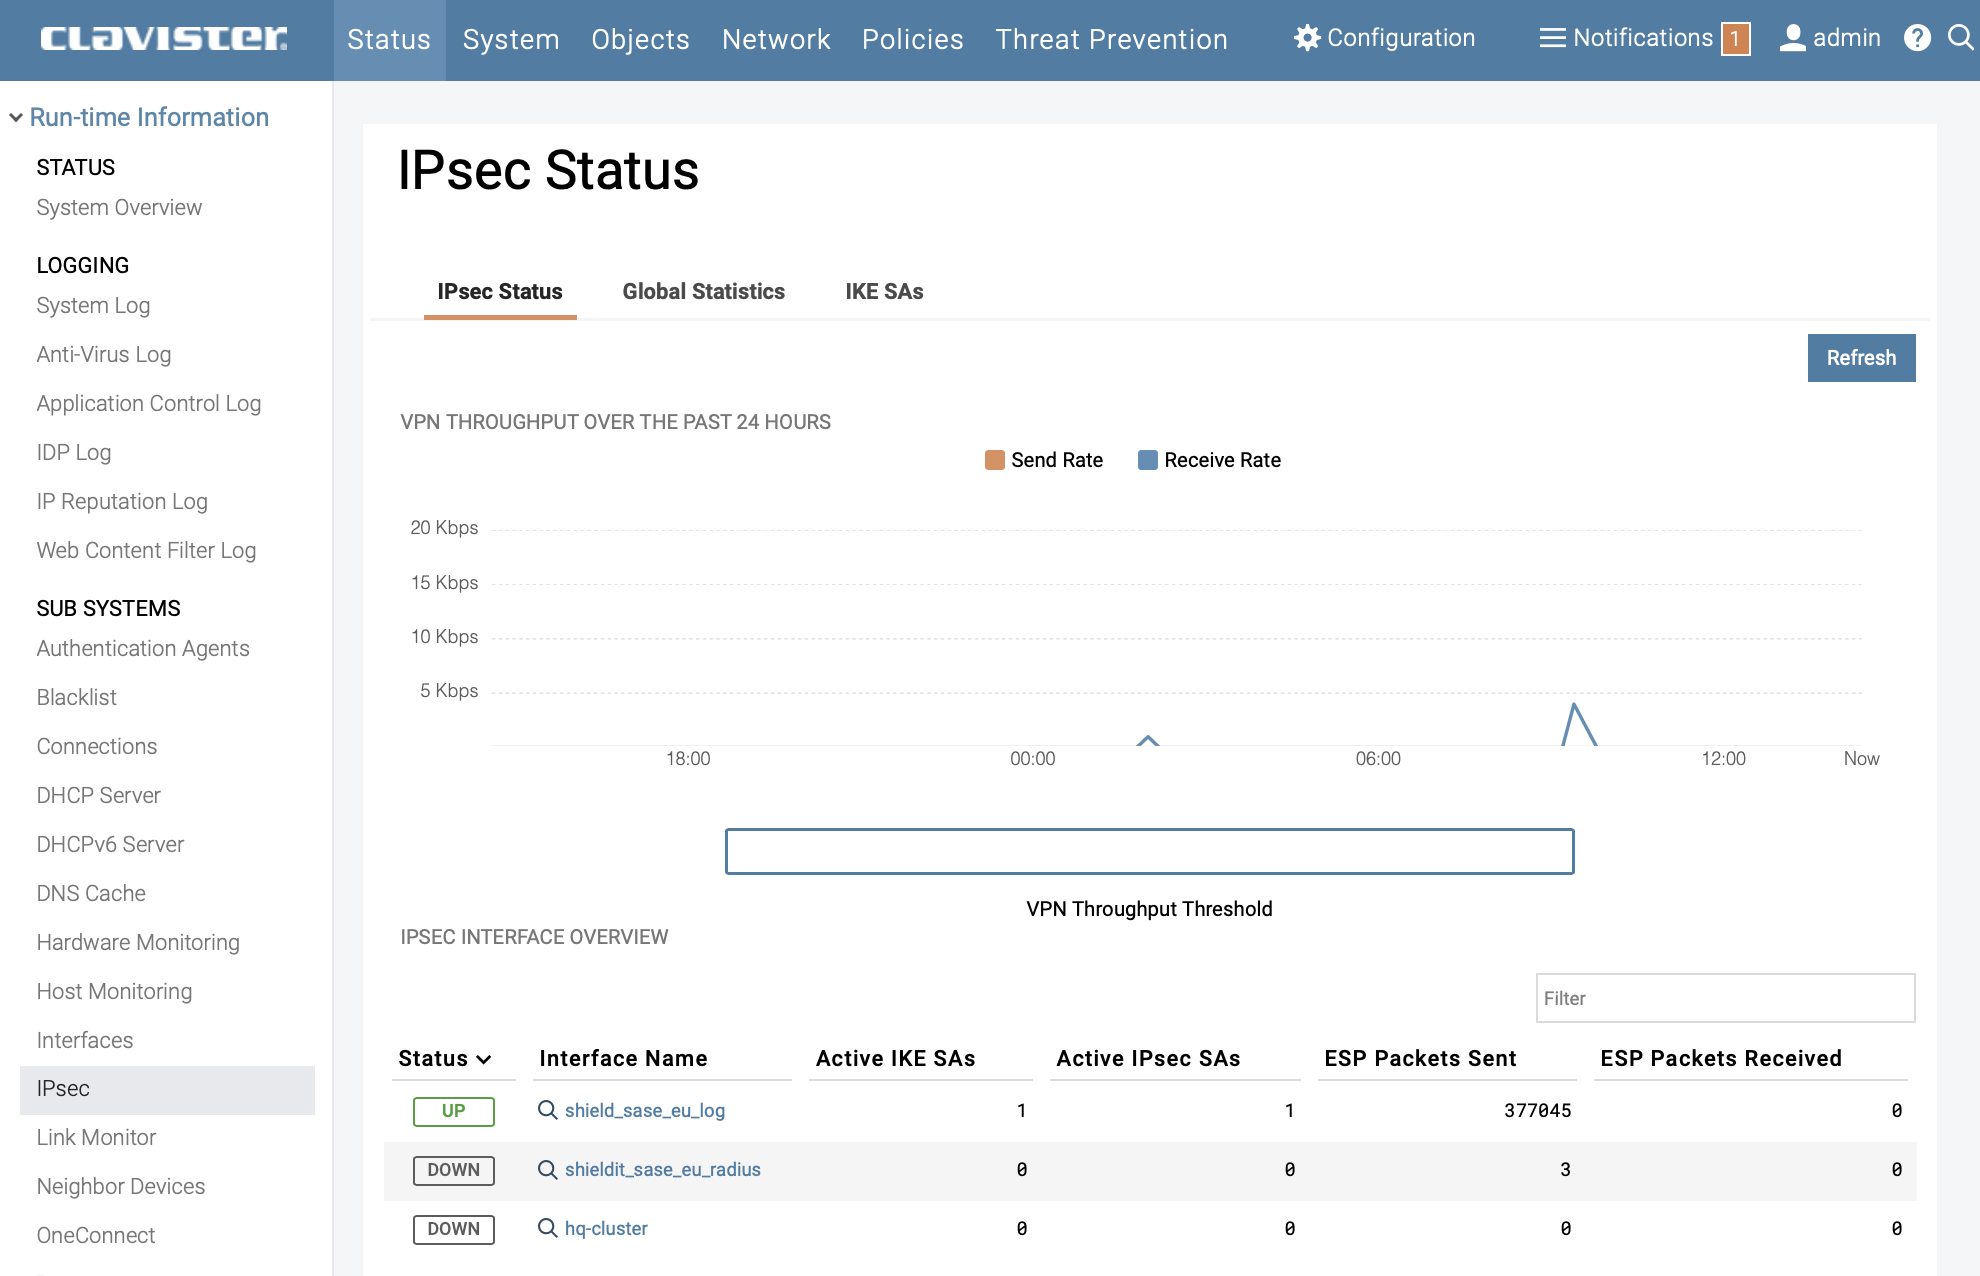
Troubleshooting
Check tunnel status by navigating to : Status → IPsec
Done.
Related articles
13 Jun, 2022 oneconnect macos ios windows android
26 Jan, 2026 sase cloud oidc
3 Jun, 2022 oneconnect openconnect sslvpn
8 Feb, 2026 oneconnect sase cloud
8 Feb, 2026 oneconnect sase
28 Apr, 2023 openconnect oneconnect macos ios iphone
17 Sep, 2025 sase
18 Mar, 2024 core certificate oneconnect ipsec vpn
29 Jun, 2026 sase cloud oidc oneconnect core
23 Aug, 2022 sslvpn openconnect oneconnect android core
29 Oct, 2021 sslvpn openconnect oneconnect windows
8 Feb, 2026 sase
6 Dec, 2025 sase cloud oidc
9 Feb, 2024 core oneconnect windows splittunneling dns
21 Nov, 2025 sase cloud ad
18 Mar, 2024 core incontrol certificate oneconnect ipsec vpn
27 Oct, 2022 oneconnect log
23 Jun, 2026 sslvpn openconnect oneconnect linux core
8 Apr, 2021 core sslvpn oneconnect interfaces arp
21 Nov, 2025 sase azure cloud
4 Jul, 2025 core oneconnect oidc
18 Mar, 2024 onetouch sslvpn oneconnect troubleshoot certificate
25 Feb, 2022 oneconnect windows howto
8 Feb, 2026 sase oneconnect core userauth oidc
19 May, 2026 oneconnect core sase
27 Feb, 2024 oneconnect userbased core
23 Aug, 2022 core oneconnect
28 Nov, 2022 core configuration oneconnect
21 Nov, 2025 oneconnect sase cloud radius
18 May, 2026 sase
7 Feb, 2024 sase
8 Feb, 2026 sase
11 May, 2023 oneconnect certificate howto
21 Nov, 2025 sase cloud ad
27 Aug, 2024 oneconnect windows
8 Jun, 2022 openconnect oneconnect android
23 Aug, 2022 sslvpn openconnect oneconnect macos windows linux core