Question:
How do I set up a OneConnect VPN tunnel in cOS core?
Answer:
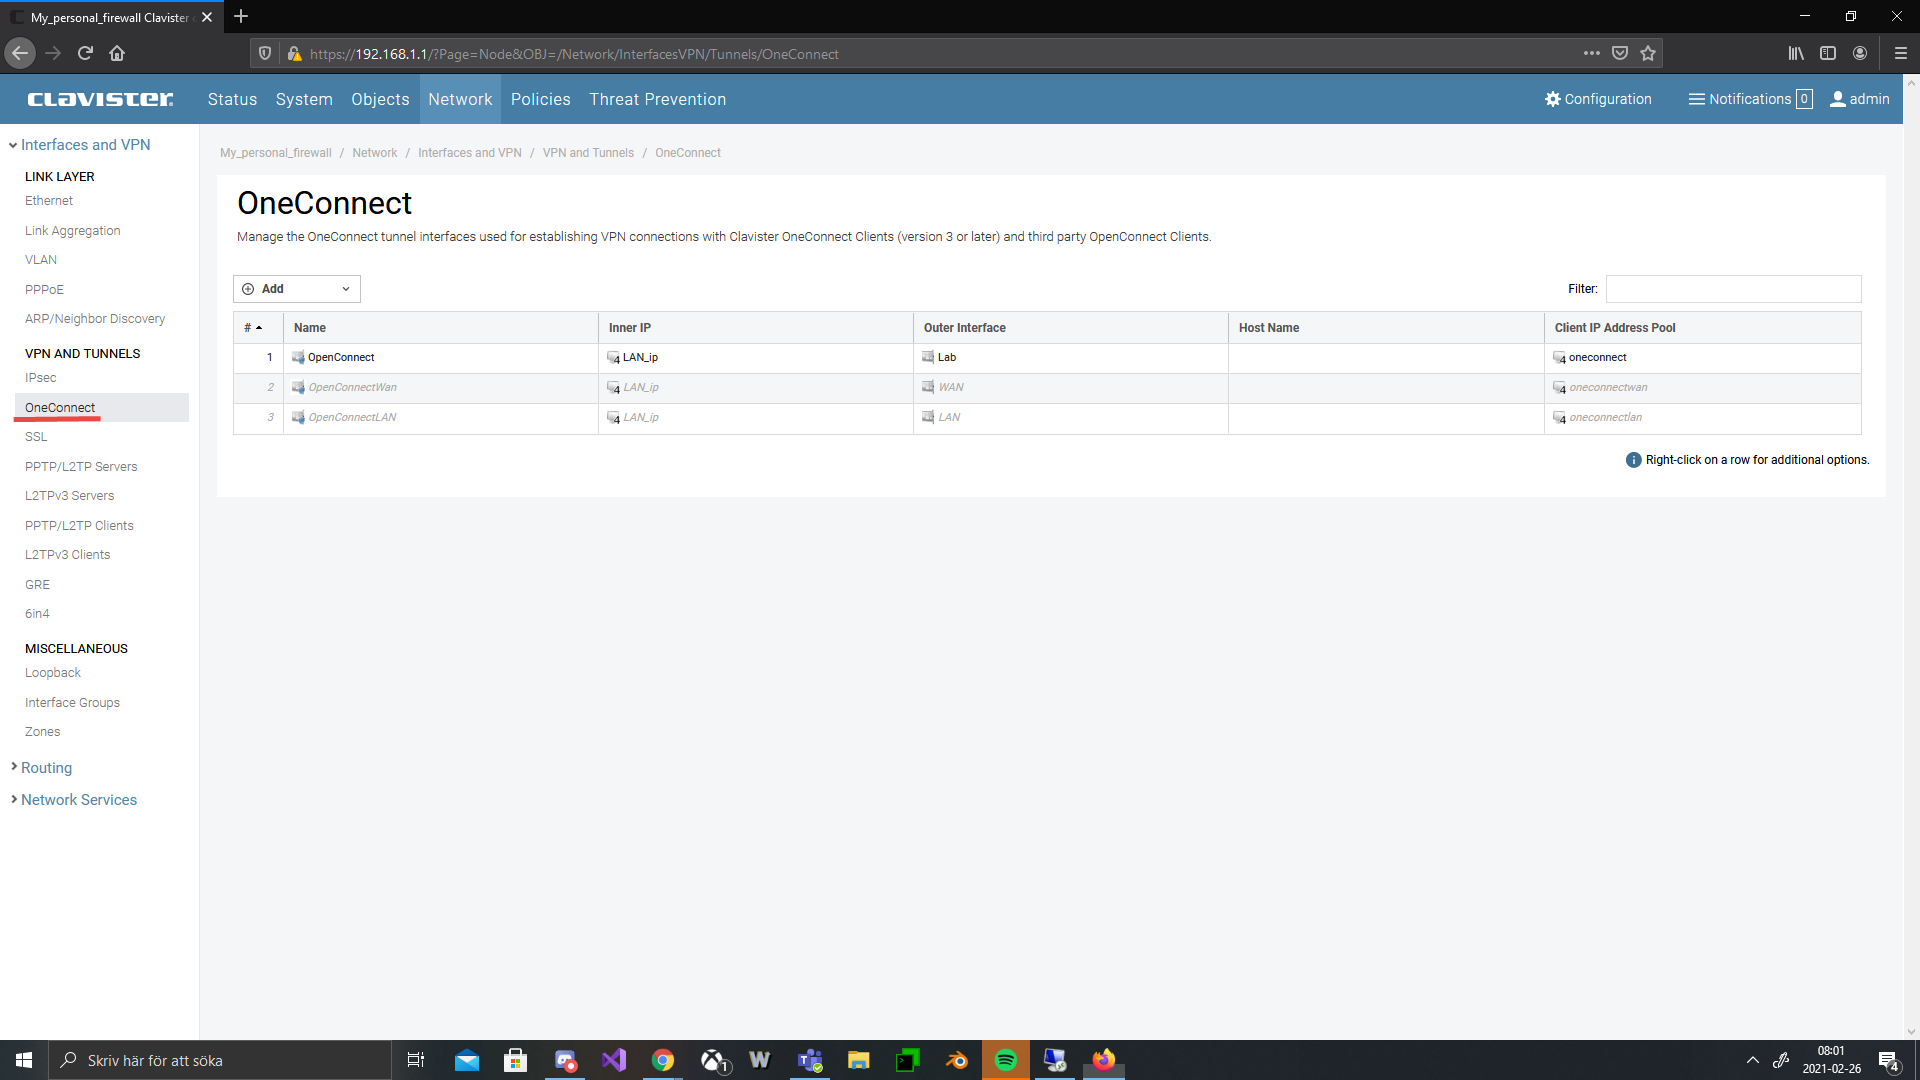
To create a OneConnect VPN we need to go in under Network > Interface and VPN > OneConnect and then press the add button and select OneConnect Interface.

Once the interface window opens up, you need to fill in information on the tunnel.
- Name: A descriptive name.
- Inner IP: This is the local IPv4 address on the firewall side within the OneConnect tunnel. This IP must belong to the same network segment as the IP Pool.
- Outer Interface: The interface on which the OneConnect listens for connection attempts (usually the external interface, e.g. Wan).
- Server IP: Which IP address the OneConnect server listens to for incoming connection attempts from clients.
- Server Port/DTLS Port: What port type the connection is made over.
- Authentication Source: What kind of authentication is required for the VPN.
- Client IP Address Pool: The pool of IP addresses that, when connecting, one is assigned an IP from. Remember the Inner IP must be part of the same network as the pool but not be one of the pools IPs.
- Netmask: Must be set for the IP pool to limit its size. Default setting is 255.255.255.0.
- DNS: The DNS that will be given to connecting clients.
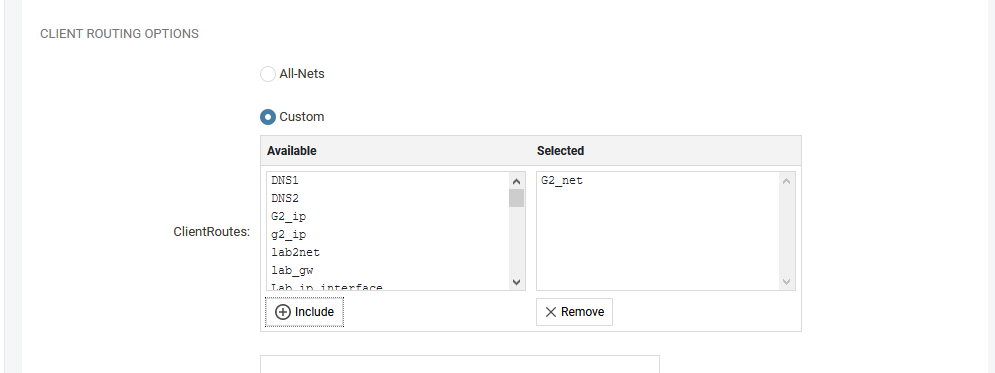
- Client Routes: Default setting is All-routes setting so a connecting client route all traffic over the VPN.
Once these setting is made we can press OK and save the VPN. We can now to connect with the OneConnect client version 3 or higher or a 3rd party client such as OpenConnect.
If you are using a version 2.02.01 or older you need to run a SSL VPN instead. Information on how to set that up can be found in chapter 10 in the administration guide.
How to set up a split tunnel
If we want to split the tunnel so not all of the clients traffic goes over the VPN we can do like this;
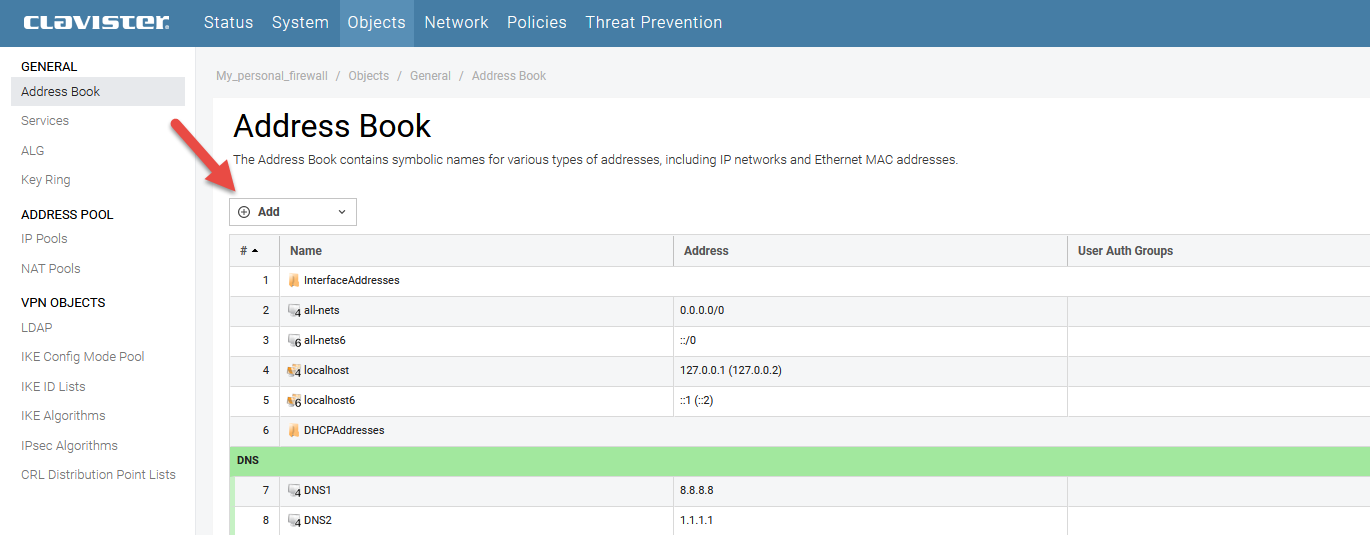
First we need to create the objects in the address book. These objects will be the IP addresses and ranges that the clients can reach over the VPN once a connection has been established. To do this go under object > Address Book and press Add. The objects need to be specific IPv4 addresses, networks or address ranges.

Once we have created the objects we go back to the OneConnect interface we created and scroll down to the Client route option.

We can now select Custom instead of default All-Nets and include the objects we created.
Once we have added the correct routes we press OK and deploy. Now we have set up a split tunnel.
More information regarding OneConnect setup and example can be found in the Administration guide for cOS core version 13.00.09 released 23/2 2021
Related articles
13 Jun, 2022 oneconnect macos ios windows android
3 Jun, 2022 oneconnect openconnect sslvpn
17 Mar, 2025 oneconnect sase cloud
5 Feb, 2024 oneconnect sase
28 Apr, 2023 openconnect oneconnect macos ios iphone
18 Mar, 2024 core certificate oneconnect ipsec vpn
6 Dec, 2025 sase cloud oidc oneconnect core
28 Feb, 2024 oneconnect windows
23 Aug, 2022 sslvpn openconnect oneconnect android core
29 Oct, 2021 sslvpn openconnect oneconnect windows
13 Oct, 2021 oneconnect macos openconnect ios
9 Feb, 2024 core oneconnect windows splittunneling dns
18 Mar, 2024 core incontrol certificate oneconnect ipsec vpn
27 Oct, 2022 oneconnect log
5 Mar, 2021 sslvpn openconnect oneconnect linux core
8 Apr, 2021 core sslvpn oneconnect interfaces arp
4 Jul, 2025 core oneconnect oidc
18 Mar, 2024 onetouch sslvpn oneconnect troubleshoot certificate
25 Feb, 2022 oneconnect windows howto
9 Dec, 2025 sase oneconnect core userauth oidc
27 Feb, 2024 oneconnect userbased core
28 Nov, 2022 core configuration oneconnect
21 Nov, 2025 oneconnect sase cloud radius
29 Jun, 2021 core oneconnect
11 May, 2023 oneconnect certificate howto
27 Aug, 2024 oneconnect windows
8 Jun, 2022 openconnect oneconnect android
23 Aug, 2022 sslvpn openconnect oneconnect macos windows linux core