Configure Microsoft Entra ID
Configure a new Application: (See Photo 01)
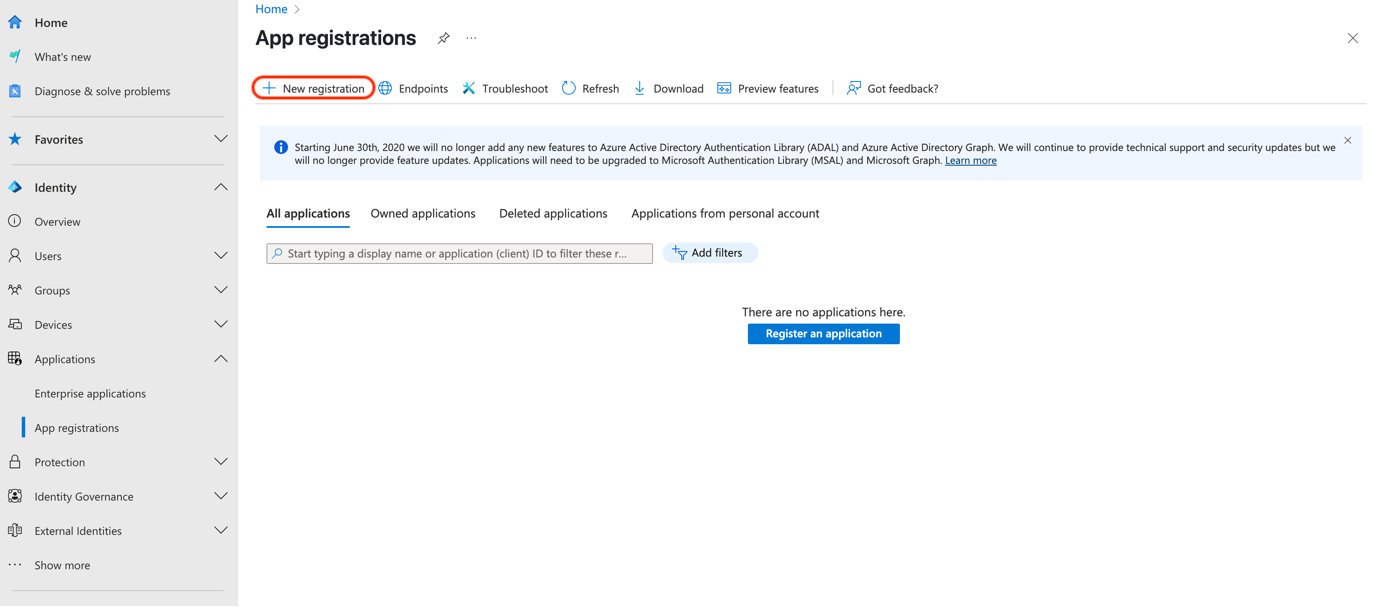
Photo 01.
Choose a name for the application (in this case named Clavister-OIDC)
and choose “Accounts in this organizational directory only (Default Directory only - Single tenant)” (See Photo 02)
In “Redirect URI” choose
Public Client/Native (mobile & desktop): http://127.0.0.1/oneconnect/oauth/
(See Photo 02)
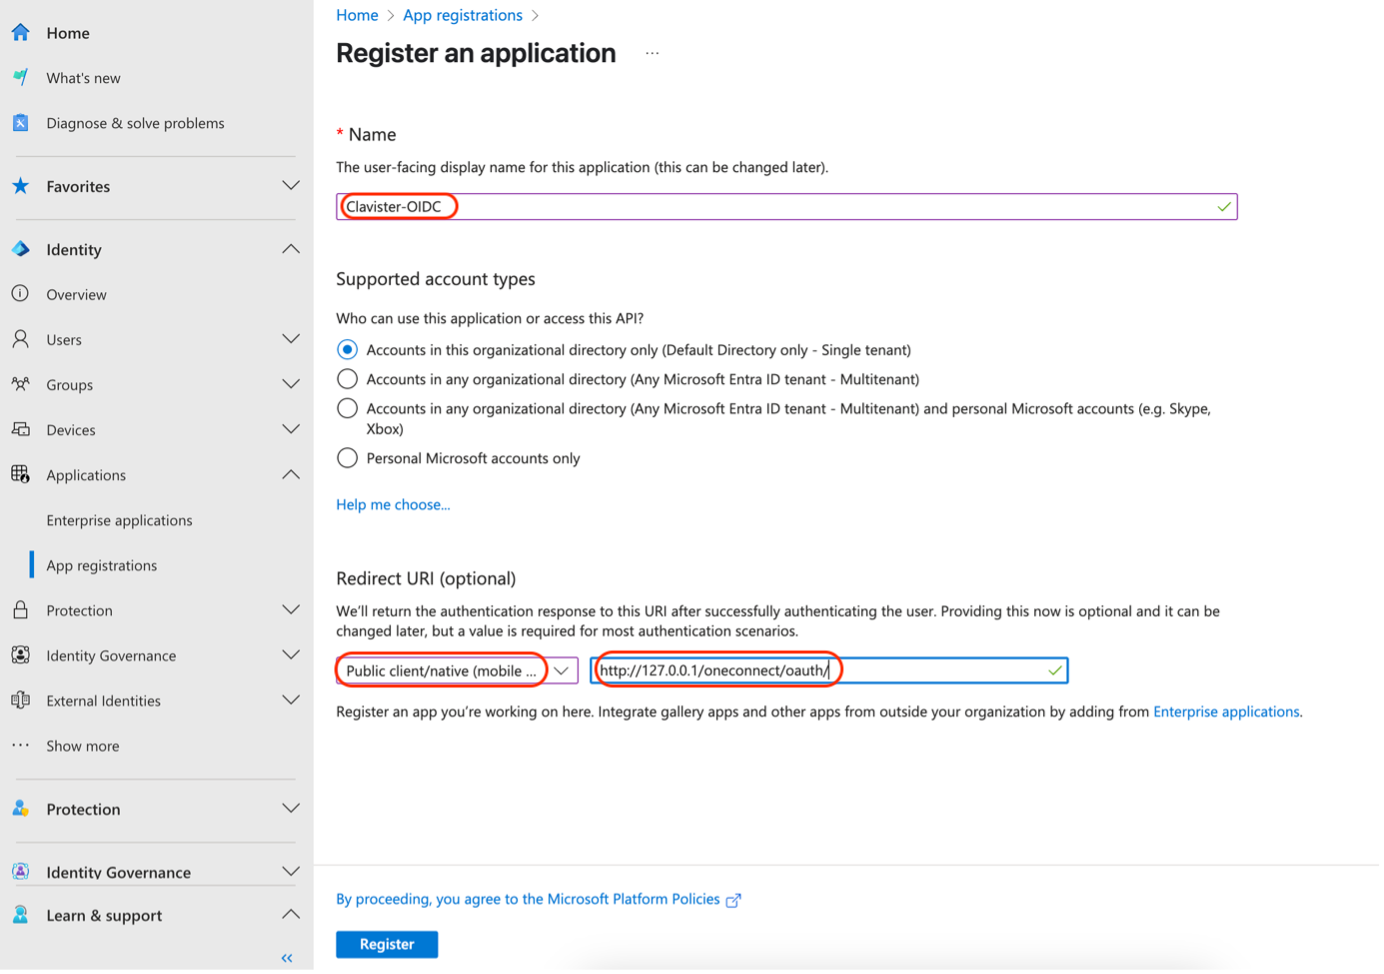
Photo 02.
We need to add one more “Redirect URI”
com.clavister.oneconnect://oauth/ (See Photo 03)
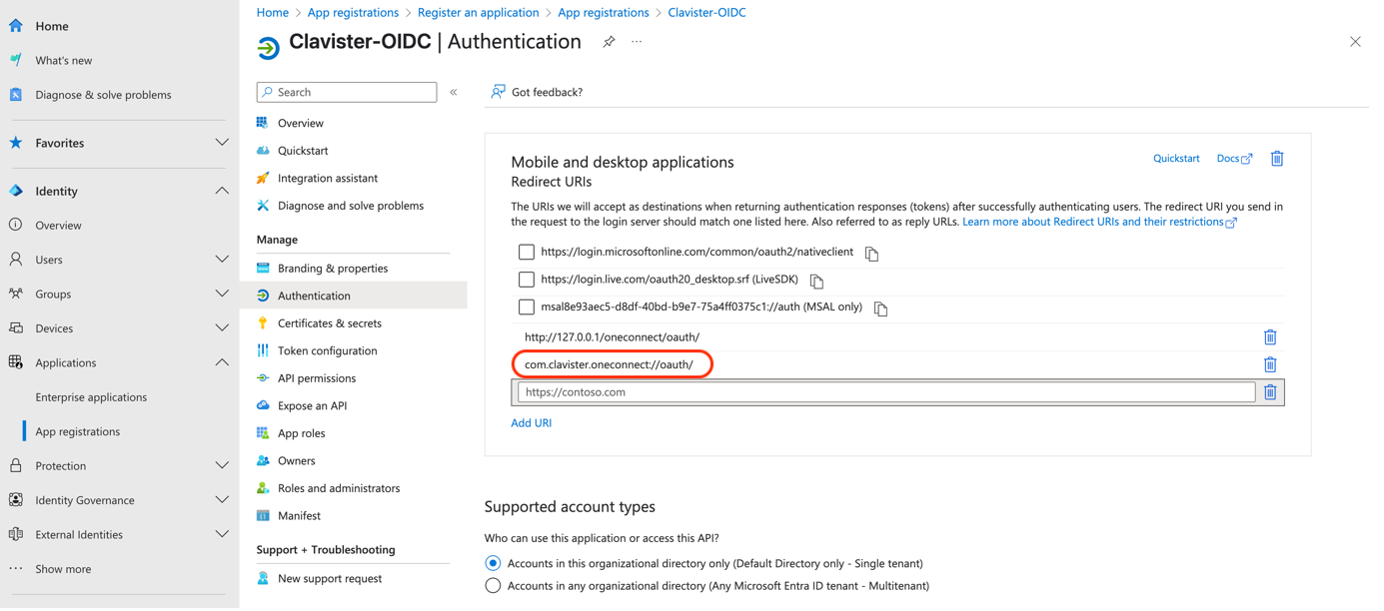
Photo 03.
Configure the application to require user assignment, (only assigned users can login) (See Photo 04)
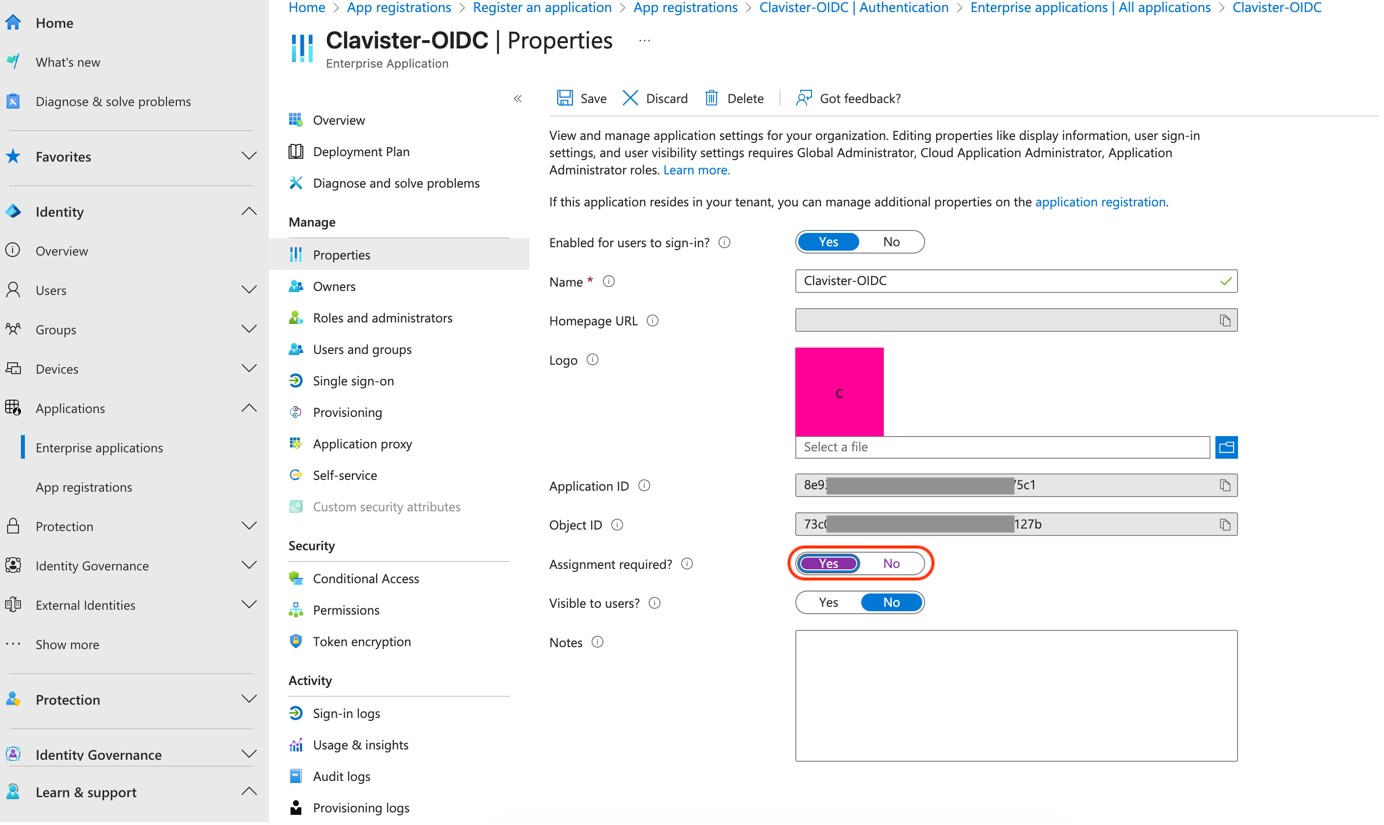
Photo 04.
Assign users to be able to login (See Photo 05)
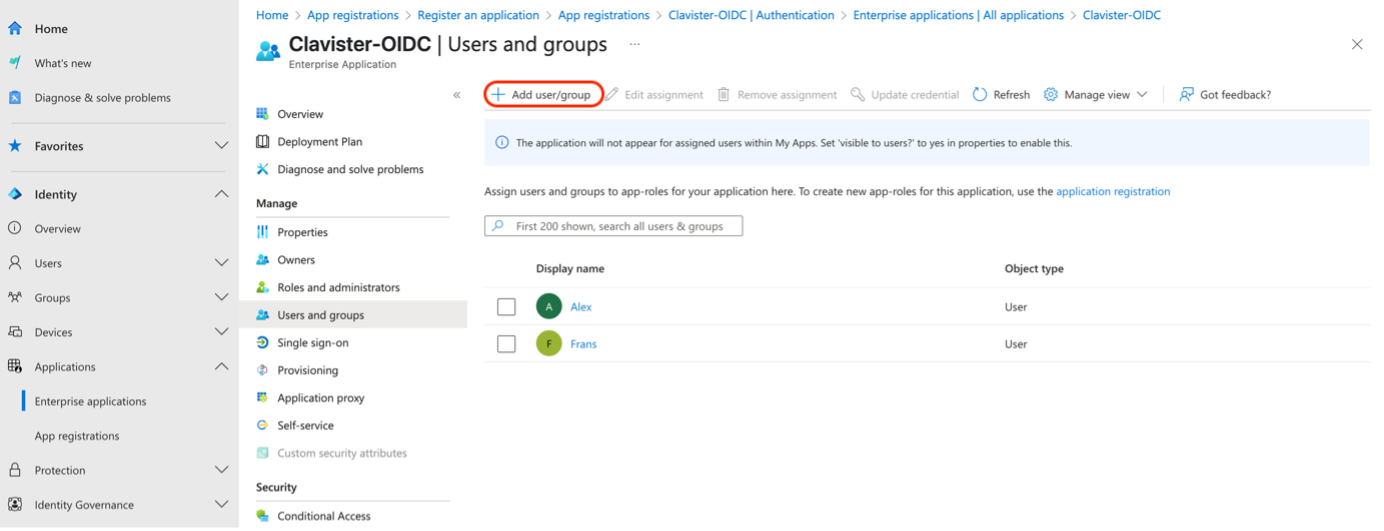
Photo 05.
To be able to see Userprinciple names (username) instead of tokens (numbers and letters) in Clavister NetWall we need to configure claims.
We start to change in manifest to “acceptMappedClaims”: true(See Photo 06)

Photo 06.
Configure Claims in Entra from “Single sign-on” page (See Photo 07)
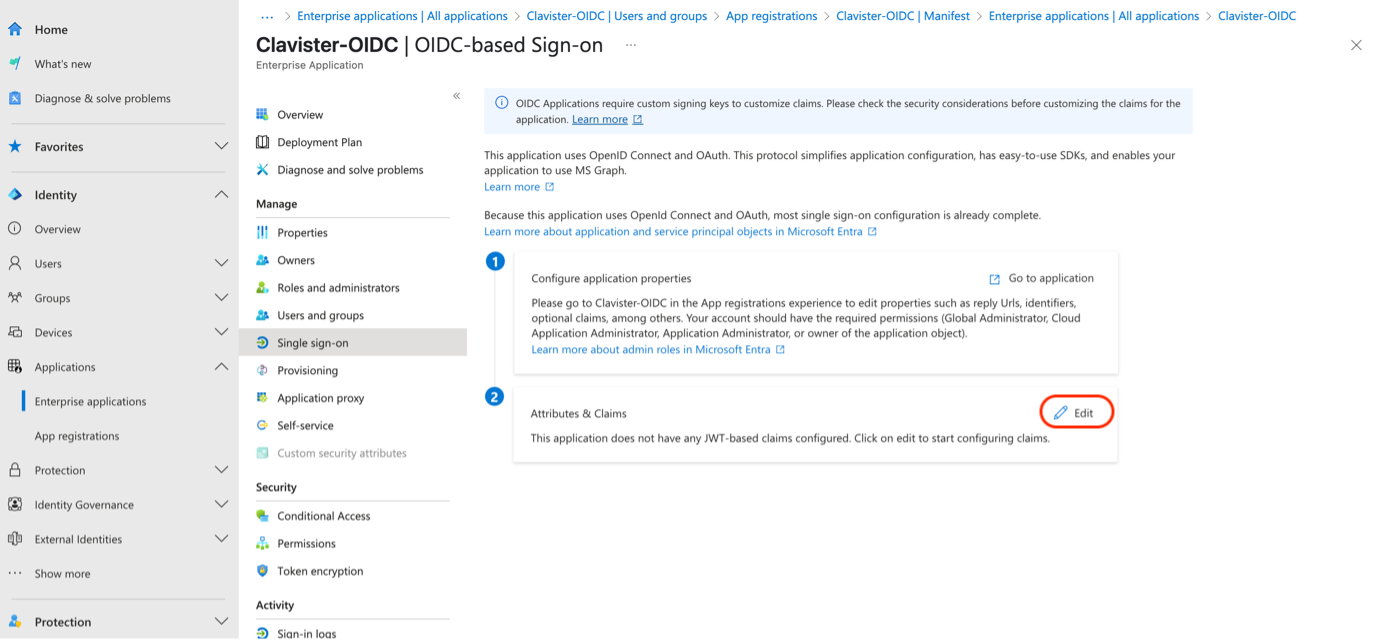
Photo 07.
Name: userprincipalname
Source Attribute:user.userprincipalname (See Photo 08)
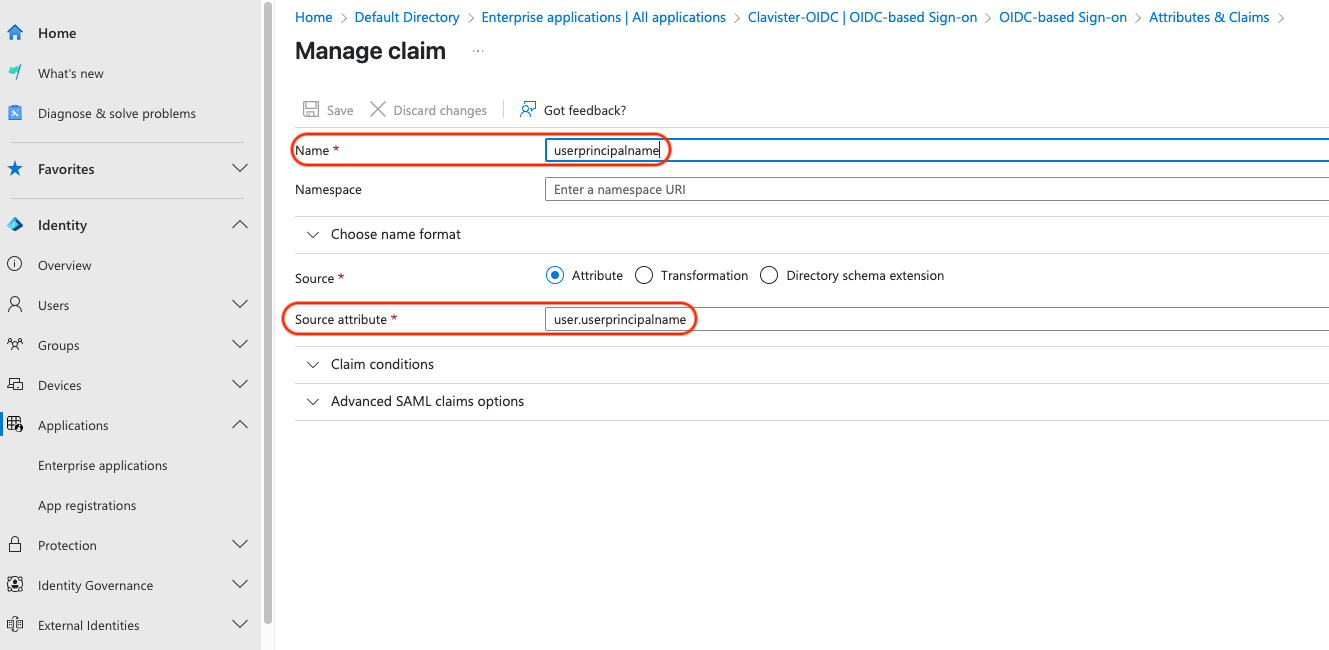
Photo 08.
Configure Clavister NetWall
You’ll find information in Entra that’s needed in NetWall.
OIDC Discovery Endpoint (See Photo 09) = OpenID Connect metadata document (See Endpoints) (See Photo 11)
OIDS Client ID (See Photo 09) = Application (client) ID (See overview page) (See Photo 10)
To see userpriciplename (username) instead of token (numbers and letters), check “Alternative Username Claim:” and what claim to be used, in this case “userprincipalname” (See Photo 09)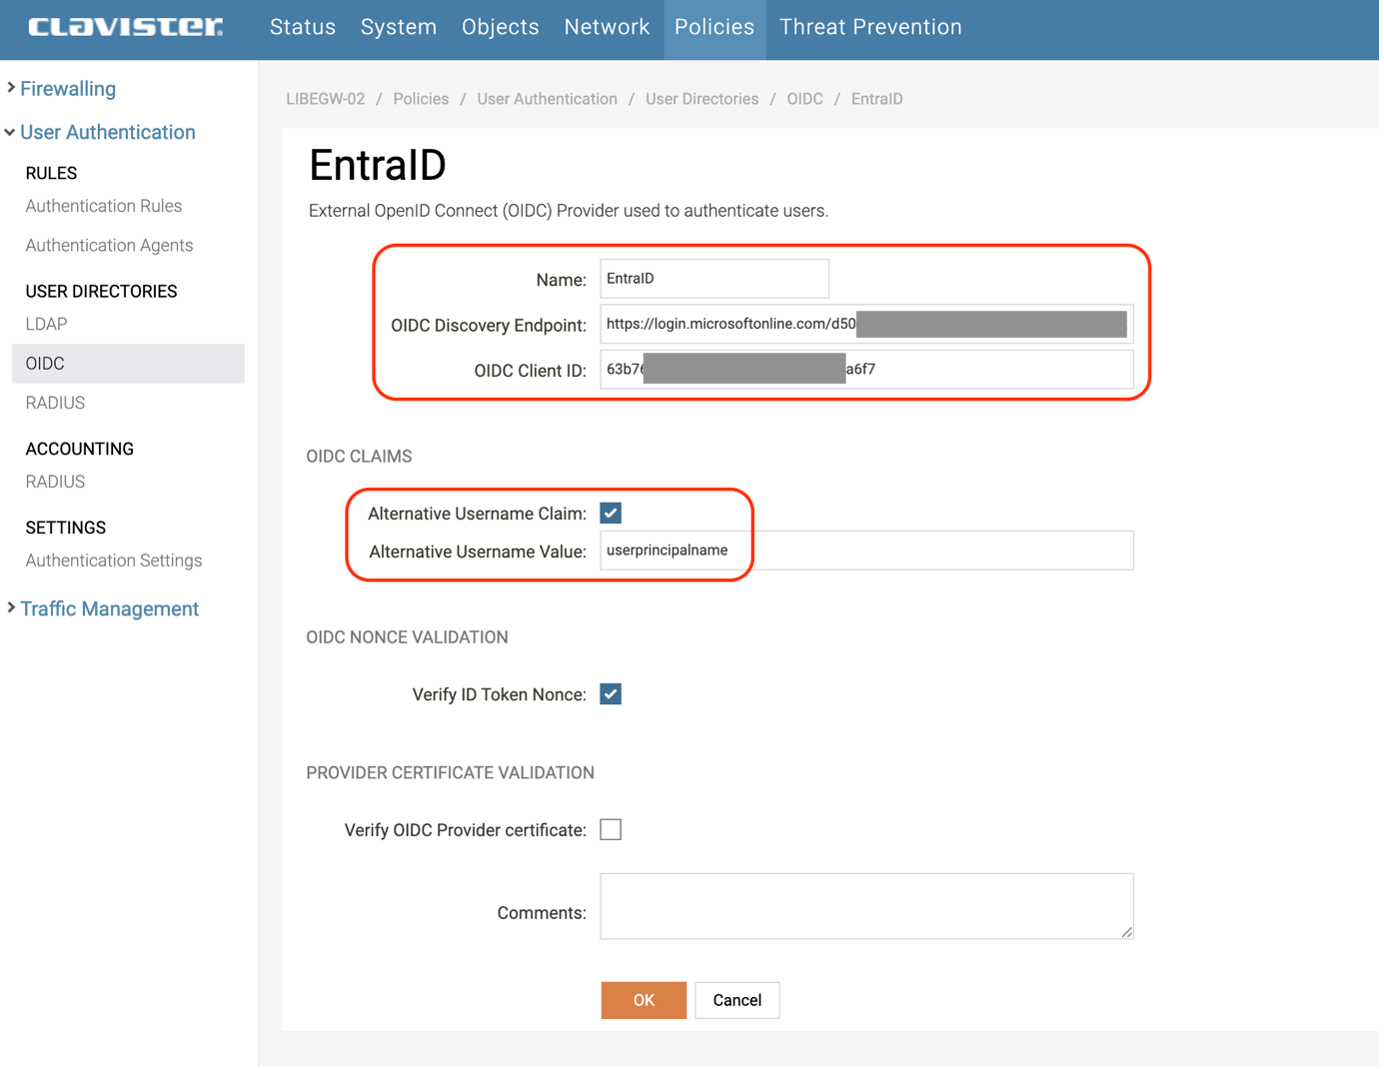
Photo 09.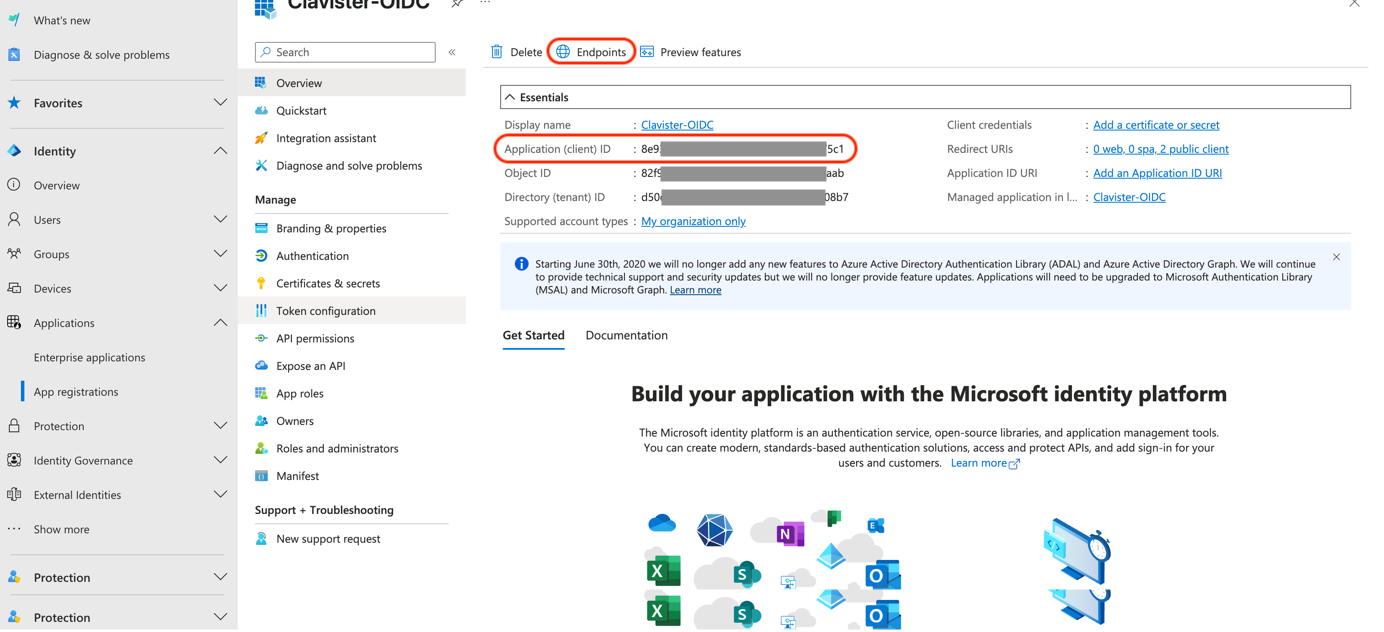
Photo 10.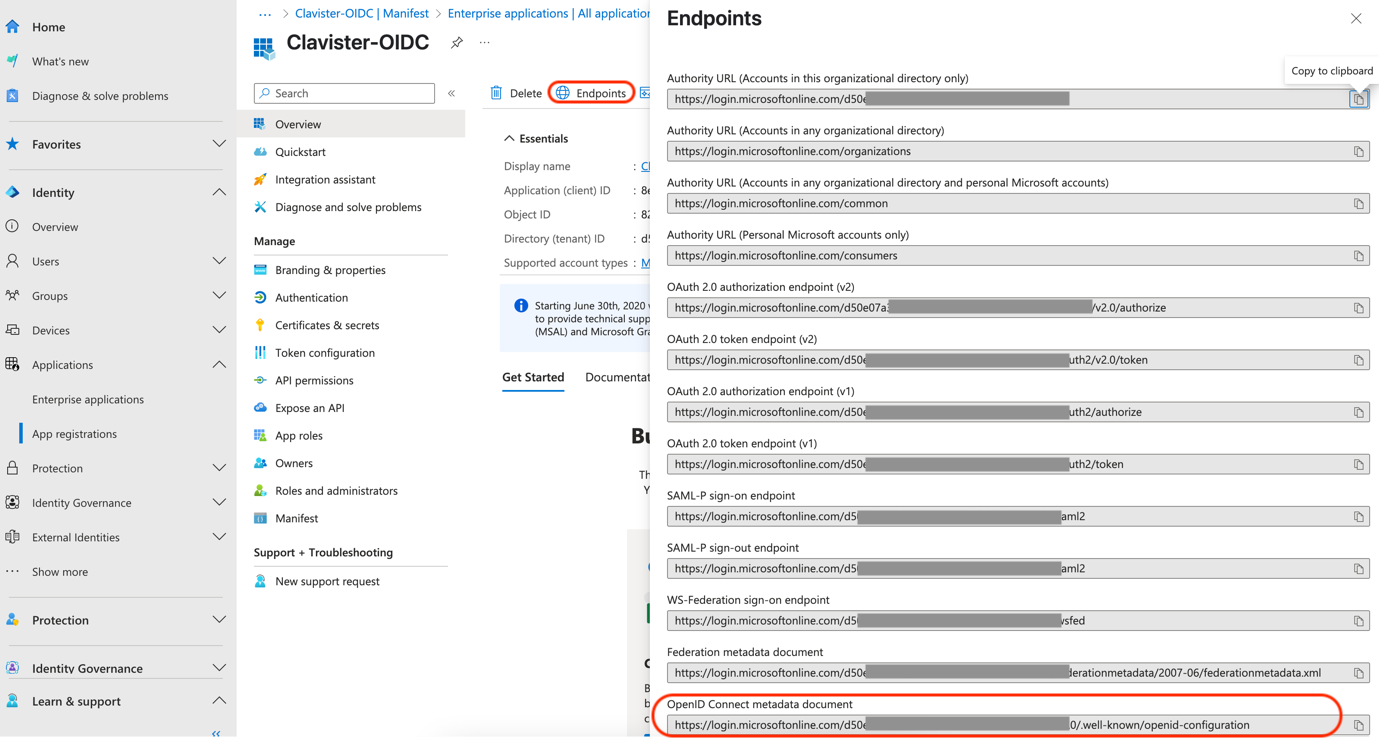
Photo 11.
Configure OneConnect in Clavister NetWall and choose Authentication source OIDC and the name given for the OIDC Provider (See Photo 12)
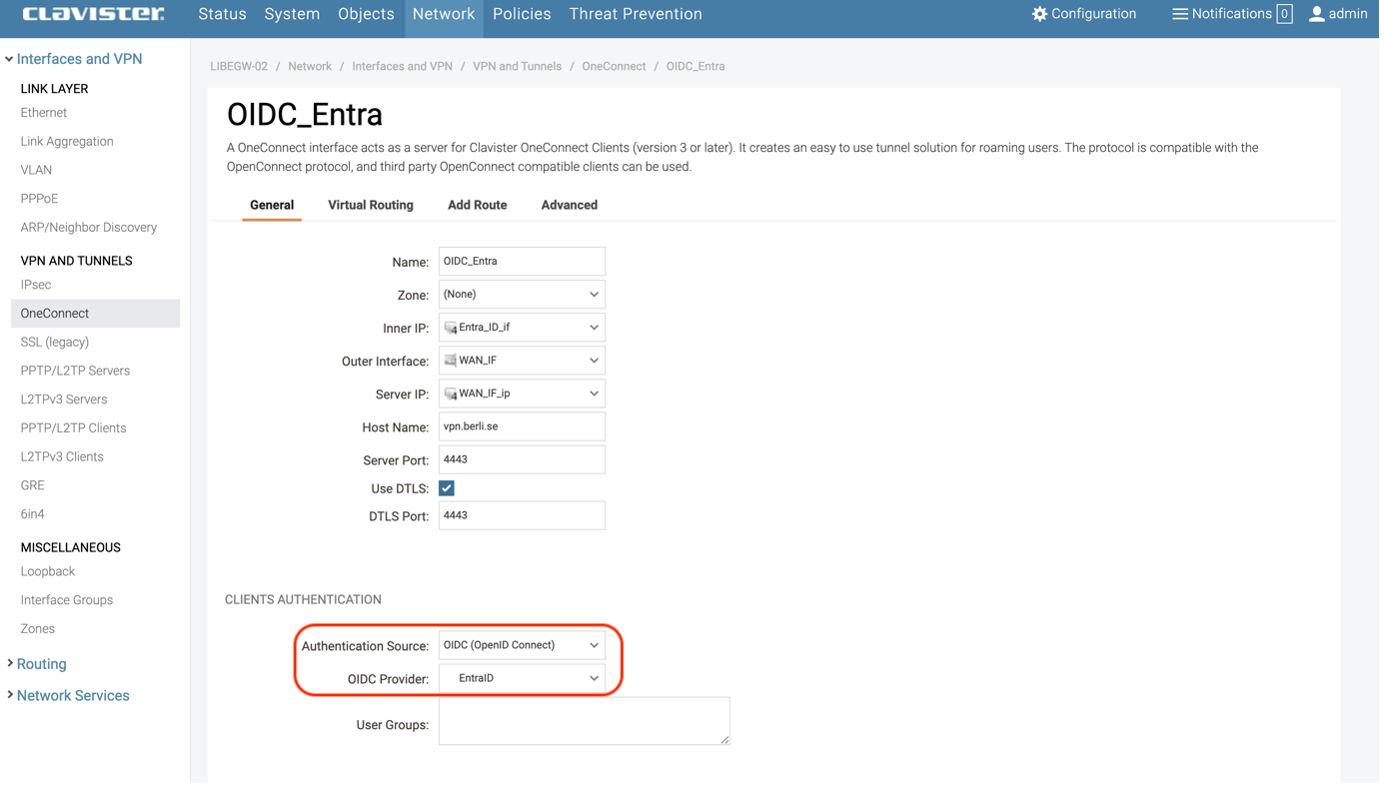
Photo 12.
Retrieve group belongings from Entra
To be able to use groups from Entra in Clavister NetWall, there are some steps at the Entra side that neeed to be configured.
First we need to add the groupe to the application (See Photo 13)
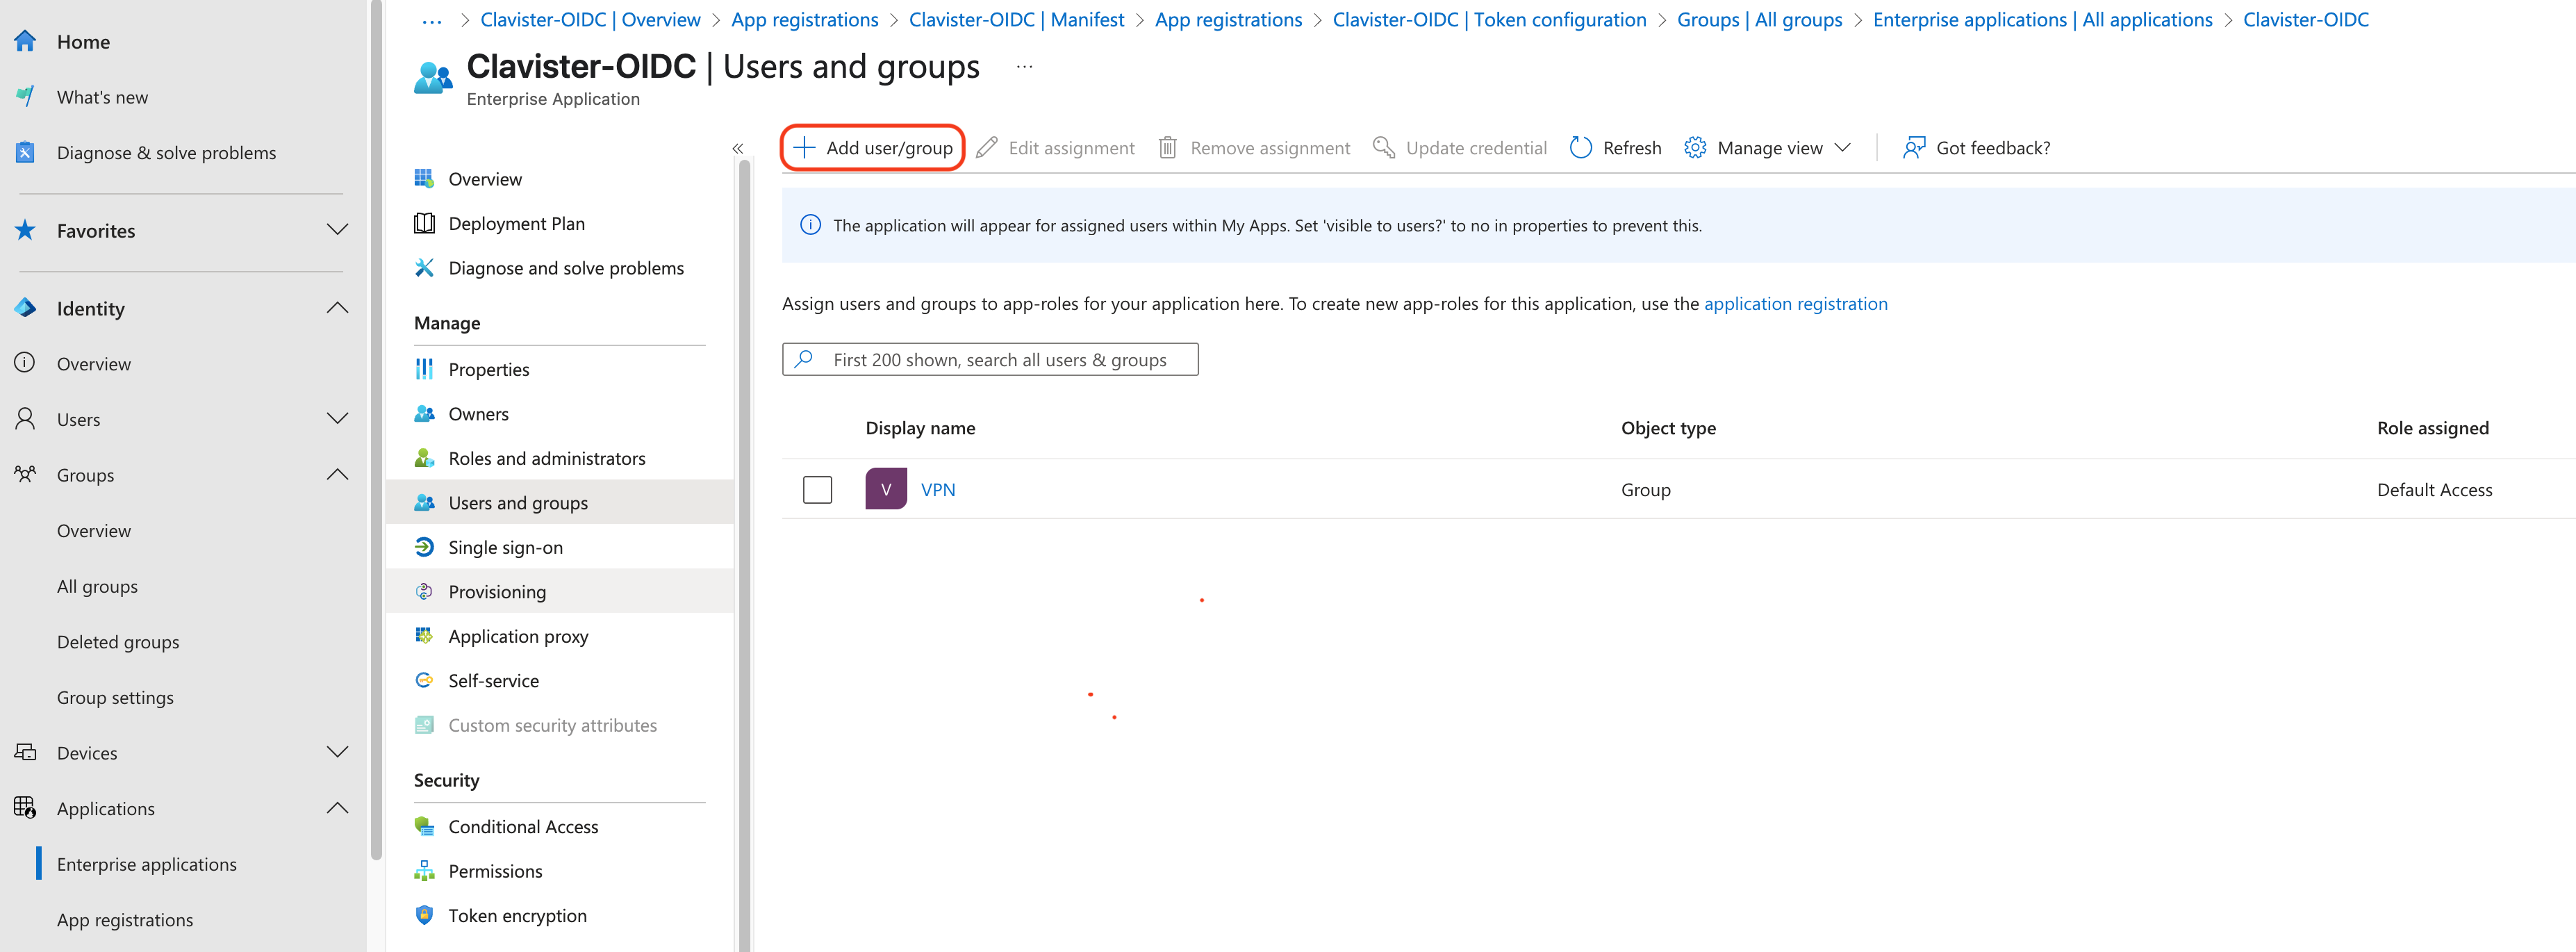
Photo 13.
Configure the claim for the group (see photo 14, 15 and 16)
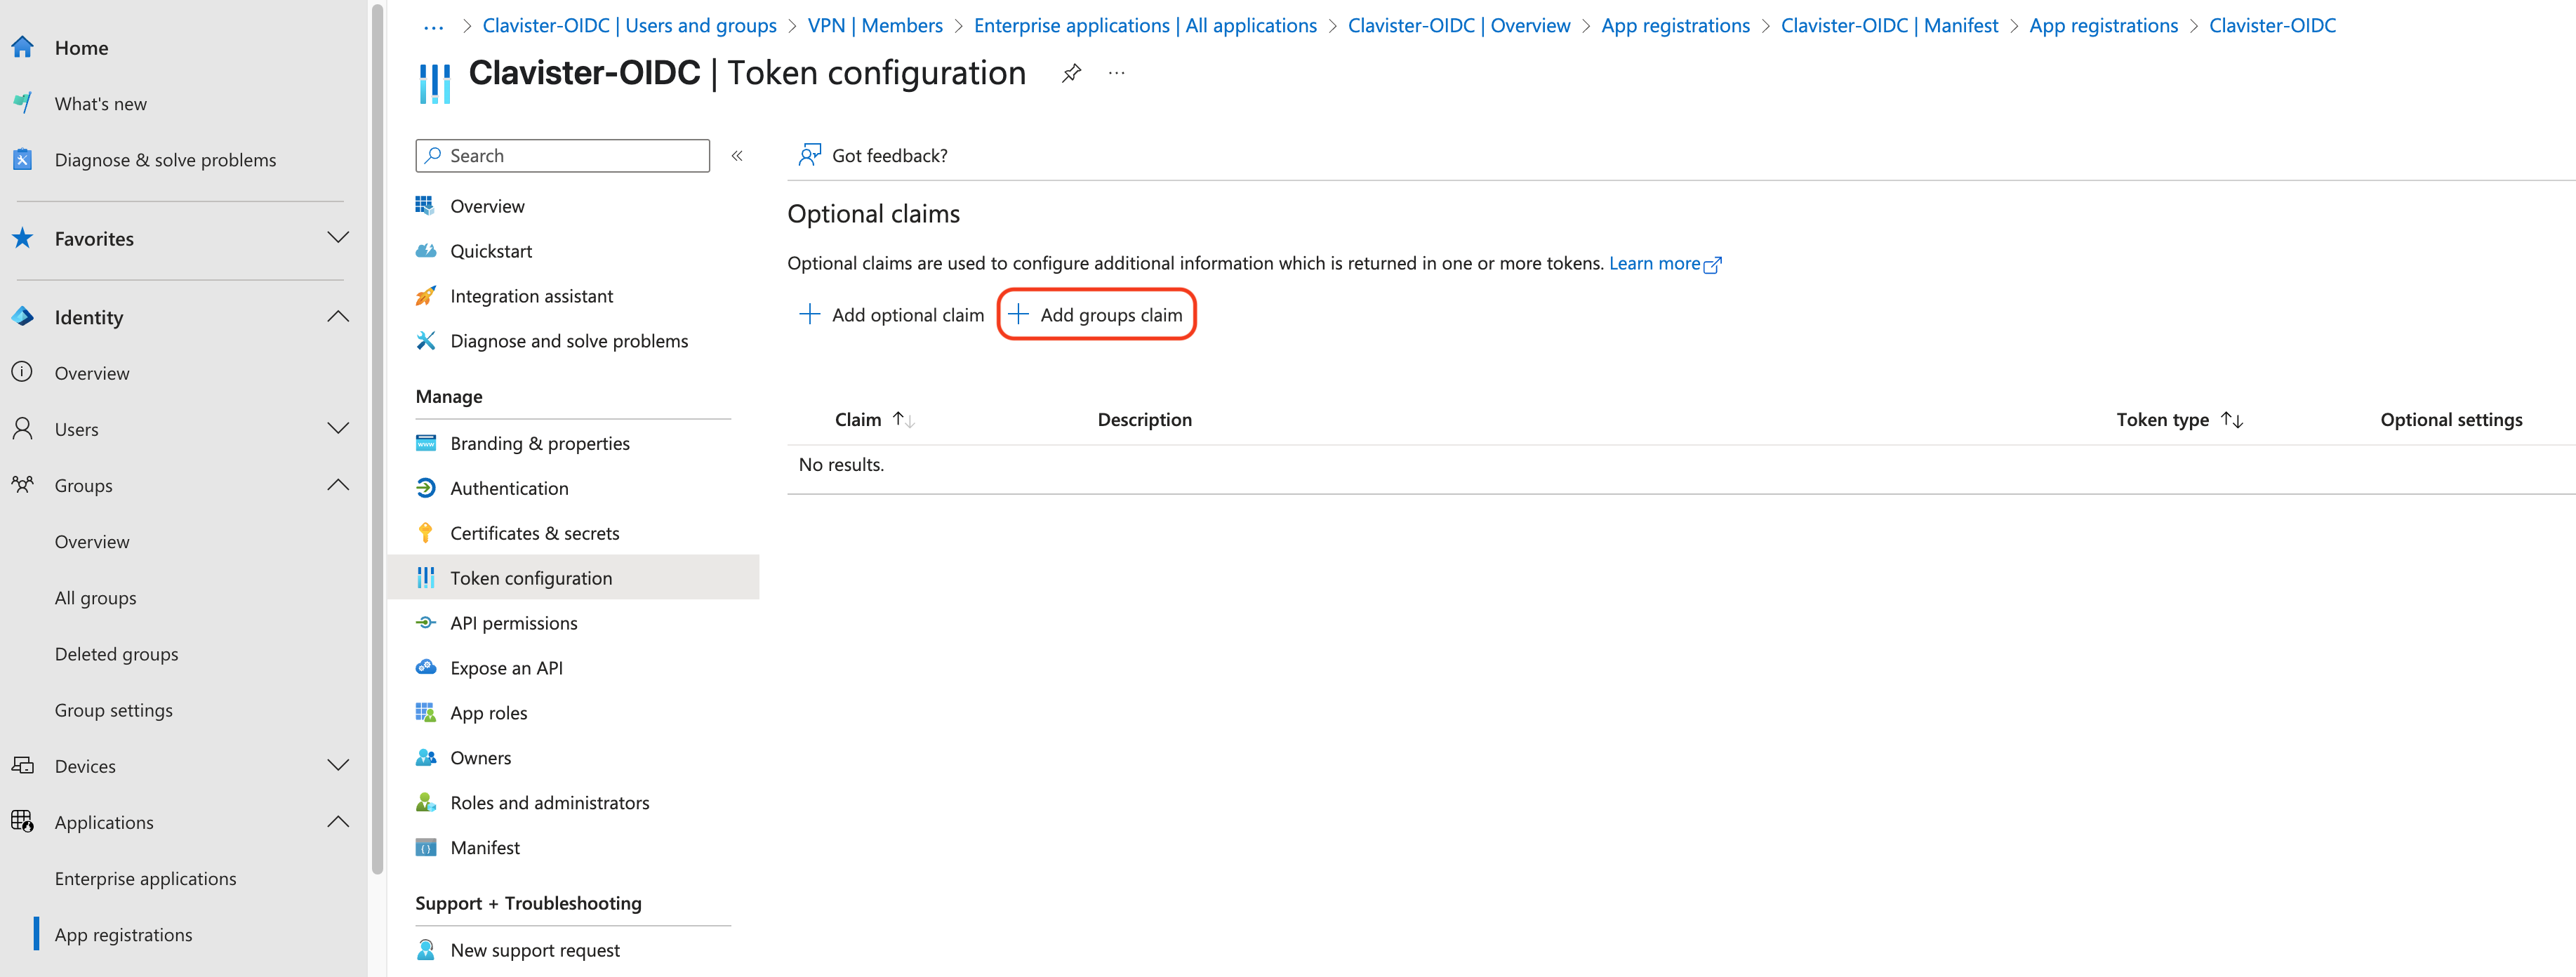
Photo 14.
Photo 15.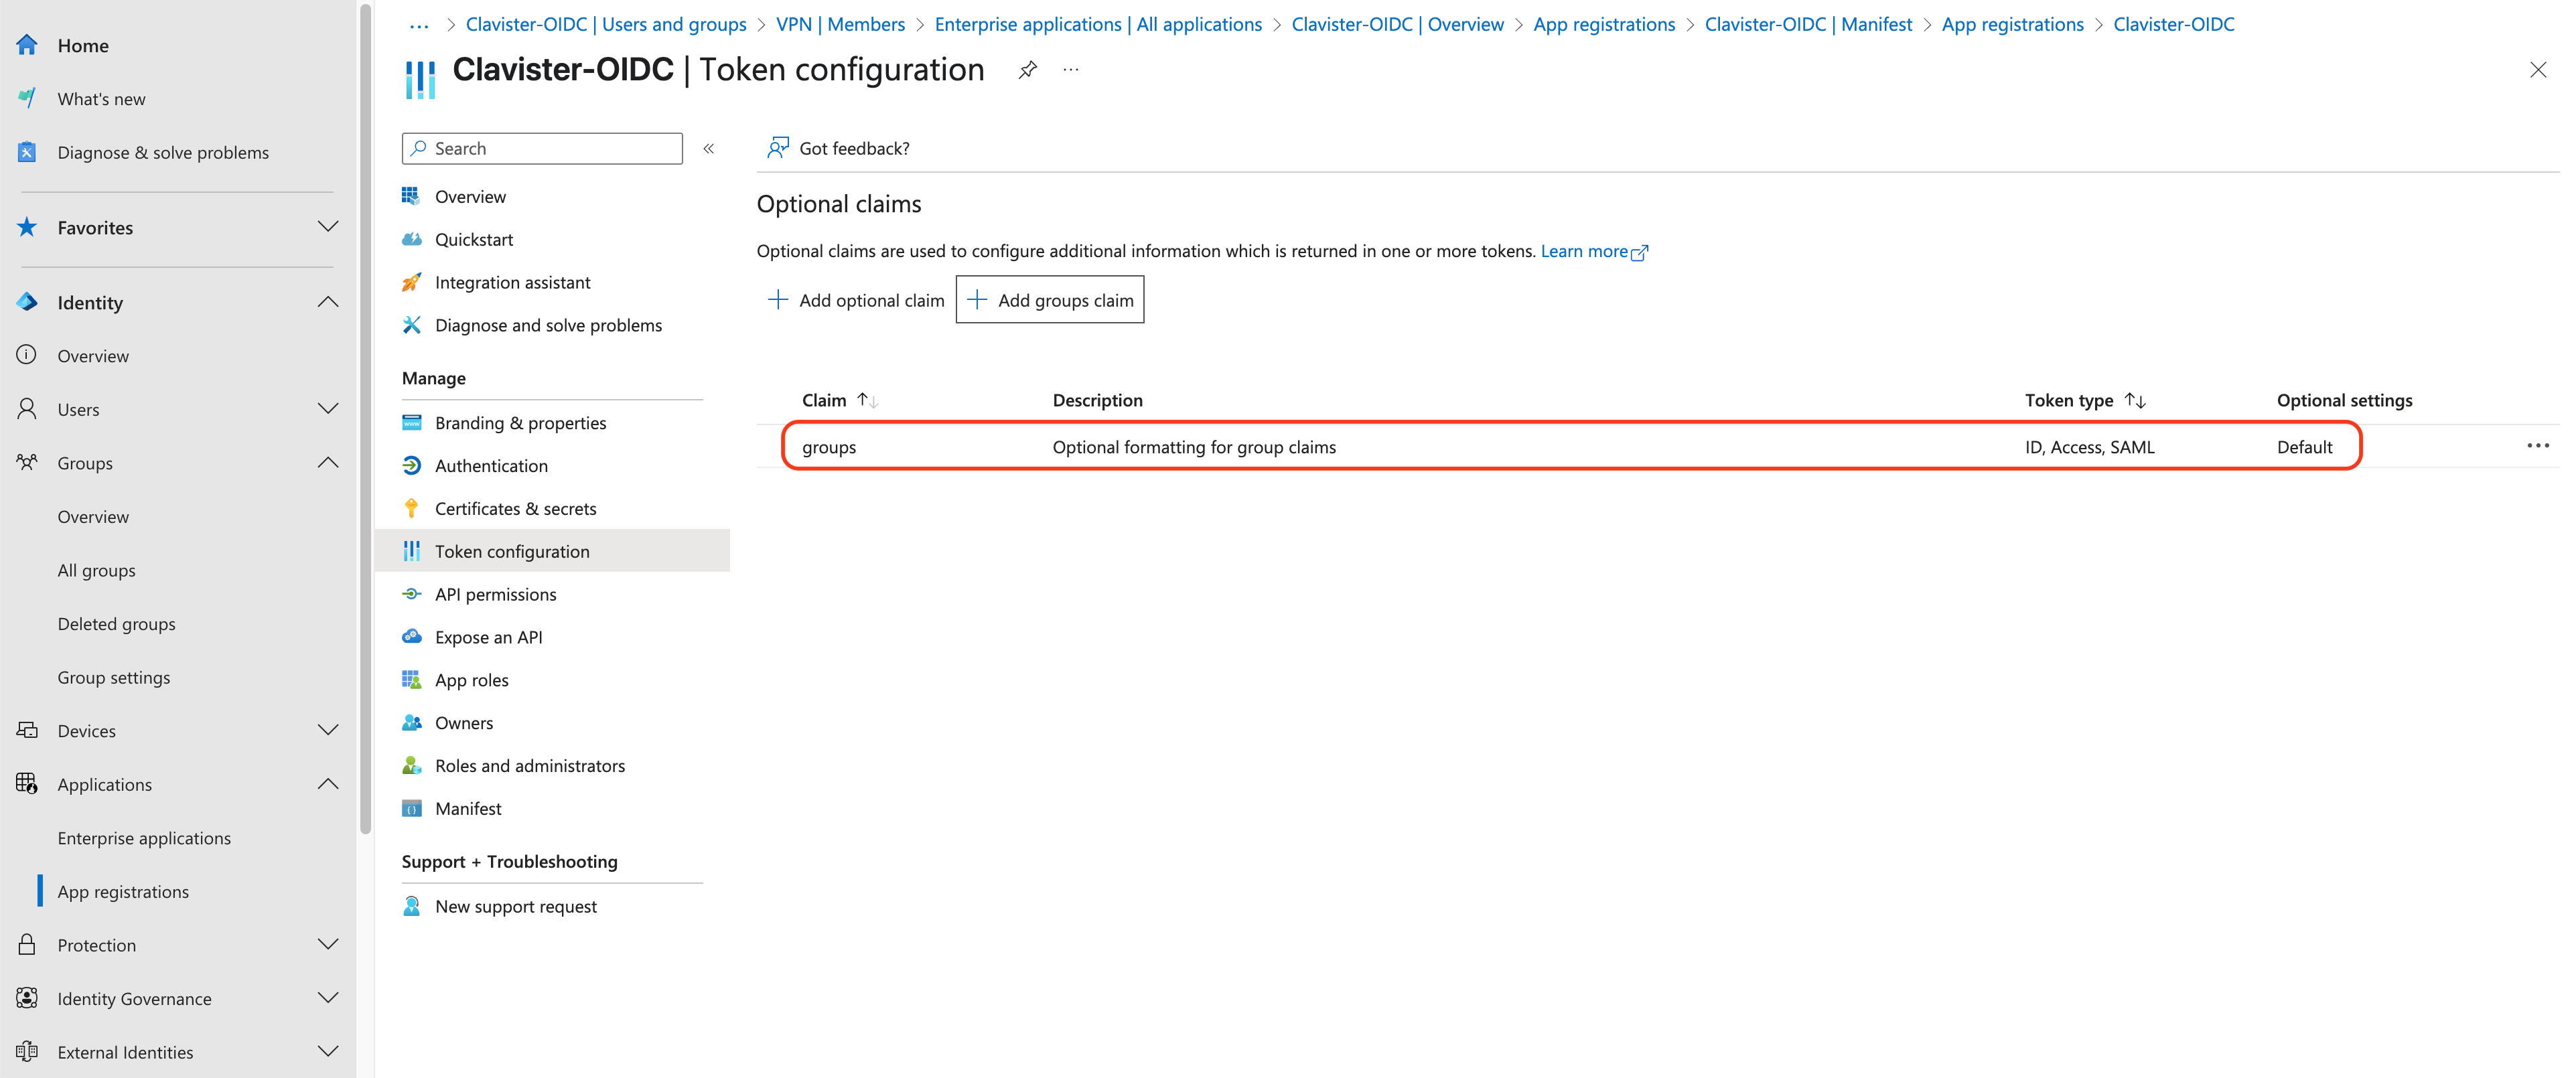
Photo 16.
Next wee need to do some changes to the Manifest. “groupMembershipClaims”: “ApplicationGroup”,(See photo 17)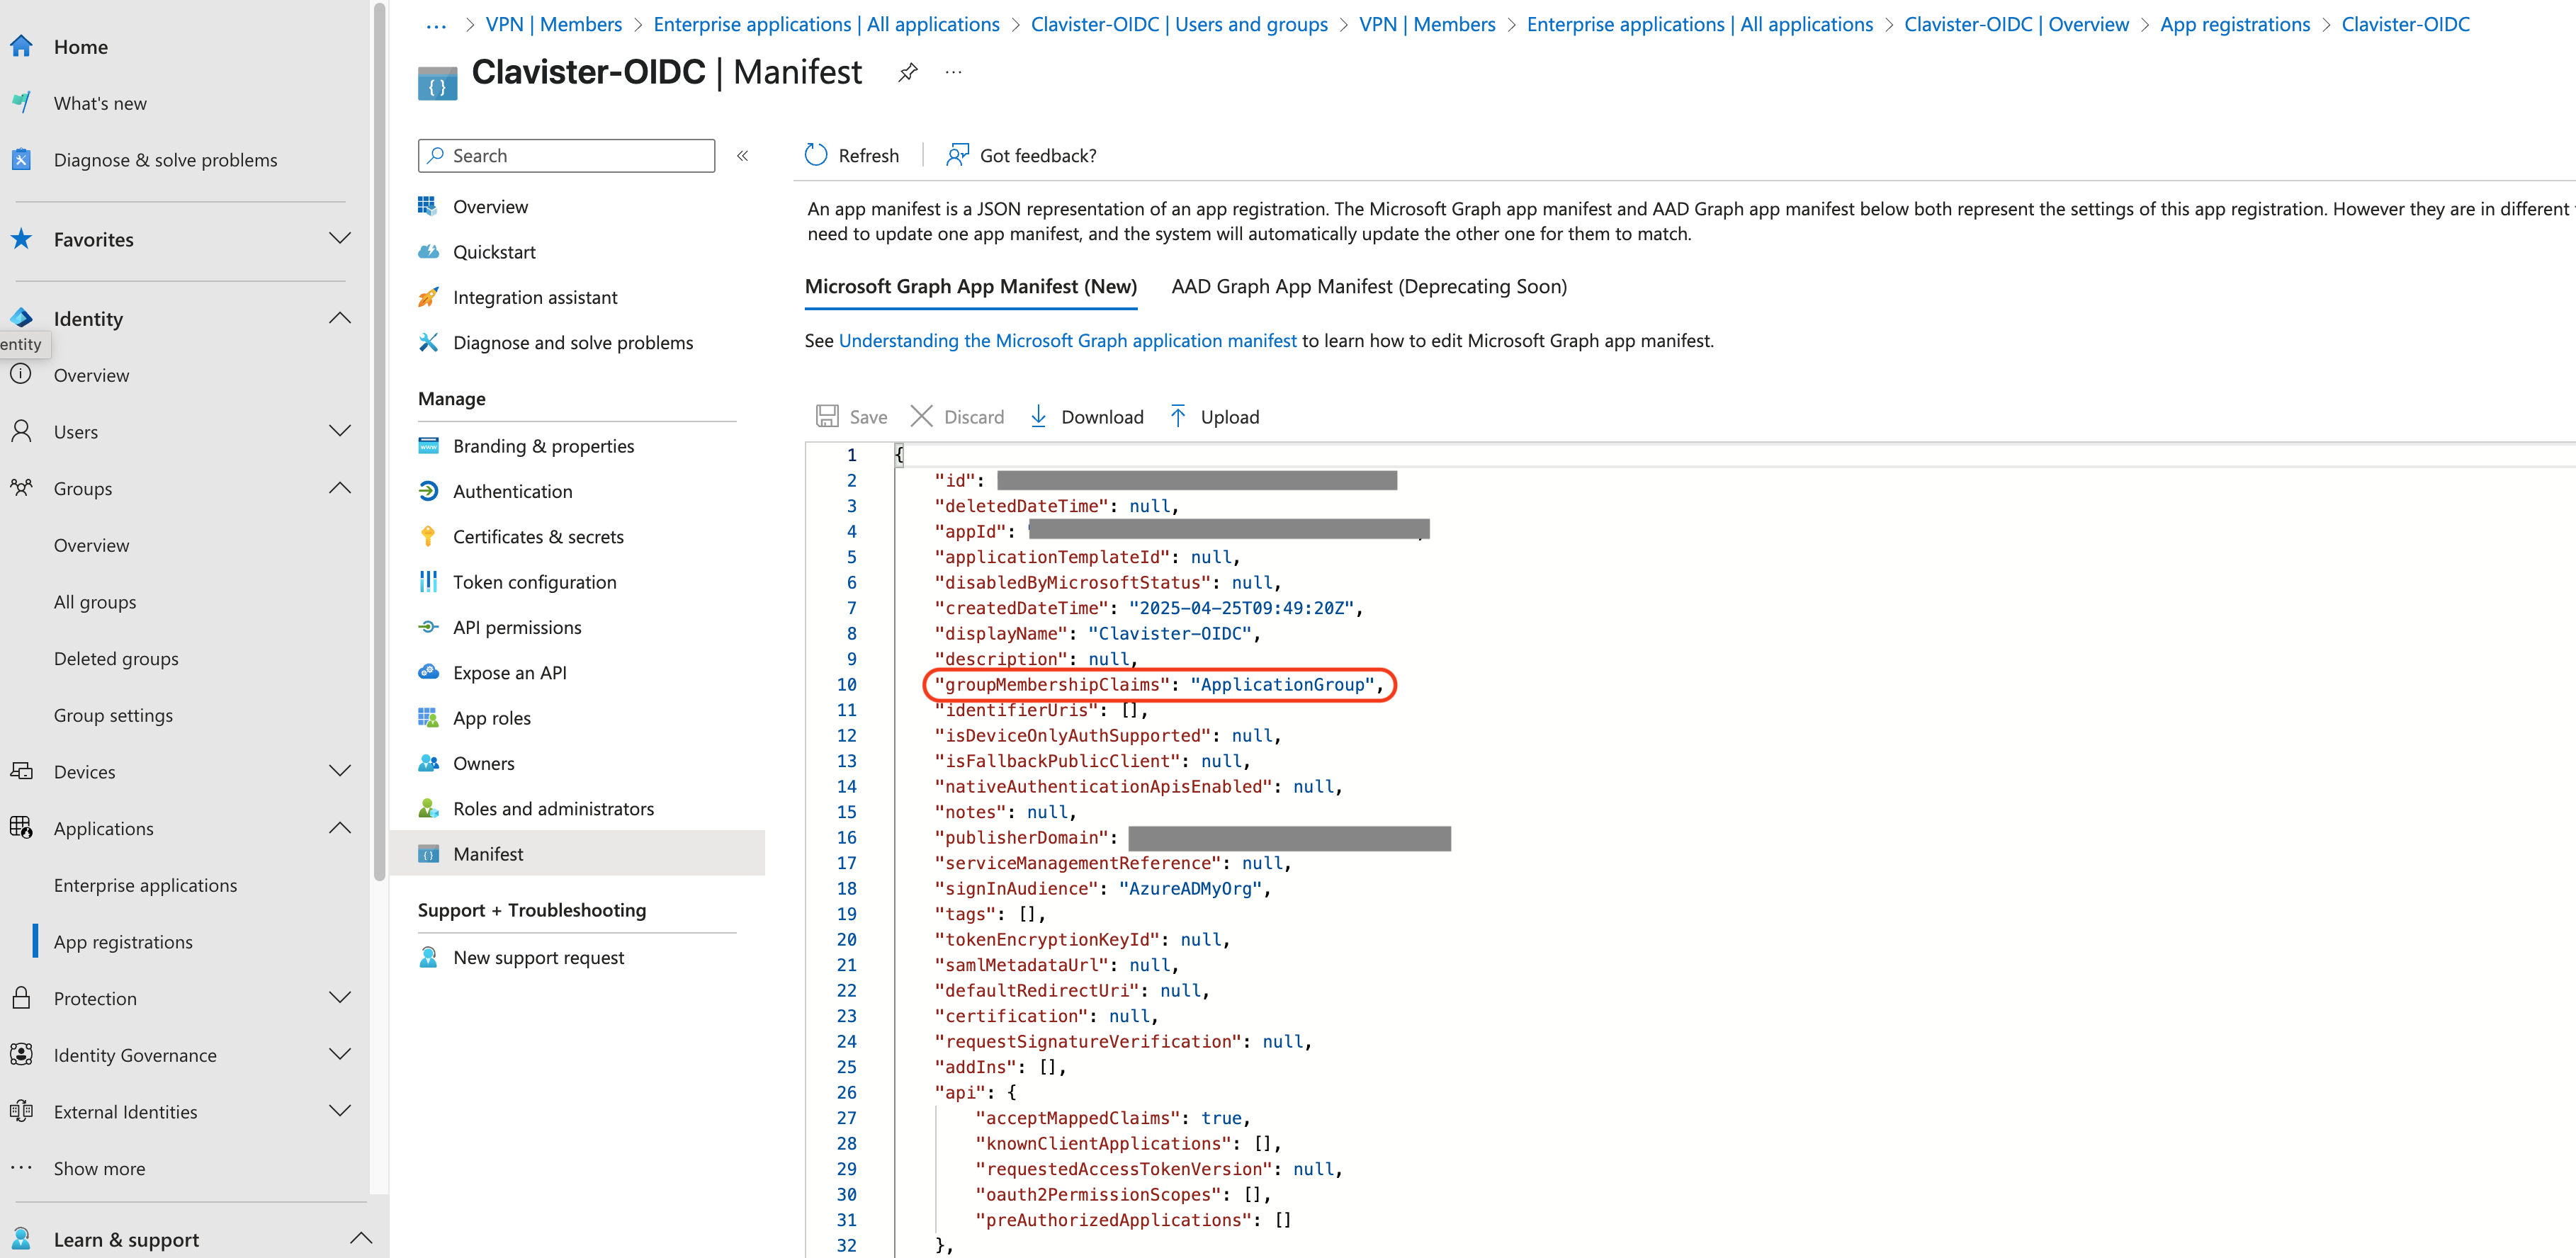
Photo 17.
We also need to change idToken, to “additionalProperties”: [“cloud_displayname”],(See Photo 18)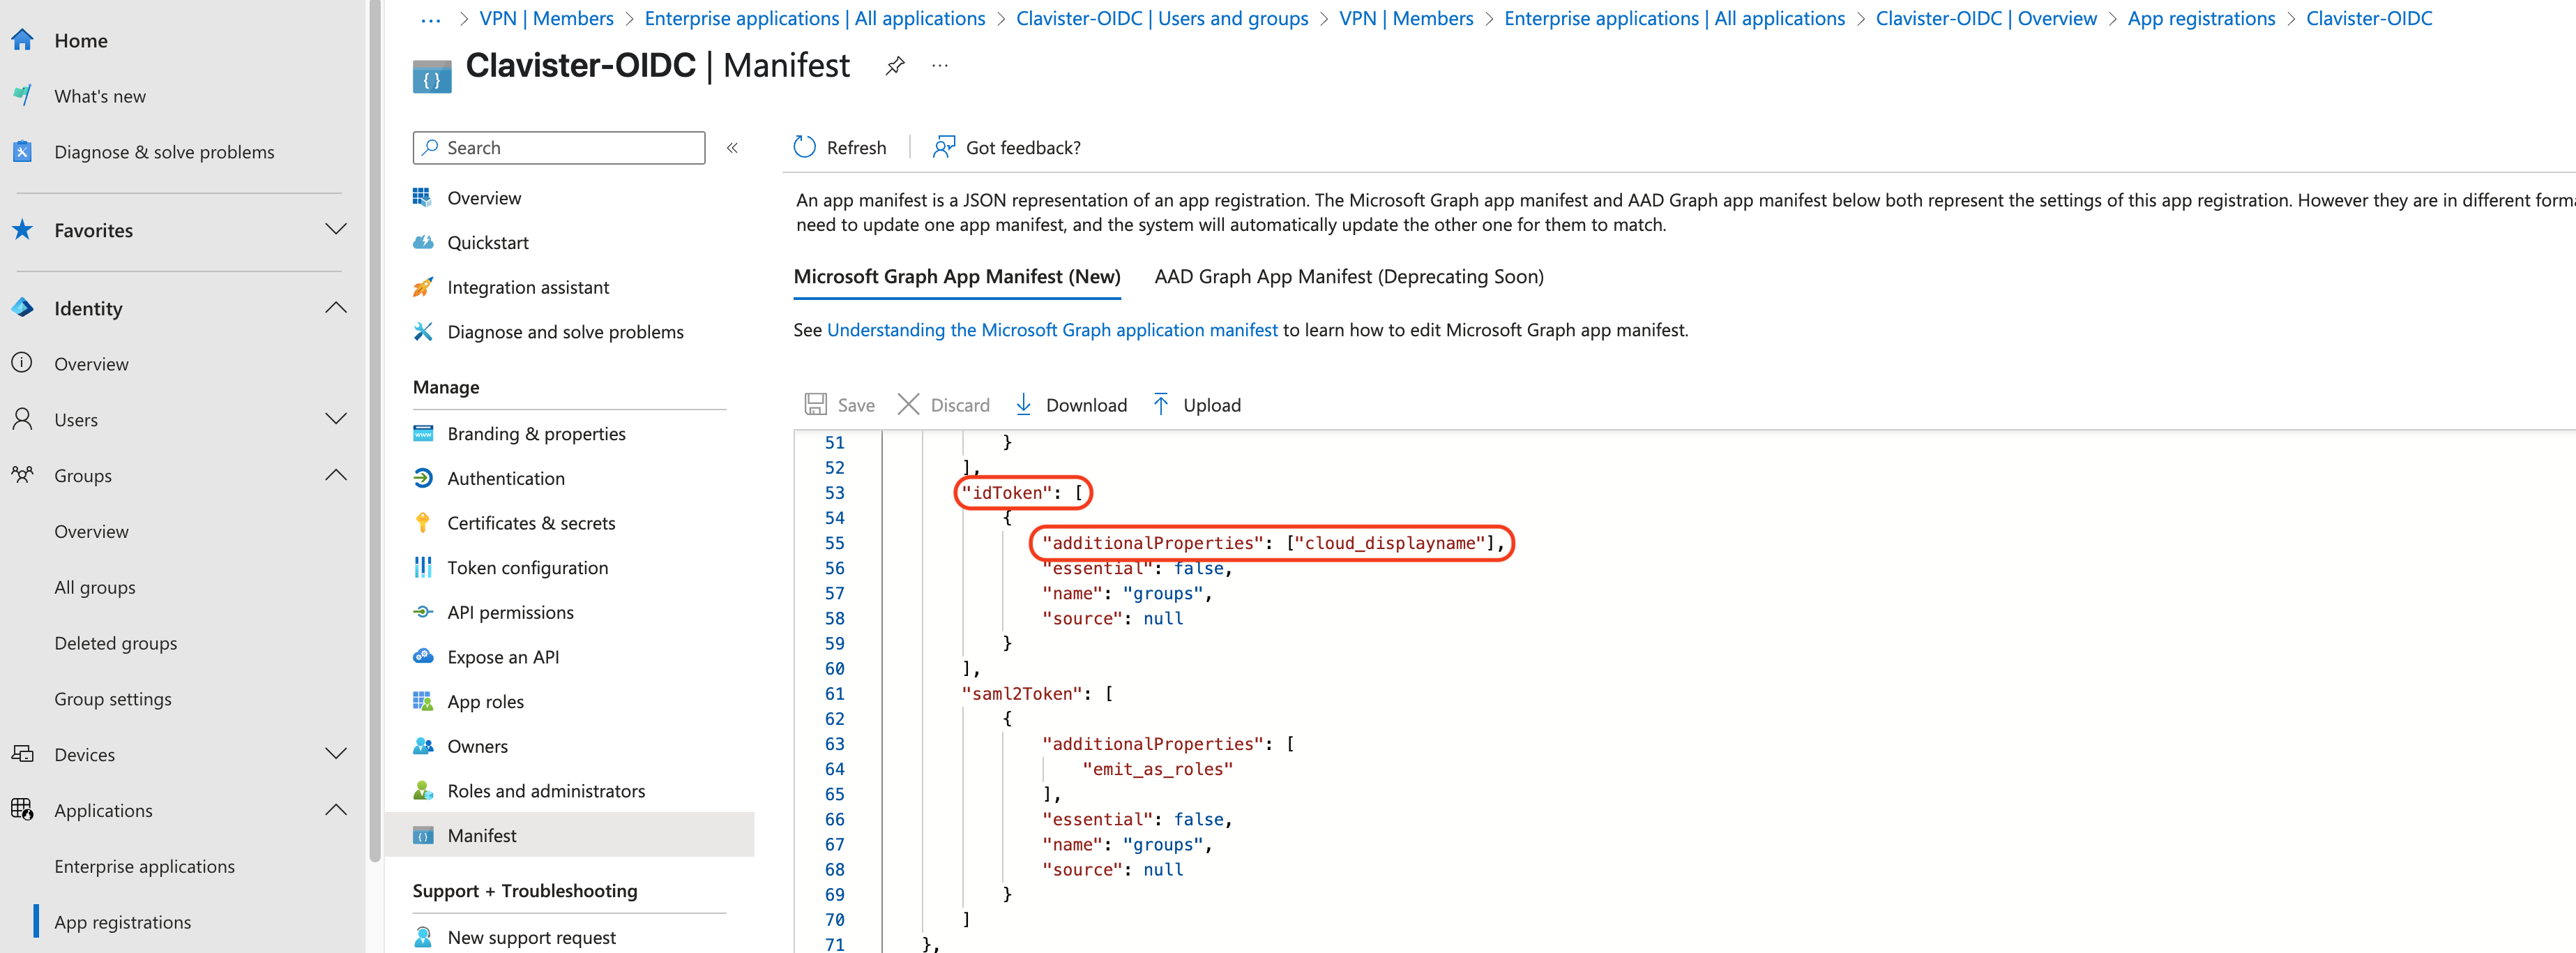
Photo 18.
NetWall will not automatically create groups. To use groups, you will need to manually create them within NetWall. Once the groups are set up, the users from Entra will be mapped to the corresponding groups in NetWall.
The group name must be identical in both systems. For example, if a group is called VPN-dev or VPN-it in Entra, it must have the same name in NetWall. (See photo 19 and 20)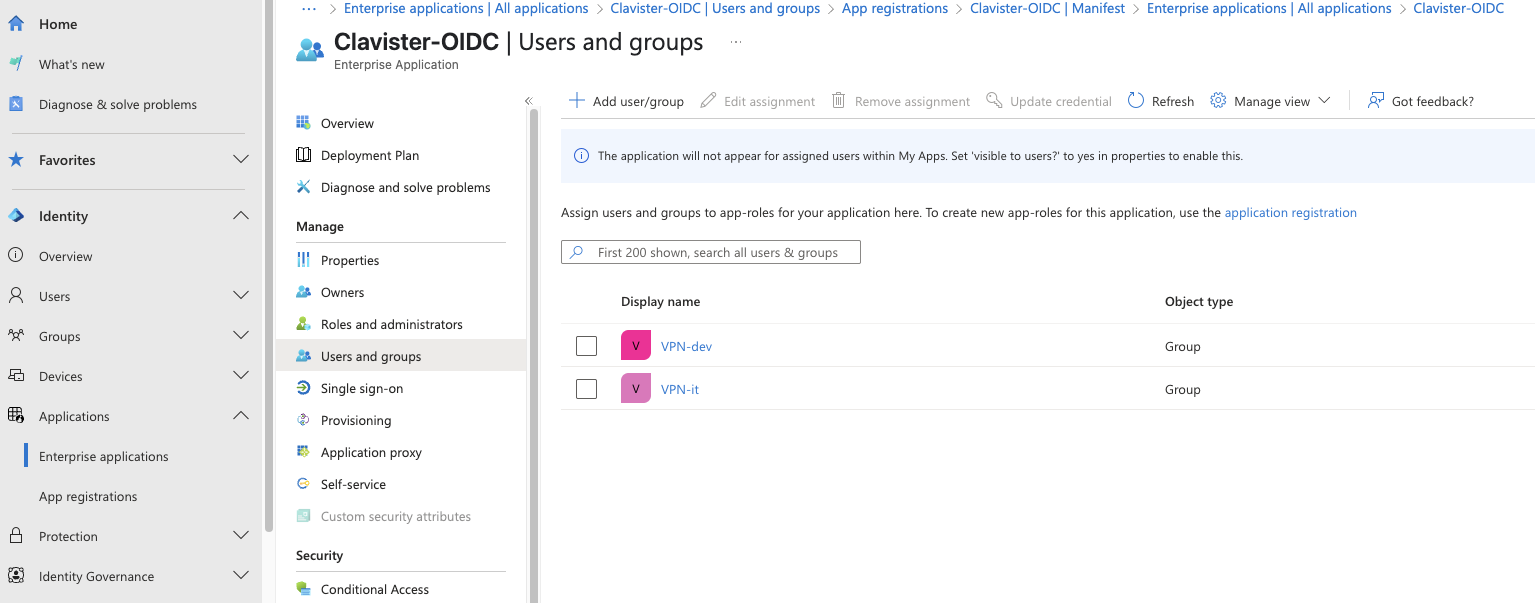
Photo 19
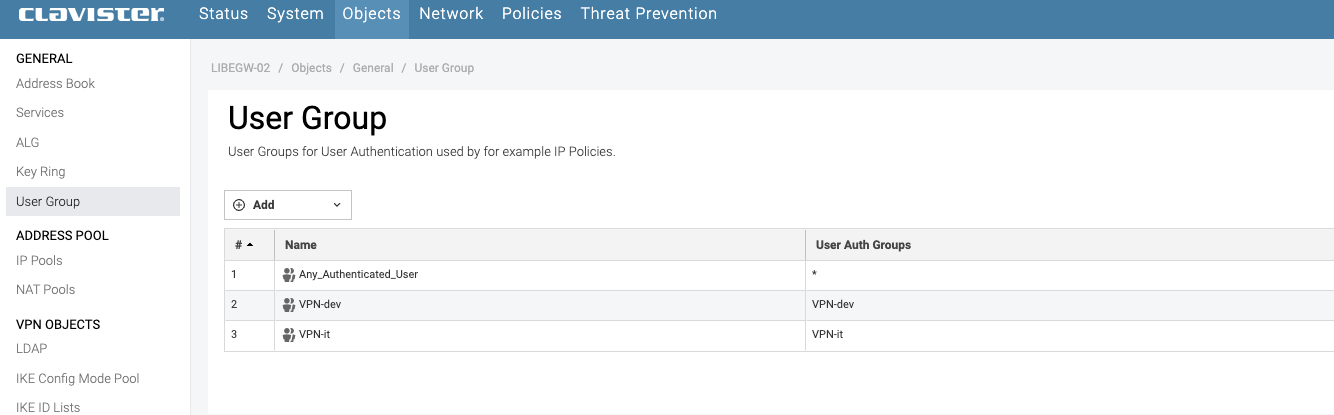
Photo 20
Related articles
26 Jan, 2026 sase cloud oidc
29 Jun, 2026 sase cloud oidc oneconnect core
6 Dec, 2025 sase cloud oidc
4 Nov, 2024 oidc core authentication
8 Feb, 2026 sase oneconnect core userauth oidc