Introduction
Modern, internet-enabled devices continuously check their internet connectivity by sending an HTTP request to a known server. They expect to receive an HTTP status code of 200 OK or 204 No Content if the connection hasaccess to the Internet. If the request instead results in any other status code (such as 203 Redirect) it assumes that the network requires authentication to reach the Internet. These checks are used to force the device to show a login notification or a login dialogue to the user.
We accomplish this by setting up an IP Policy that catches all outbound HTTP traffic for non-authenticated hosts and by defining a Web Filter on that IP Policy that redirects all HTTP traffic (except traffic to the authentication page). Therefore signal that this is a network that requires authentication for access.
This article will go through two ways to accomplish the same result. The first method uses the redirect functionality in the HTTP ALG and the second method uses an IP policy with SAT translation to forward non-authenticated users to the login page. Which method to use will be up to the administrator.
Note: The steps described will be based on the web user interface, but the same thing can be configured using InControl centralized management.
Method 1: Using HTTP ALG Redirect
Creating a local user database
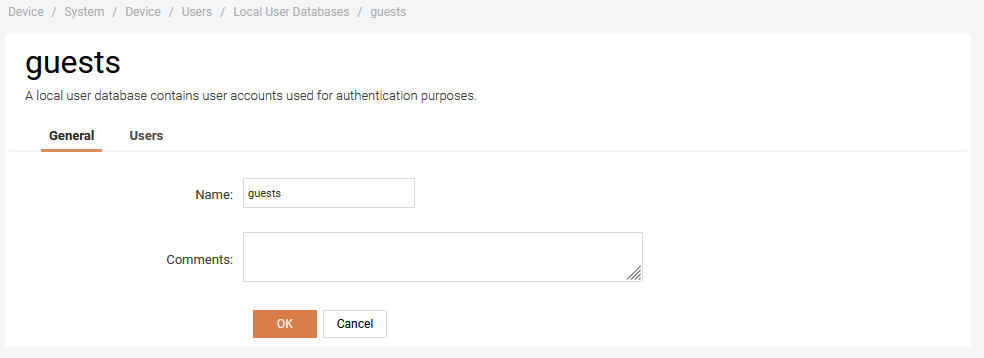
Go to System -> Users -> Local User Databases and create a new user database. Let’s call it guests.
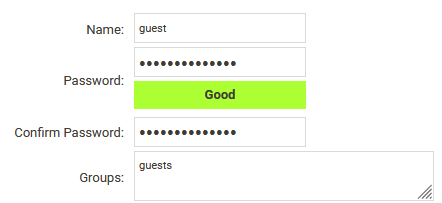
Create a guest user for testing
Create a guest user that we can use for testing.
Configure an Authentication Rule for web-base authentication.
Go to Policies -> User Authentication -> Rules -> Authentication Rules and create a new Authentication Rule.
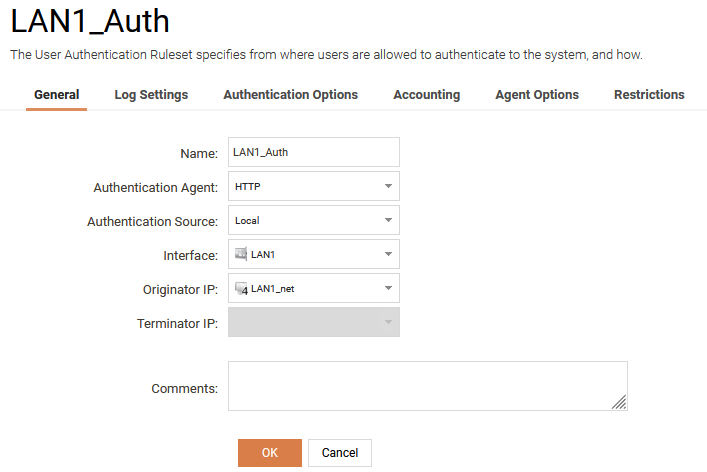
Select HTTP as Authentication Agent, Local as Authentication Source and the correct Interface and Interface network.
Under Authentication Options you need to select guests as Local User DB.
PLEASE NOTE: We are using unencrypted HTTP in this example for simplicity but you should use HTTPS in production with a trusted TLS certificate.
It’s also a good idea to adjust the Idle Timeout and Session Timeout under the Restrictions tab.

Redirect HTTP traffic for unauthorized hosts to the web-based authentication
Create a Web Profile
Go to Policies ->Profiles → Web and create a new Web Profile. Let’s call it RedirectAll.
Edit this new profile and configure the URL Filter to have the following properties:
- Whitelist the gateway IP 192.168.1.1/* .
- Redirect traffic that matches * to the URL: http://102.168.1.1
Make sure that the whitelist filter is positioned first in the list.

Update network objects
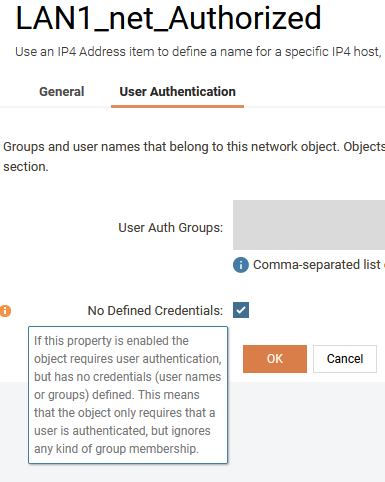
Go to Objects -> General -> Address Book -> Interface Addresses and rename the existing net address to _Authorized and check the No Defined Credentials checkbox under *User Authentication. This will make sure that you existing IP Rules that allow traffic from that interface now requires the host to be authenticated for them to match.
Also create a new network object that does not require authentication. This object is used for IP Policies that should match when the user is not authenticated.
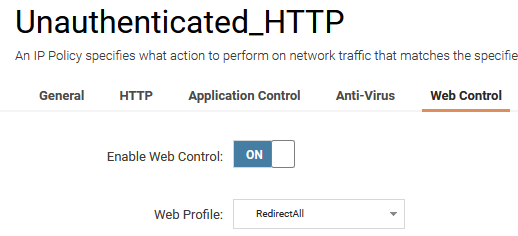
Create a IP Policy that uses the Web Profile.
Go to Policies -> Rules -> Main IP Rules and create a new IP Policy that matches you Source Interface and Source Network and the HTTP Service.
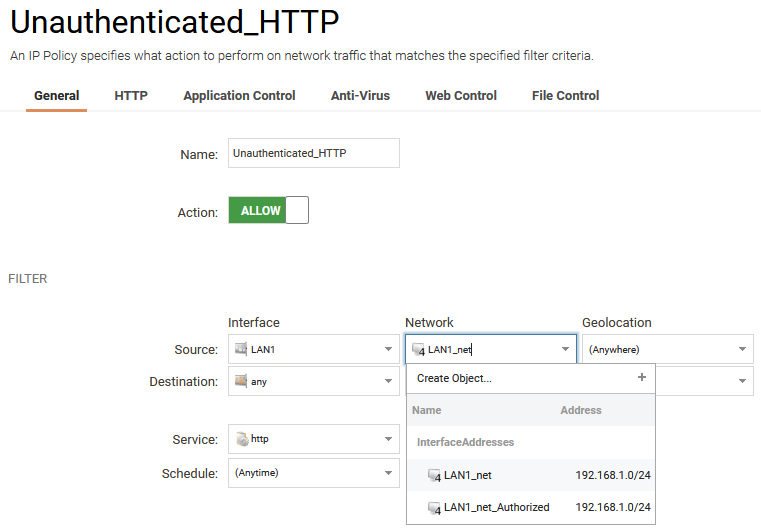
NOTE: Since the network connectivity checks from various operating systems use unencrypted HTTP to perform Captive Portal checks, you should only redirect unencrypted HTTP traffic to the Web Auth page. Trying to block HTTPS will result in SSL/TLS certificate errors!
Enable Web Control and select the RedirectAll profile we created earlier.
This IP Policy MUST be placed after the IP rule set entry that allows the Authorized Src Net (# 5 in the Main IP Rules screenshot below).
Reject ALL other traffic for unauthorized hosts.
Go to Policies -> Rules -> Main IP Rules and create a new IP Policy that matches the Source Interface, Source Network and the all_services Service.
This IP policy MUST be placed after the IP rule set entry that we just created (#6 in the screenshot below).
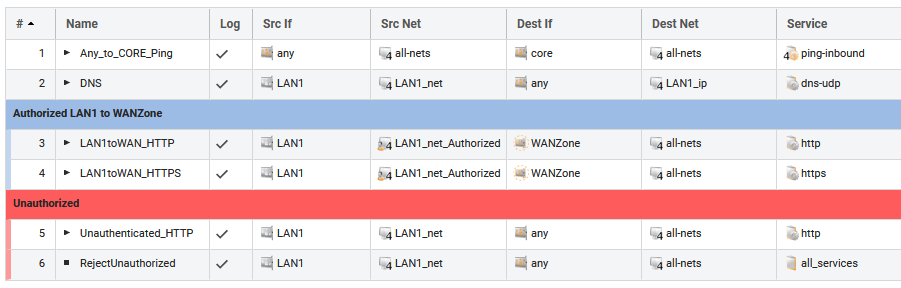
Make sure the IP rule set entries are in the right order.
To make this work correctly the IP Policies that allow traffic from authorized sources MUST be placed BEFORE the ones we created above so that they are evaluated before
Verify that it works
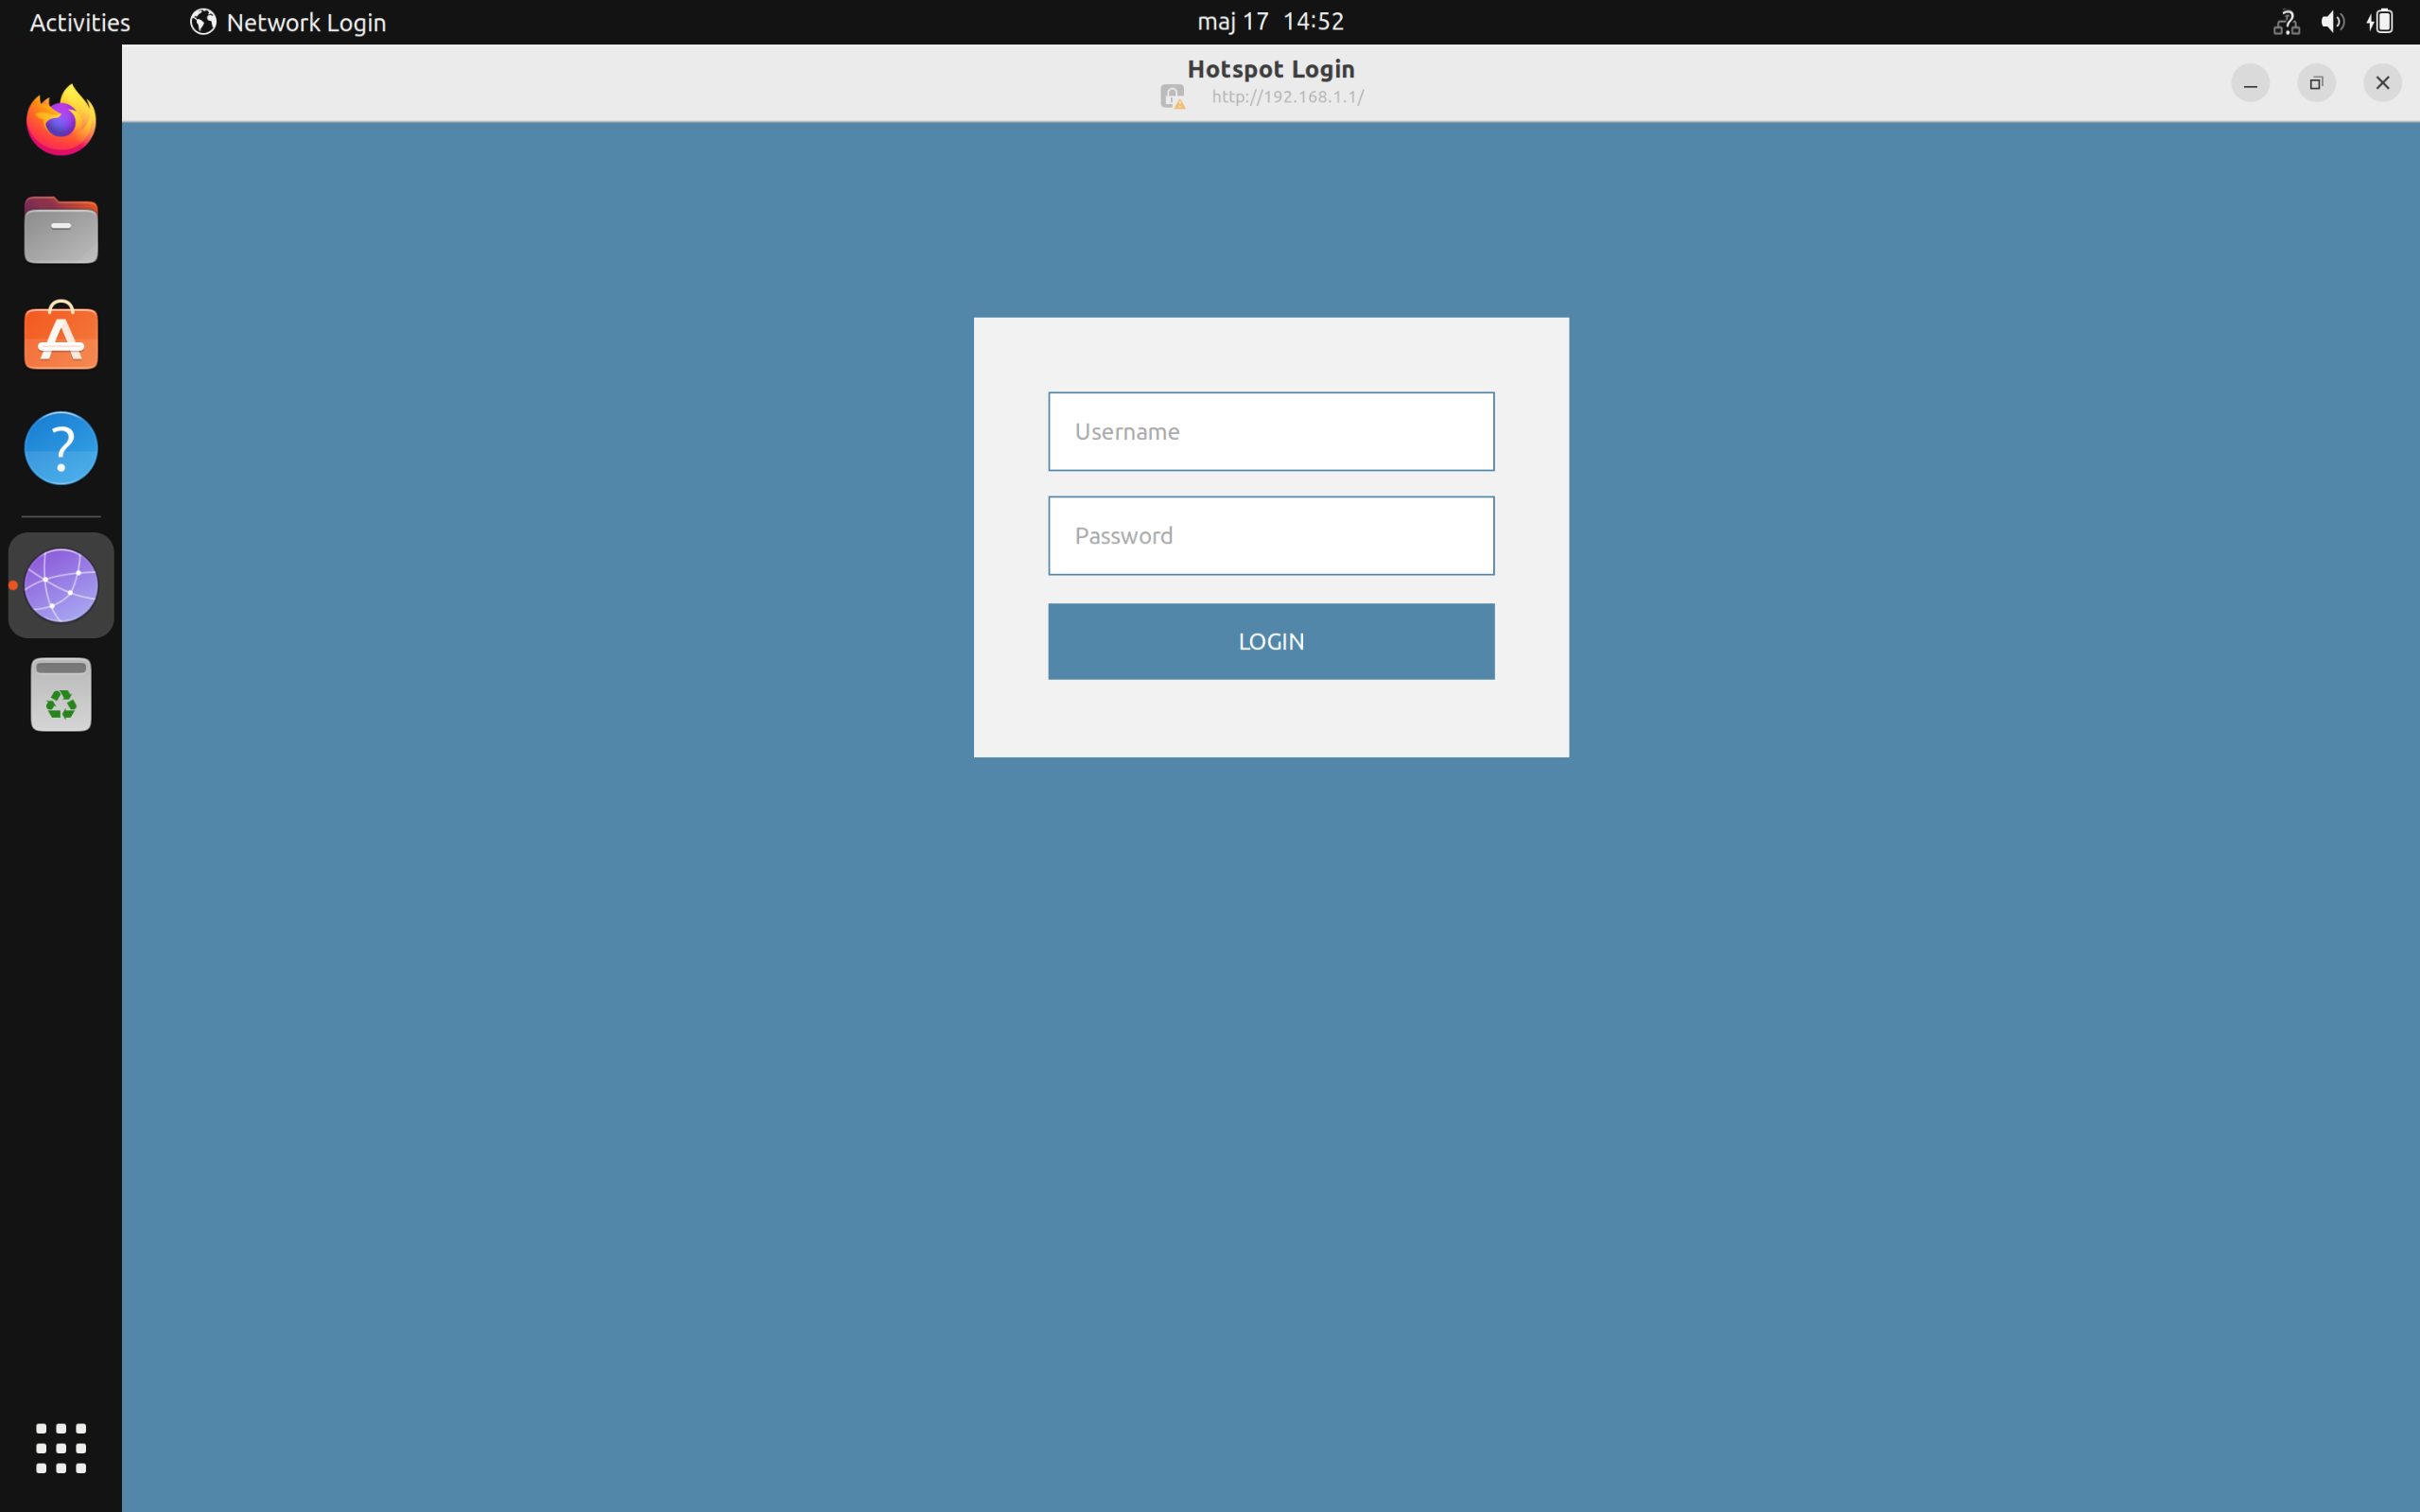
You should now be able to connect to the network and as soon as you connect, the system should detect that it’s not able to reach the Internet and instead open the “Hotspot Login” dialogue, or show a notification that “Network Authentication” is required.
The Ubuntu “Hotspot Login” dialogue is shown below:
For Firefox, the “You must log in” banner is shown below:

Note: The above dialogue may not be visible directly when testing. A browser restart may be needed.
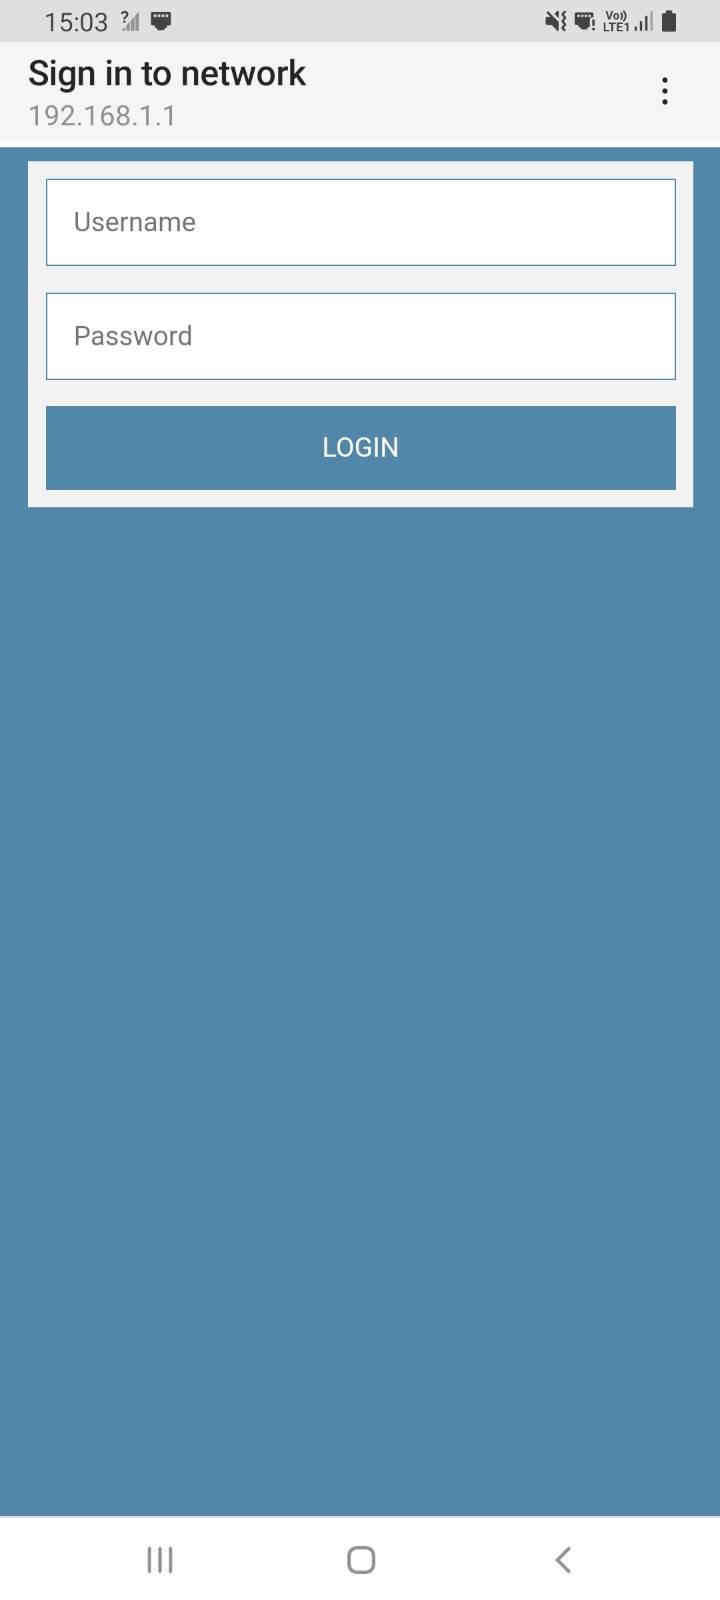
A typical Android “Sign in to network” dialogue is shown below:
Custom Web Pages for authentication
Note: Custom HTTP pages can be used for authentication by enabling custom HTTP Banners on the Authentication Rule.
Method 2: Using IP Policy address translation
For this method we will set up an environment that will grant web access to users that belong to the local user group TrustedUsers, which is defined and populated in the Local User Database, if users are to authenticate themselves as members of that group.
We use User Authentication via HTTP and HTTPS. The user is assumed to not be logged in initially, and tries to open a webpage, say *www.clavister.com * . Depending on the browser, the browser may detect automatically that the user needs to login in order to gain internet access (see the introduction for more details on this). If the browser detects this, it may look as in the below screenshot:

The user will then be redirected to the login page of the firewall if configured as this the below guide.
If the browser does not detect this or does not support it, the user is automatically redirected to the login page and after a successful login, either of these options can happen
- (Default) The user is redirected to the web page s/he was going to in the first place (http://www.clavister.com).
- The user is redirected to a static web page (e.g the company who owns the internet connection)
- The user is redirected to a status page, saying that the login was successful. Then s/he have to re-type the URL of a web page to actually get there.
Configuring User Authentication
Creating a Local User Database
- Create a new User Database and name it UserDB.
- Populate the User Database with a user
- Open the UserDB.
- Add a New User.
- Fill in username (user) and password (clavister).
- Type TrustedUsers in the Groups field.
- HTML Banner files
You can modify the web authentication pages, for example to include the company logotype (as an external image link), but that is not covered here.
You can also change the Redirection behaviour by opening the file "FormLogin.html" and locate the string %REDIRURL% and change it to a:- Static url ( http://www.clavister.com ) to always forward the user to that page after a successful login.
- Empty string ("") to always forward the user to the status page (successful login) after a successful login.
- HTML Banner files
Changing the WebUI from port 80 to port 8080
- System - Remote Management - Advanced Settings - WebUI HTTP Port, set the value to 8080
- Note: Also change the HTTPS port to e.g. 4443 if HTTPS also should be redirected.
Create a User Authentication rule for HTTP
- Go to Policies - User Authentication.
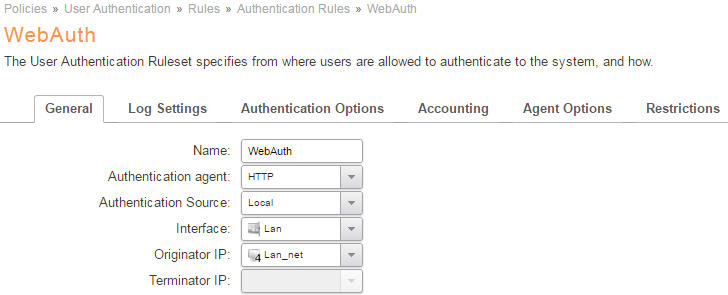
- Add a new Authentication Rule and fill in as follows:
- Name: HTTP_Auth
- Agent: HTTP
- Authentication Source: Local
- Interface: Lan
- Originator IP: lan_net
Authentication Options tab
Select the Local User Database named UserDB that we created earlier.
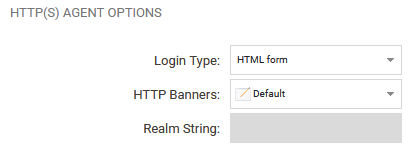
Agent Options tab
Use either the default HTTP Banners, or a set that you have created earlier.
Restrictions tab
Set the values for multiple logins and session timeout that matches your requirements.
HTTPS
For HTTPS, make a copy of the above User Authentication rule and change it to use HTTPS. A Host certificate must selected under the Agent Options tab, this can be the same certificate as used on the firewall for remote management but it can also be something completely different.
Create Address Book Objects
Users triggering the WebAuth mechanism would be located on the LAN interface, having an IP Address in the lan_net range.
We therefore add a new object with the same IP address value but with the additional requirement that the user must be authenticated to match this object:
- Open the Objects - Address Book and copy the existing lan_net object:
WebUI: Right click on lan_net and use Clone, InControl: Use copy & paste. - Modify the object to these parameters:
- Name: lan_net_auth
- Network: 192.168.1.0/24
- Under the User Authentication tab, enter TrustedUsers in the text field.
Creating the needed IP Policies
We need a minimum of four IP rule set entries for this scenario:
IP Rule Set Entry 1:
Action: Allow
Source Interface: Lan
Source Network: Lan_net
Destination Interface: Core
Destination Network: Lan_ip
Service: http-all
Source Address Translation: None
IP Rule Set Entry 2:
Action: Allow
Source Interface: Lan
Source Network: Lan_net_auth
Destination Interface: Wan
Destination Network: all-nets
Service: All-services
Source Address Translation: NAT
IP Rule Set Entry 3:
Action: Allow
Source Interface: Lan
Source Network: Lan_net
Destination Interface: Wan
Destination Network: all-nets
Service: DNS-all
Source Address Translation: Nat
IP Rule Set Entry 4:
Action: Allow
Source Interface: Lan
Source Network: Lan_net
Destination Interface: Wan
Destination Network: all-nets
Service: HTTP & HTTPS
IMPORTANT: Source Address Translation: None
Destination Address Translation: Single IP: Lan_ip
The resulting IP rules set entries are shown below.

IP rule set entries explained:
- Enables users to reach the lan_ip to authenticate logins and logouts. This rule is also needed later when we redirect users from whatever page they are trying to Access to the Web Auth form.
2. Internet Access rule. When a user is authenticated this rule will start to trigger, enabling the user to browse the web etc. lan_net_auth is the Address Book object with User authentication enabled.
3. Enables DNS queries from the client to reach a DNS server. This is needed because if a user tries to open a web page, s/he needs to be able to resolve the IP in order for the web browser to open the corresponding IP address. If you have an internal DNS server, this is of course not required.
4: This address translates all destination IPs users from the lan_net are trying to access, to the lan_ip, where the Web Auth is located.This will rewrite all destination IP’s to a single IP address so they can only reach the Web Auth page.
In Summary: Unless users are authenticated, they will get forwarded to the Login page (or be greeted by the login notification shown at the start of this method guide).
The ordering of the IP Rules is very important as we want the SAT IP Policy to trigger only if the user is not authenticated. When authenticated, IP Rule (2) will trigger.
We are all set now and should be able to test the Default scenario (redirection to the URL the user was going to in the first place).
Save & Activate
Now we are finished, so we can deploy the configuration and make sure there are no error messages.
Testing the login/logout procedure
Login
To successfully test the set-up, the local group “TrustedUsers” must be populated with at least one user. If this guide was followed, the user test can be used to login. The client PC should be connected to the Lan network with an address in the range specified in the lan_net network.
Start the web browser and at this stage the browser may indicate that login is required in order to connect to the internet as shown below.
If not, try connect to any URL, www.clavister.com * for example. We should be presented with a login screen. Enter the Username (user) and the Password (clavister*) and click Submit.
Note: If the certificate used for HTTPS is not trusted by the connecting machine, a certificate warning popup message will appear. This will be expected if self-signed certificates is used.
With the default behaviour, the user is forwarded to the URL entered before the login page interfered.
Logout
In order to logout manually, the user needs to go to the http://<lan_ip>/logout page (or HTTPS). This can be done in a variety of ways, the simplest being a shortcut (or favourite or bookmark, depending on your terminology) to this URL, or a link on your intranet.
It is also possible to go to the http://<lan_ip> URL and click on the log out link.
<lan_ip> must of course be replaced by the actual IP address of the Lan interface.
When successful, a message will appear that the user is Logged out. Surfing to any URL will redirect to the login page again.
Troubleshooting
In case the test was not successful, check the following:
- Verify that access to TCP port 80 or 443 is allowed and that the correct service is selected.
- Make sure that the source port selected on the service is 0-65536, only the destination port should be 80 and 443.
- Verify that the network the user is connecting from is correctly configured on the IP policies.
- Verify that the correct privilege information TrustedUsers is defined in both the local user database, and in the source network object (look at the icon, it should look different for objects with UserAuth user or groups added to them).
- Does the rule trigger? Check the logs to see what happens to the traffic, do we get any logs at all about the connection attempt?
Related articles
11 Apr, 2023 ldap core authentication radius
4 Nov, 2024 oidc core authentication
6 Apr, 2023 core radius authentication
21 Nov, 2022 radius ldap authentication core