This guide describe how to enroll your InCenter cloud user to Clavister Cloud Services. The guide assumes your Clavister cloud service instance is already provisioned.
Enrolling to the service
Follow the enrollment invitation email instructions sent by Clavister cloud service “<noreply@sase.eu>” by clicking on “Enroll” link:

You shall get redirected to the enrollment endpoint under you Clavister cloud service:
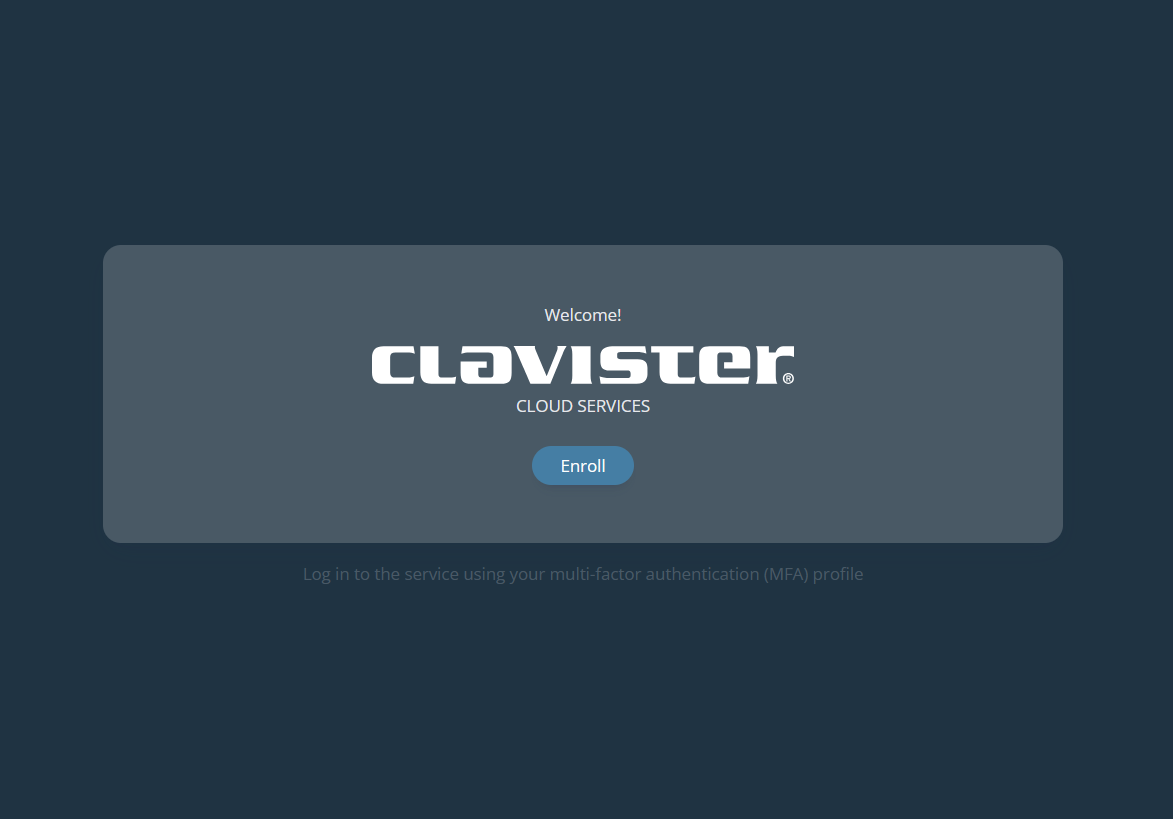
click on “Enroll”.
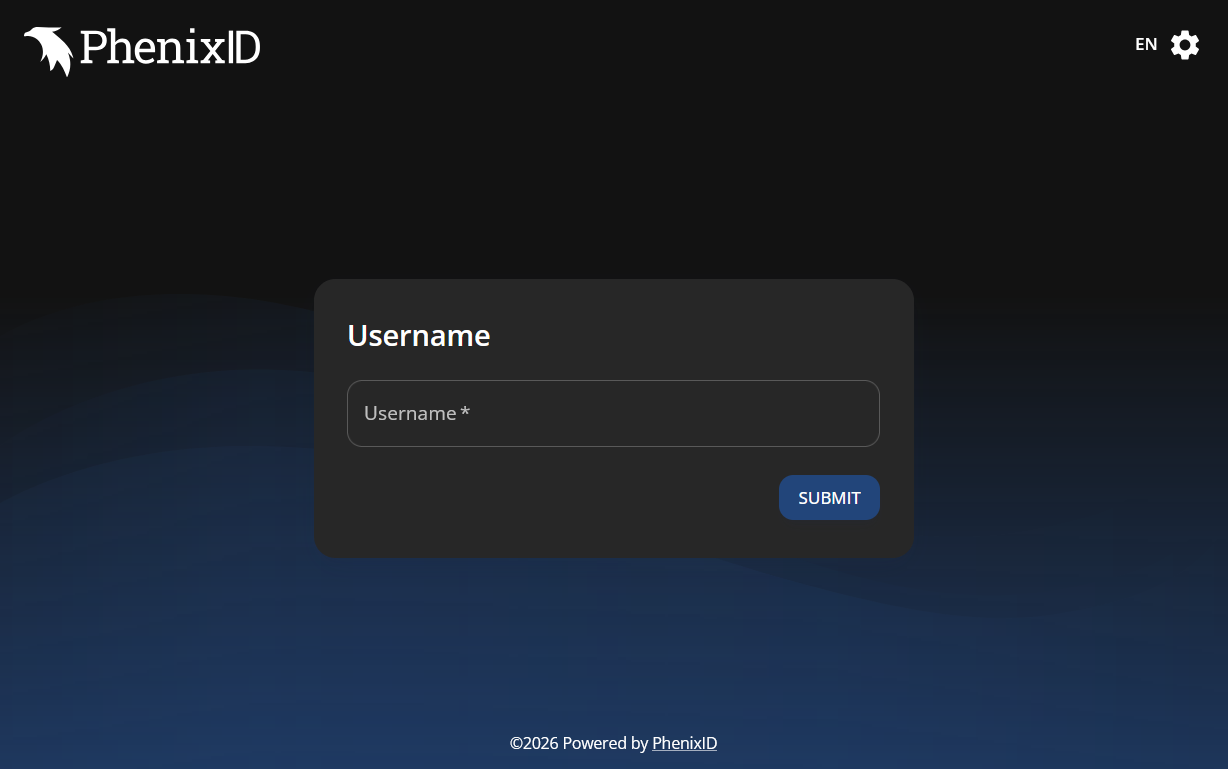
Step 1 - Username
Step 2 - Verify Email
You will receive a “One Time Code” email from noreply@sase.eu.
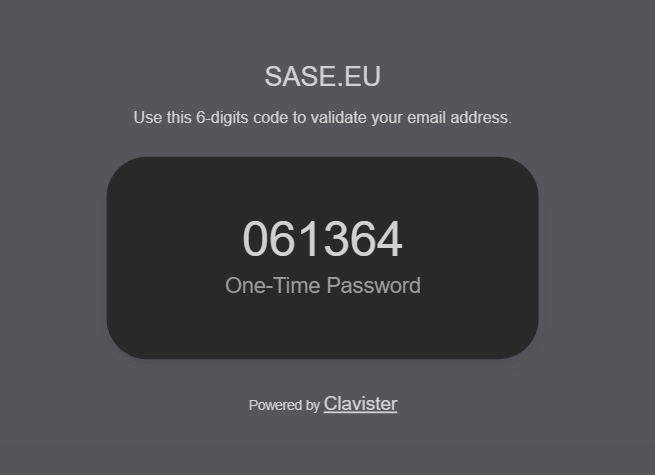
Insert the “One Time Code” to validate your e-mail and click SUBMIT.
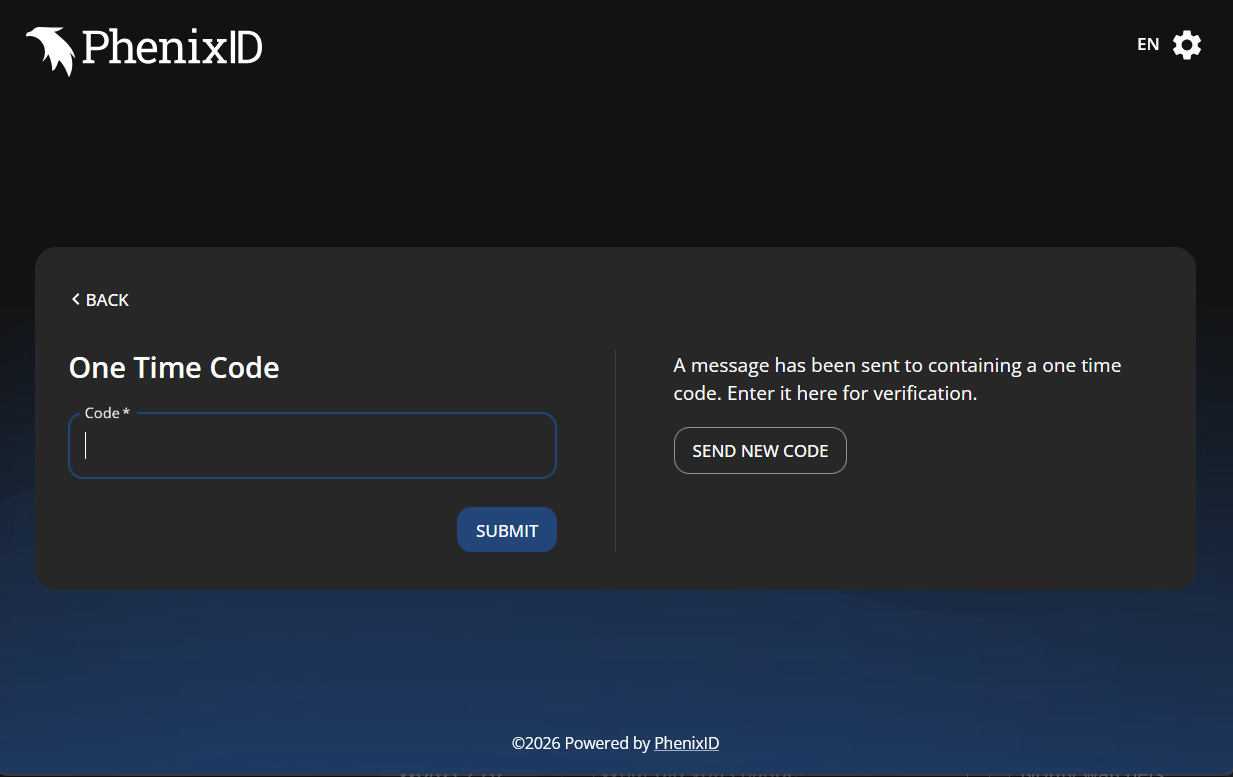
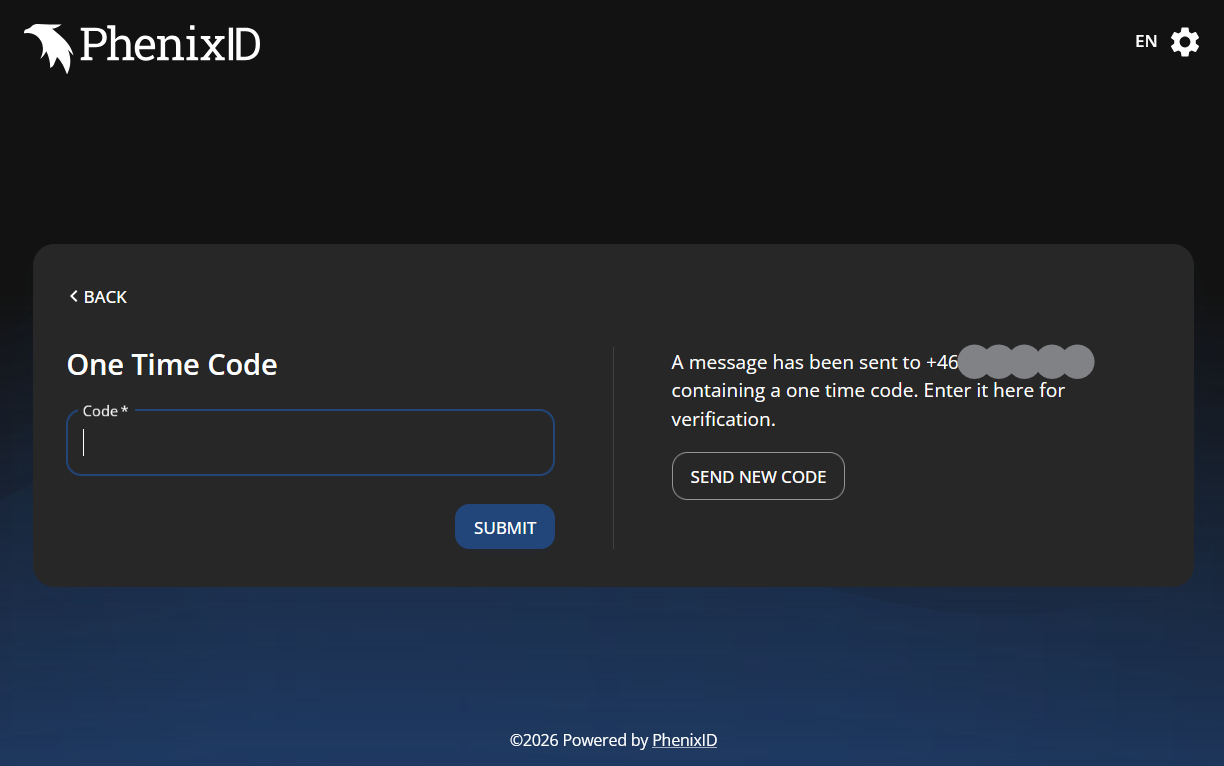
Step 3 - Verify mobile number
Next you shall receive SMS “One Time Code” under your per-registered mobile number from PHX
Enter the six digit code received via SMS and and click SUBMIT.
Step 4 - Install OneID App
Depending on which platform your OneID app will be running on, click on relevant provided app store.
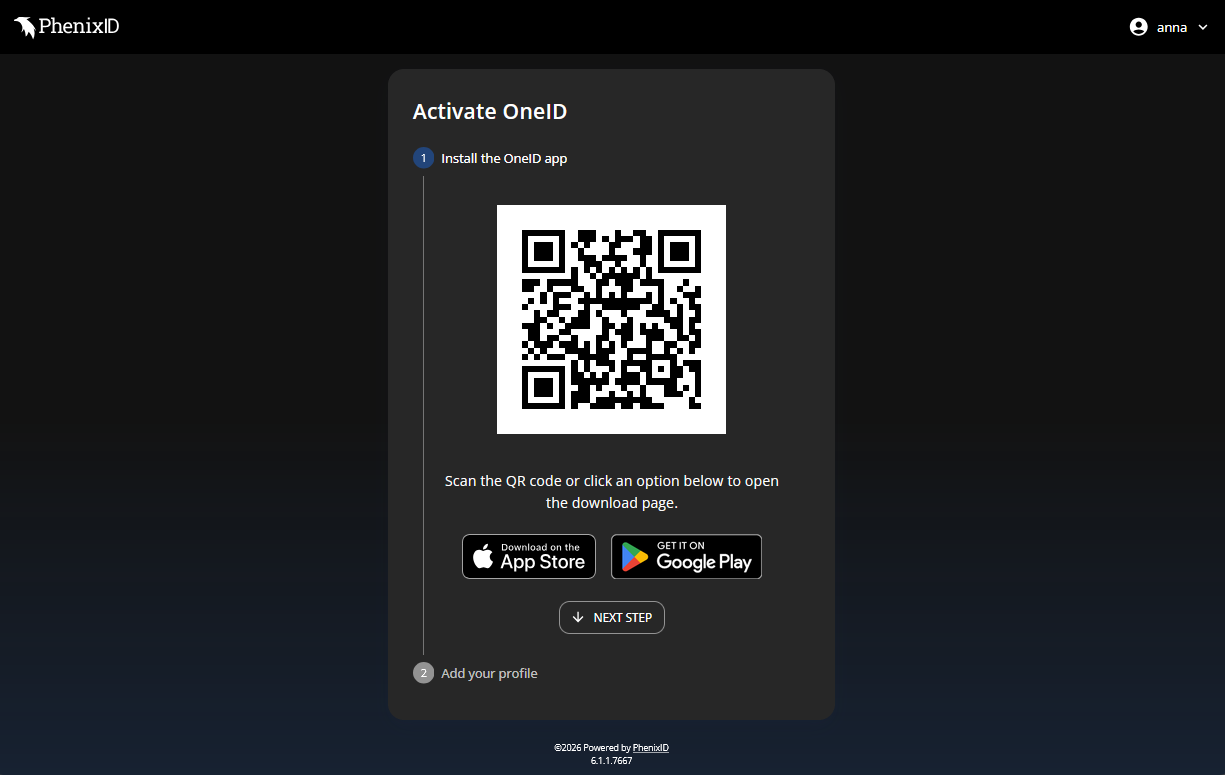
Once the app is installed, click on “NEXT STEP”.
Step 5 - Install OneID profile
Under your mobile OneID app, scan the provided QR code by the enrollment service
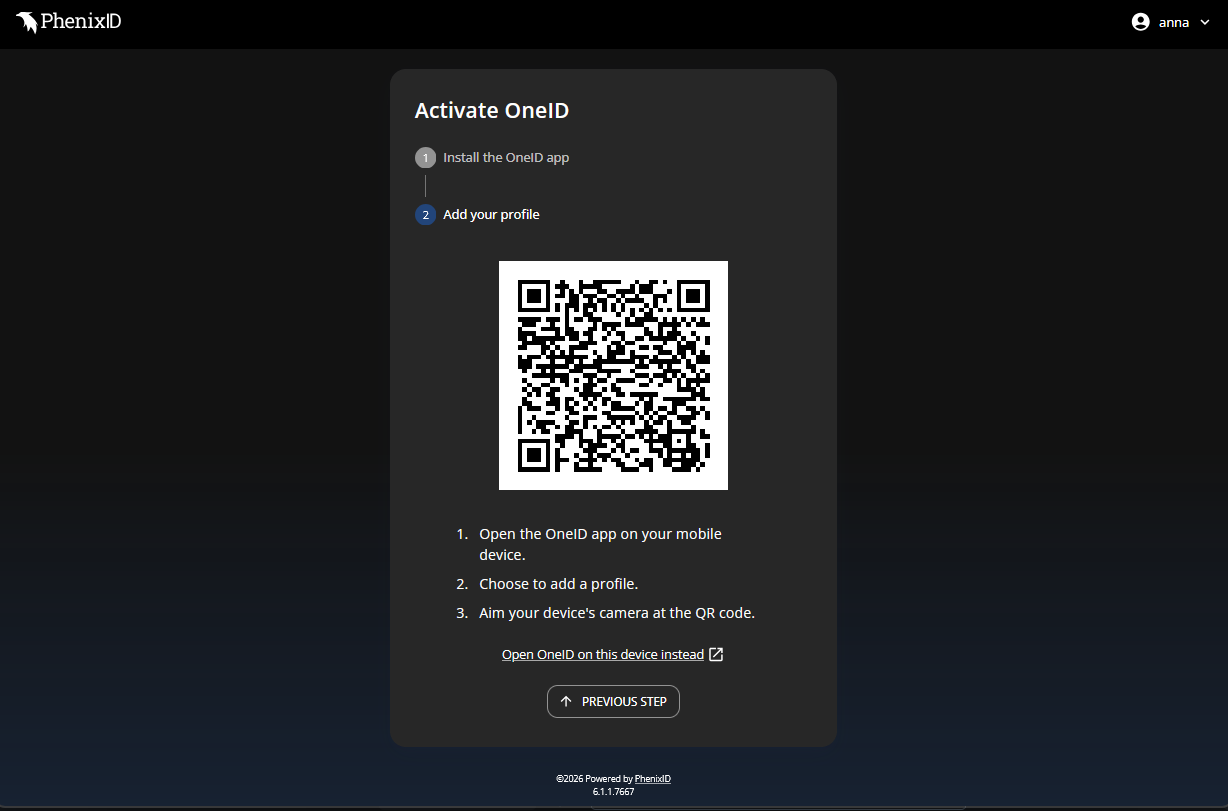
You will be asked to create a 6 digit passcode as backup and thereafter asked if you want to turn on bio-metric validation. Click Yes.
Now your OneID profiled is installed and the device is enrolled to Clavister cloud services.
Step 6 - Login to the service
The browser will provide you with QR code to login to the service
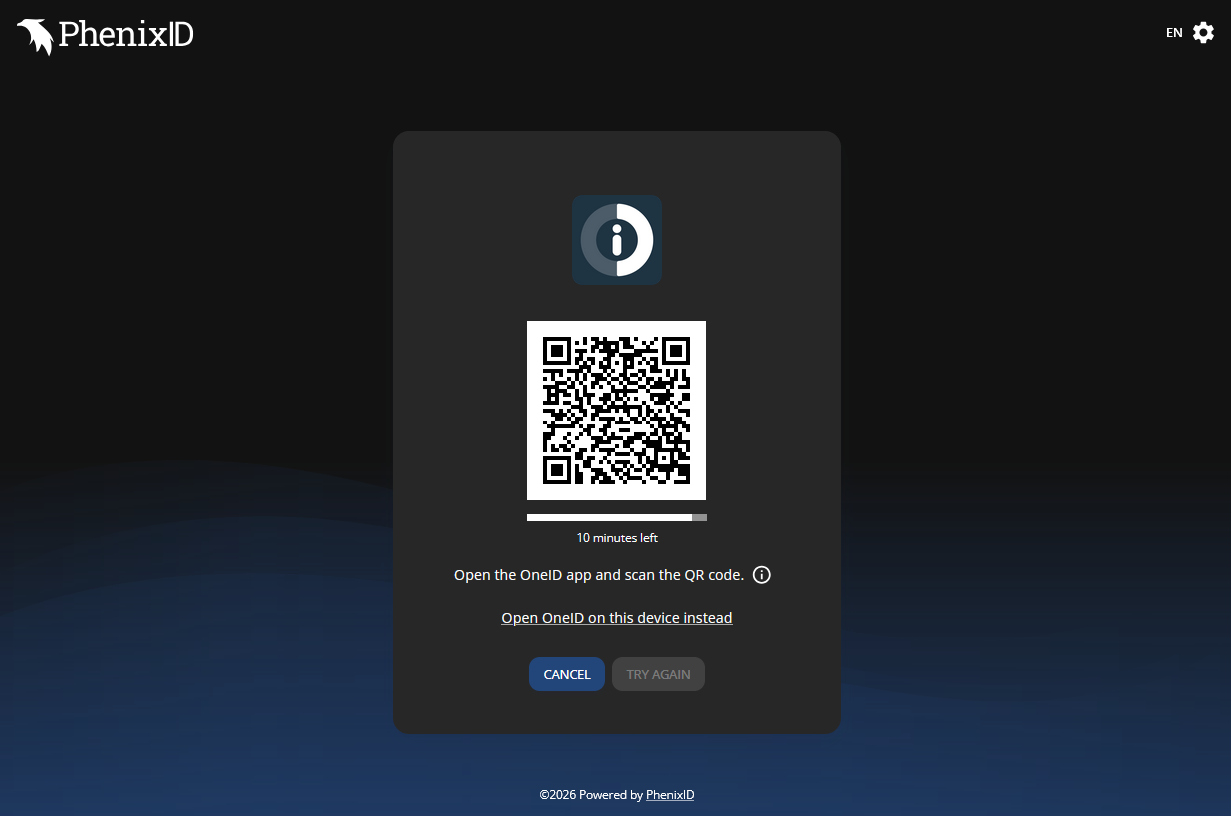
Scan the QR code under your OneID app, and you should be able to successfully login to Clavister Cloud Services.
Related articles
26 Jan, 2026 sase cloud oidc
17 Mar, 2025 oneconnect sase cloud
5 Feb, 2024 oneconnect sase
17 Sep, 2025 sase
6 Dec, 2025 sase cloud oidc oneconnect core
6 Dec, 2025 sase cloud oidc
21 Nov, 2025 sase cloud ad
31 Jan, 2023 sase
21 Nov, 2025 sase azure cloud
9 Dec, 2025 sase oneconnect core userauth oidc
21 Nov, 2025 oneconnect sase cloud radius
8 Jan, 2025 sase
7 Feb, 2024 sase
14 Apr, 2023 sase
25 Mar, 2025 cloud sase
21 Nov, 2025 sase cloud ad